Monigear Device Configuration Tool User Guide
Because the network function of Monigear network equipment is powerful, there are many corresponding configuration items. To make it easier for customers to configure and use the devices, we provide a dedicated Device Configuration Tool that allows customers to set up and manage Monigear devices through an intuitive graphical interface.
In addition, new versions of the tool are generally backward compatible with previous devices, but residual files from previous installations may cause compatibility issues. It is recommended to uninstall old versions before installing a new one.
1. Installation of Device Configuration Tool
You can download the newest version software and document here:
http://www.monigear.com/download/devcfg.zip
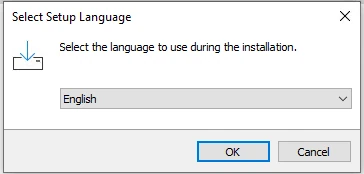
Run the installation software and select the installation language.
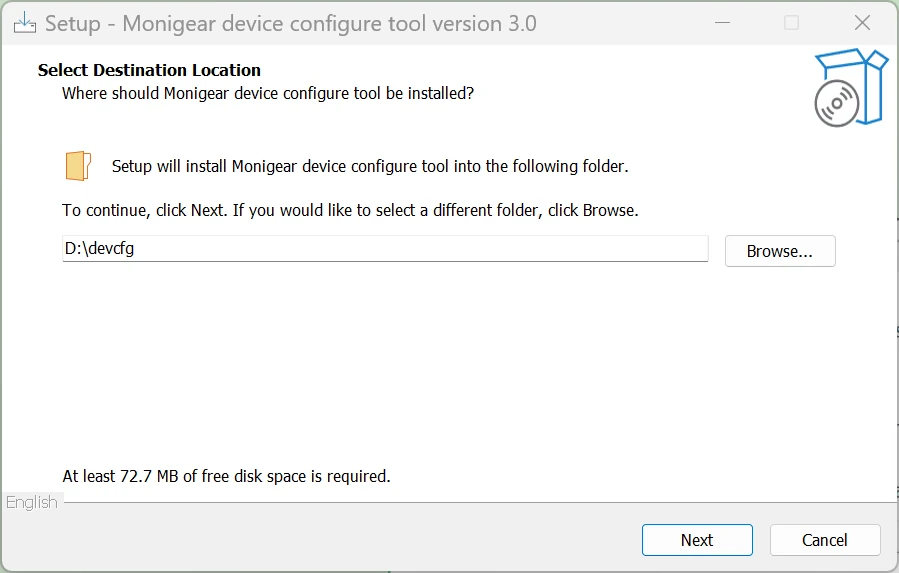
Choose the installation path.
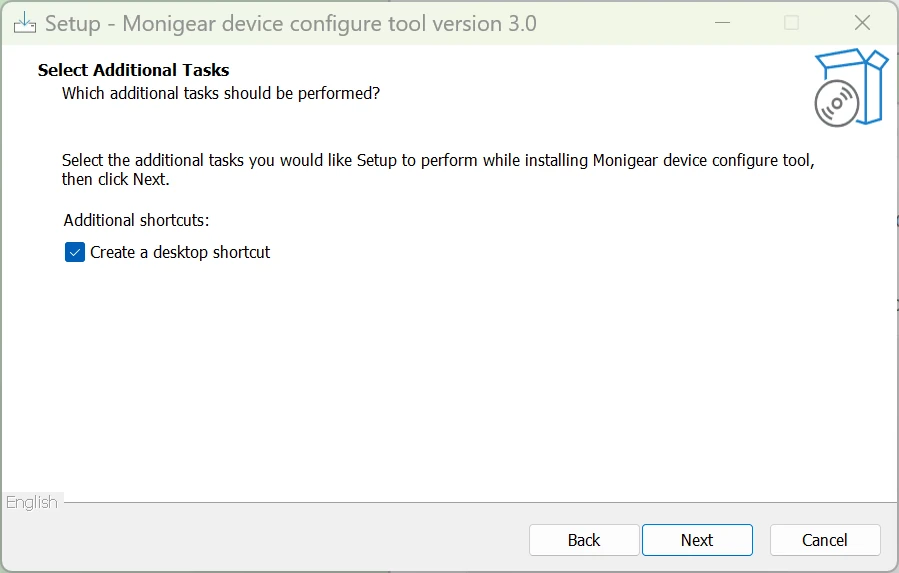
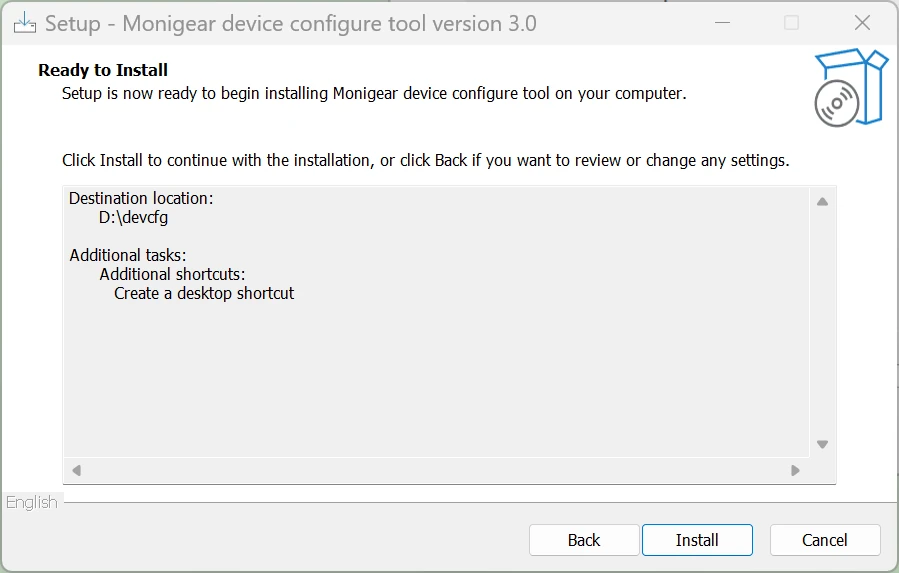
Follow the steps to complete the installation.
When the program is started for the first time, there will be a firewall prompt — at this time, you must accept it, let the software pass through the firewall, otherwise the device cannot be found.
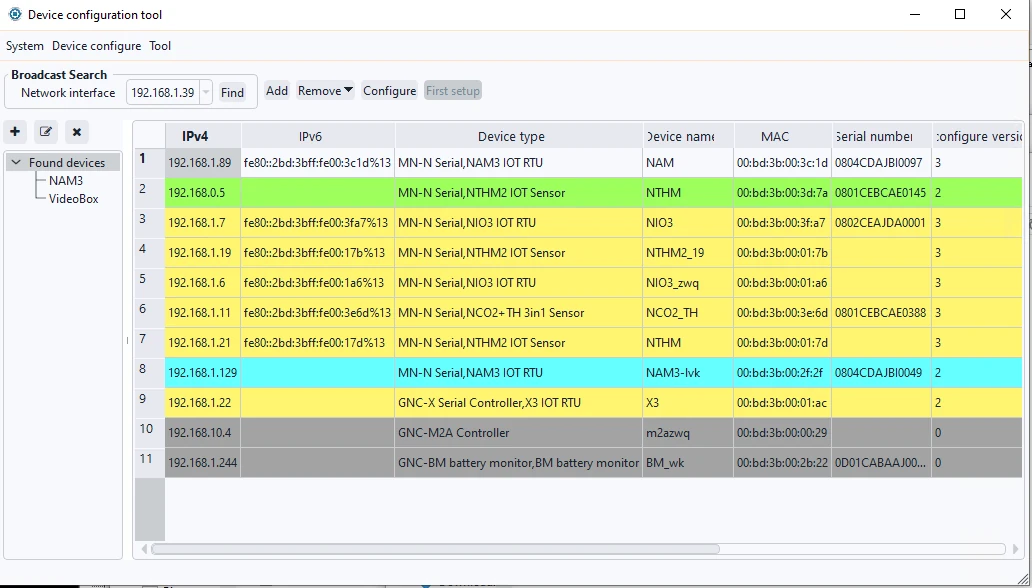
After installation, the system interface will display as shown below. The top section contains system tools, the left side is the device tree, and the right side is the configuration area.
2. Tool Initial Configuration
2.1 Login Password
The first time you run the device configuration tool, you need to set a login password. Subsequent runs will require this password to access the tool.

First run will prompt to setup a password — set and remember it.
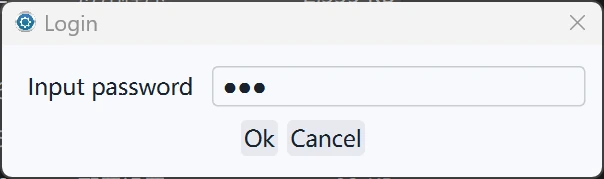
You need to input this password to login after the first run.
If you forget the password, you can delete the devcfg.db file in the installation directory to reset the software back to its initial state and set a new password.
2.2 Digital Certificate
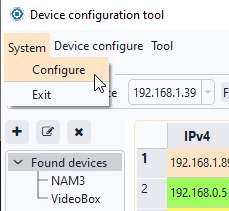
To connect Monigear devices and software, a certificate must be set for authentication. Open the configuration interface from the top menu: System → System Configuration → Certificate Auth.
Specify the directory for the locally saved certificate file and key file.
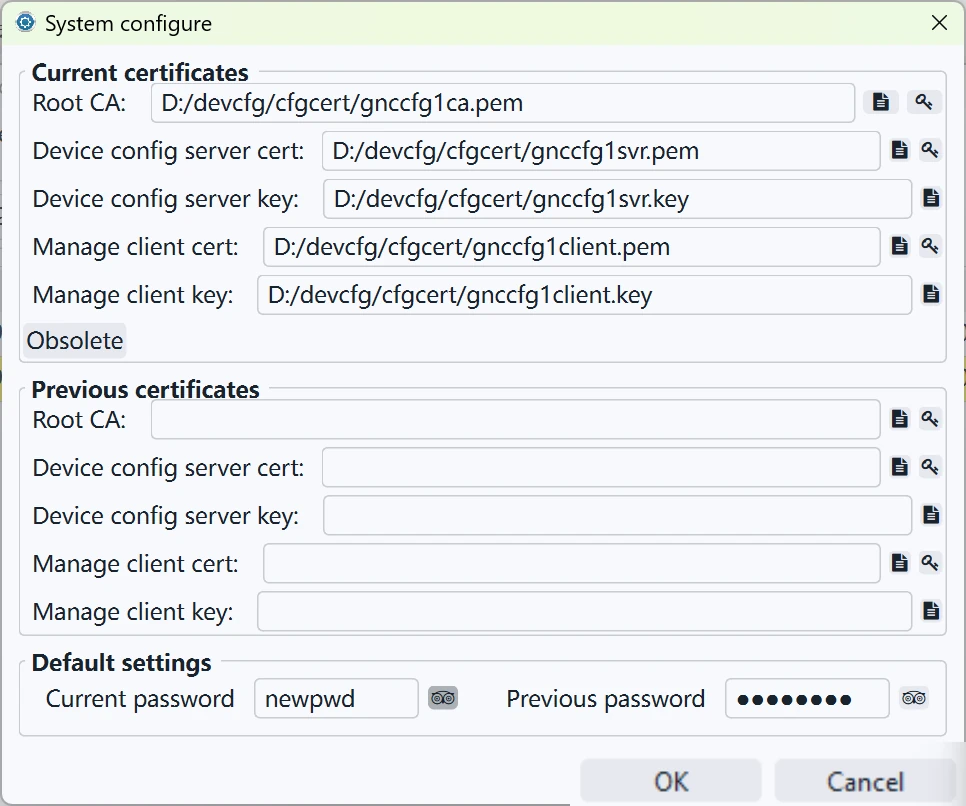
The above figure shows the digital certificate generated by us in the installation package after the initial installation. Users can also generate their own certificates and import them. There is an "Obsolete Certificate File" at the bottom. In this way, after enabling the new certificate, you can find devices with old certificates — there is a special color in the device list to show the devices that are currently using the old certificate. The tool can connect to these devices with the old certificate, and then there is a special button to update the certificate on the interface to help customers quickly replace the certificate.
After the current certificate is invalidated, do not delete the old certificate immediately; use the "obsolete" button before replacing it.
3. Device Initial Configuration
3.1 Device Network
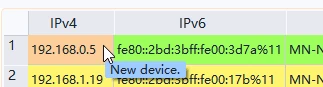
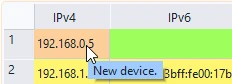
After finding the device (specifically, see section 4.1 Discovering Devices in the LAN with One Click), the background color of the device column for the new device is green. When you hover your mouse over the first column of the device, a corresponding tooltip will appear.
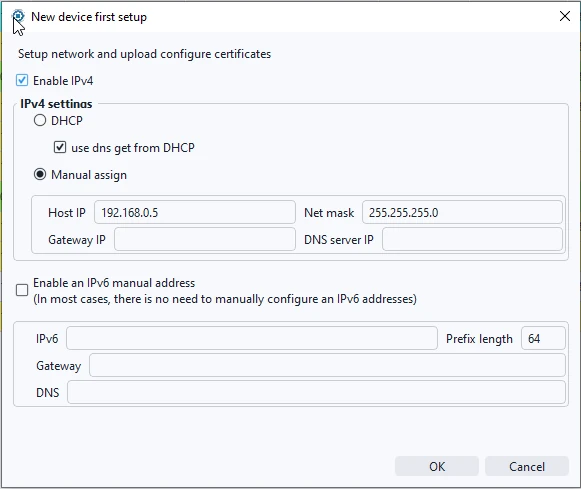
New devices require a first setup — set up the IP address before other subsequent configuration and use. Select the new target device, click the "first setup" button, and the new device first setup interface will pop up. According to the configuration protocol version, for relatively newer devices, during the first setup period, users can choose whether to enable IPv4 and IPv6 according to their own needs. After entering the corresponding content, click "OK" and wait for the configuration data to be successfully transmitted downwards. After a brief wait, click the 'find' button again. Once the information is updated, you can proceed with further use.
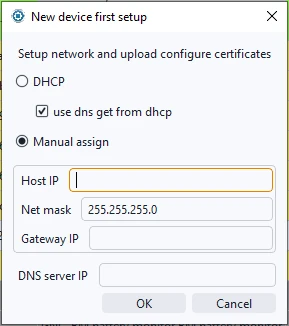
If the IOS date of the device is relatively old, the corresponding configuration version may also be older. In this case, the device may only support IPv4 and no IPv6. If necessary, you can contact MONIGEAR technicians for device upgrade related operations. If you choose 'configure via COM', you can directly modify the network parameter configuration in the basic settings of the device. For detailed information, please refer to section 4.3 Connecting Devices via Serial Port.
3.2 Device Password
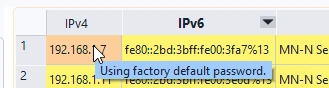
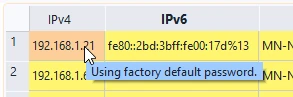
New devices are shipped with the initial password "wangkong"/"monigear". Devices with the default password have a yellow background in the device column of the configuration tool. The corresponding prompt information is as follows.
In the system configuration mentioned in Section 2.2 "Certificate Authentication" of this document, there is a default settings section at the bottom. The field "Current password" represents the password that users desire to use for their devices. This field allows you to set the password for multiple devices in bulk through device configuration. The field "Previous password" is primarily for record-keeping and find operation.

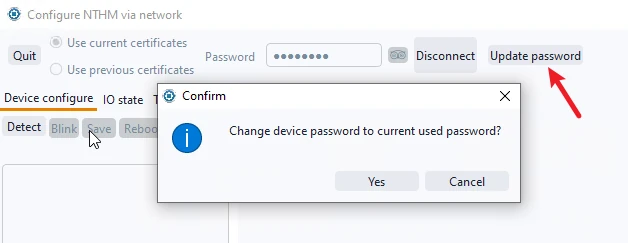
If the device connection password does not match the content in "Current password", an "Update password" button will appear on the right after connecting to the device. Clicking "Update password" and confirming the action will change the device password to the content in "Current Password" in use. To ensure device security, it is recommended to update the password promptly.
4. Discovering / Connecting Devices
4.1 Discovering Devices in the LAN with One Click
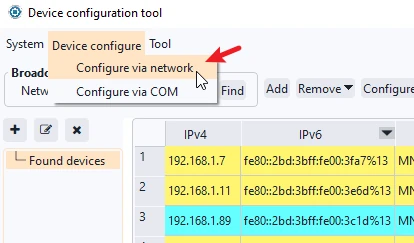
There are two ways to configure the device: over the network, or through the serial port. By default, the tool is configured through the network, or you can select the configuration method in the "Device configure" menu.
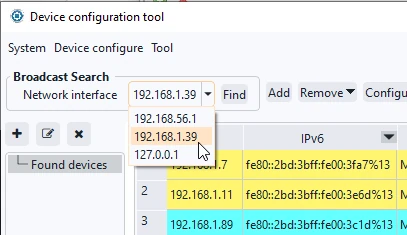
Select the network interface where the host and devices are located.
Click "Find", and devices within the same LAN segment will be discovered.
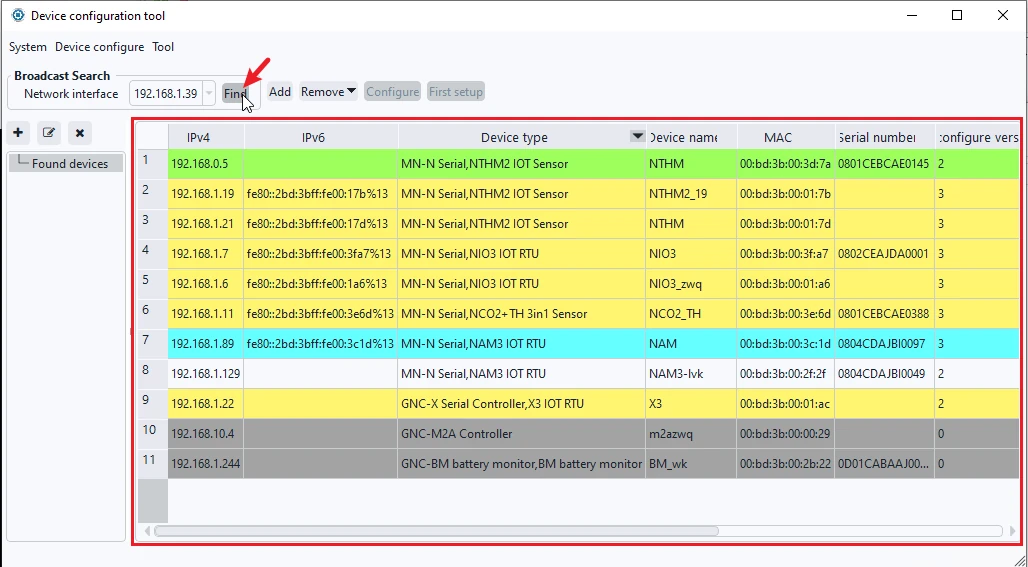
In the list of found devices, the background color of each device is different to indicate different device status, and you can see the current status information of the corresponding device by moving the mouse over the IP column in the first column. The dark gray color indicates that the product of our previous generation can be found but cannot be configured with this tool. The light gray color indicates that the device is configured with a digital certificate that is different from the current tool and cannot be configured. The green one indicates that it is a new device and has not yet been uploaded to the configuration certificate. The yellow one indicates that the factory password is being used, which has security risks, etc.
4.2 Adding Devices Across Network Segments via IP
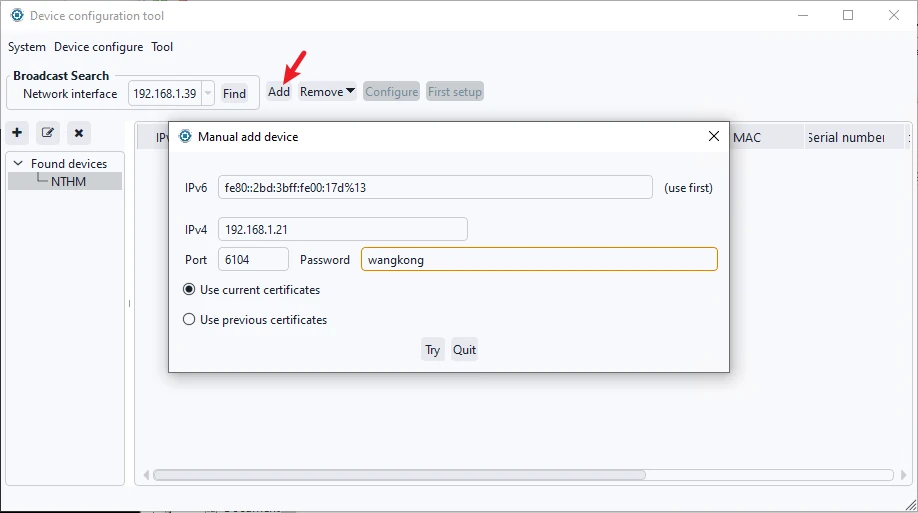
If the device and the host are not in the same LAN, but can communicate through the router, it cannot be discovered in this case, but can be manually added through the device IP address. Select any device group node, click Add, enter the device IP, port number (default 6104), and device connection password. Ensure the input is correct, click Try to Connect. If connected successfully, the device will be added to the list, and you only need to select one of the IPv4 or IPv6 addresses to fill in.
If the device with the same name already exists in another group, it cannot be added to the current group. Remove it from the existing group first. To delete a device, select the target device and click Delete in the top menu.
Devices discovered via LAN can also be added using this method. After deleting a device from any node in the LAN, clicking Search will rediscover the device in the system root node "Found devices".
4.3 Connecting Devices via Serial Port
Select the configuration method from the top menu and choose to configure via serial port. This method is to emergency recover a device whose configuration is completely wrong and cannot be configured through network. Select the host's serial port. Monigear devices have a default baud rate of 115200. After clicking Connect and entering the username and password, you can connect to the device via serial port. Ensure the correct wiring of the serial port on the device for successful communication.
5. Configuring Devices
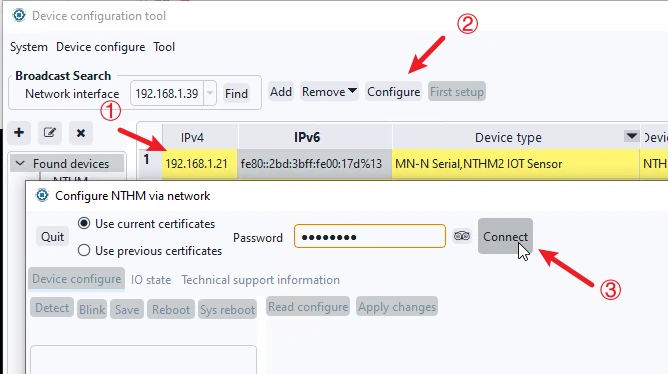
Devices discovered via network or added via IP can be configured in the network configuration interface. Select the device under the corresponding group and click Configure to enter the device interface. A device password is required to connect. If the current or previous password is not used, you can input and try the password here for the device; if successfully connected to device, the password will be saved and remembered here.
For new devices, use the "Update password" button to update the connection password to the current used one. Click "Detect" button to access the configuration interface — the left part is the category, the right part is the configuration items and values.
Devices connected via serial port can be configured similarly after connecting with username and password.
5.1 Basic Device Settings
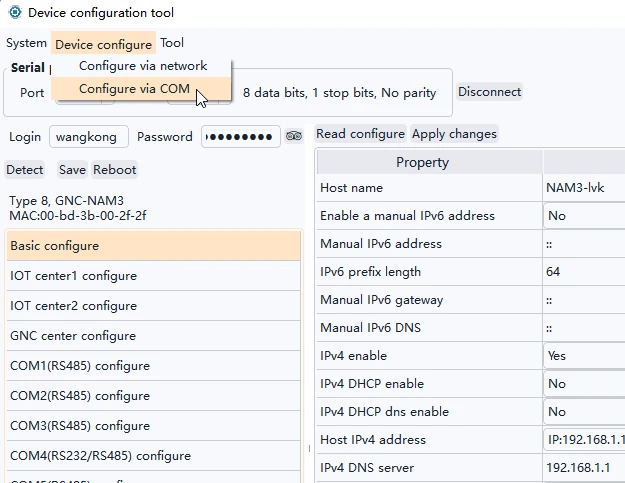
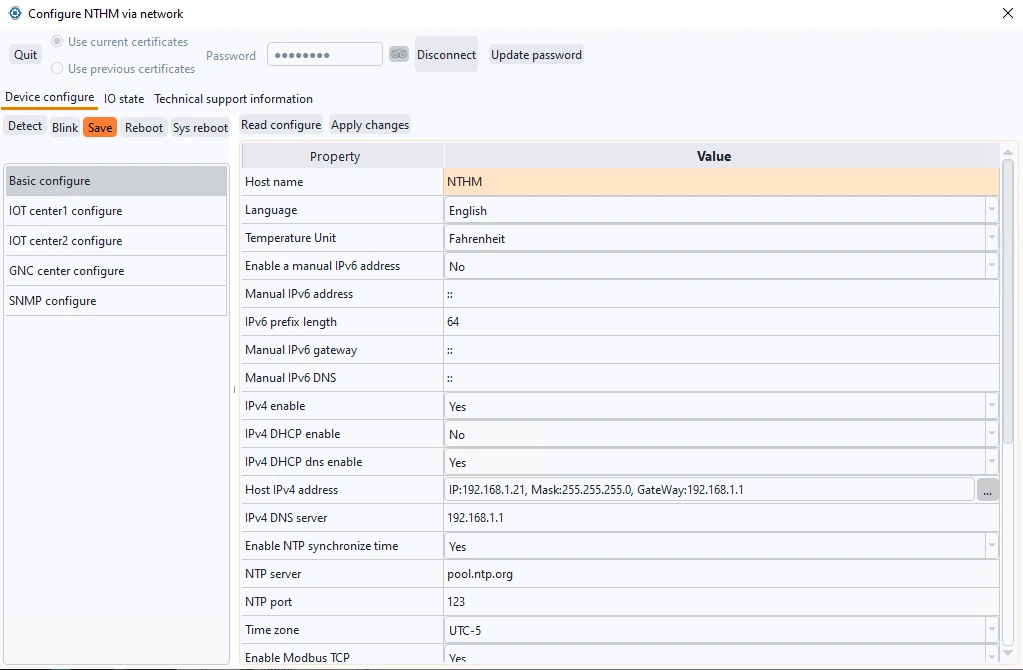
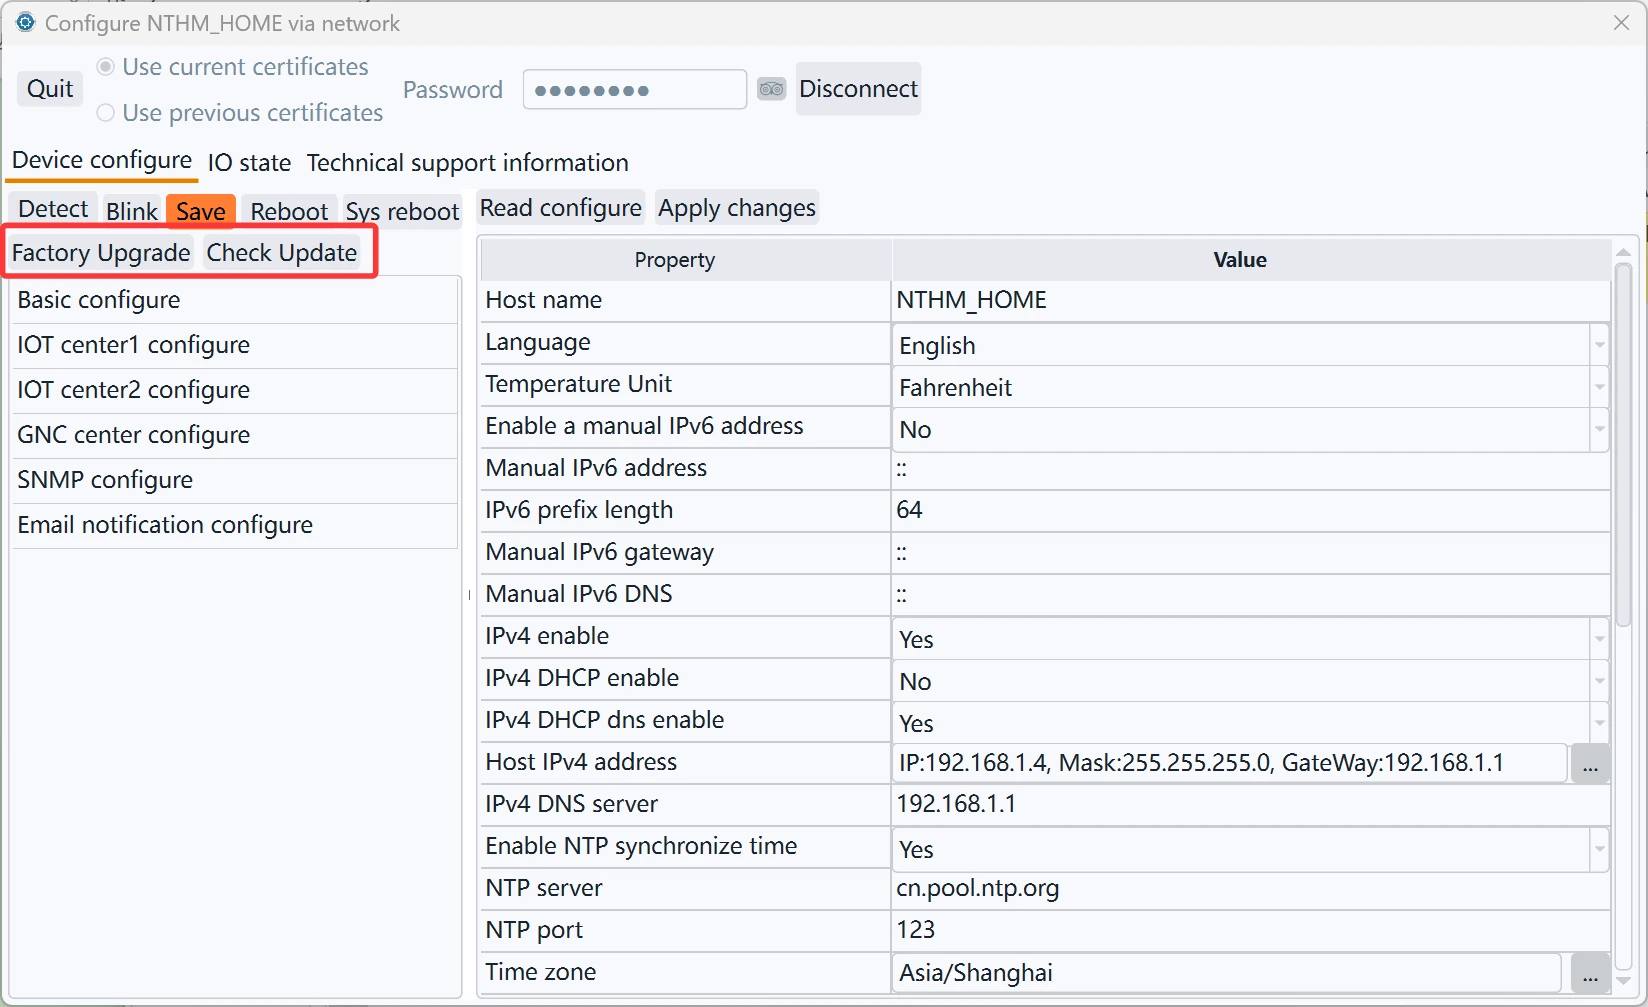
Click Basic configure → Read Configuration to display the basic settings of the device, shown as the above picture. Users can choose to enable or disable IPv6, IPv4 and its DHCP, DNS, BACNET, Modbus TCP, etc., and make changes as needed. Click "Apply Changes" → "Save" → "Reboot" for the new settings to take effect. Most of the configuration changes take effect after these steps!
If DHCP is not enabled, you can configure a fixed IP address and click the button on the right to modify the static IP address. The IP address and the gateway must be set in the same subnet, otherwise the setting is invalid. It is worth mentioning that if DHCP is enabled, the IP address displayed on the setting interface does not represent the current IP of the device!
5.2 IoT Settings
Monigear devices can be connected to two independent IoT hubs at the same time to achieve hot data backup.
Click one IoT Center Settings → Read Configuration to display the IoT settings. Apply changes, save, and reboot for the new settings to take effect.
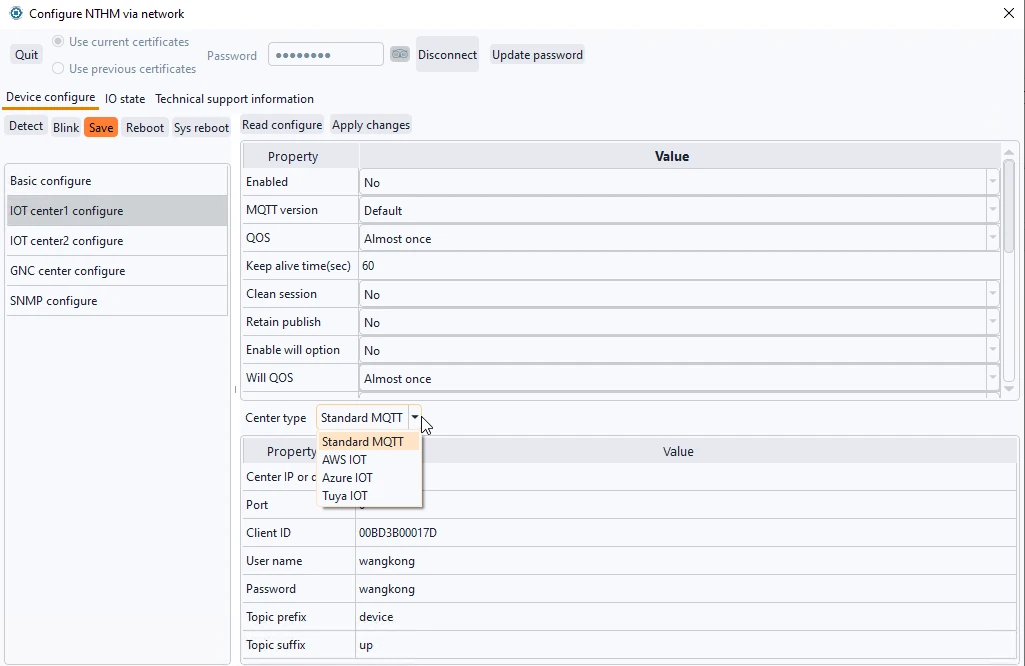
In addition to the standard MQTT protocol support, such as Mosquitto, Emqx and other commonly used MQTT brokers that can build their own services, Monigear devices are also adapted to the connection of several major IoT cloud services, such as AWS / Azure / Tuya, etc.
5.3 GNC Settings
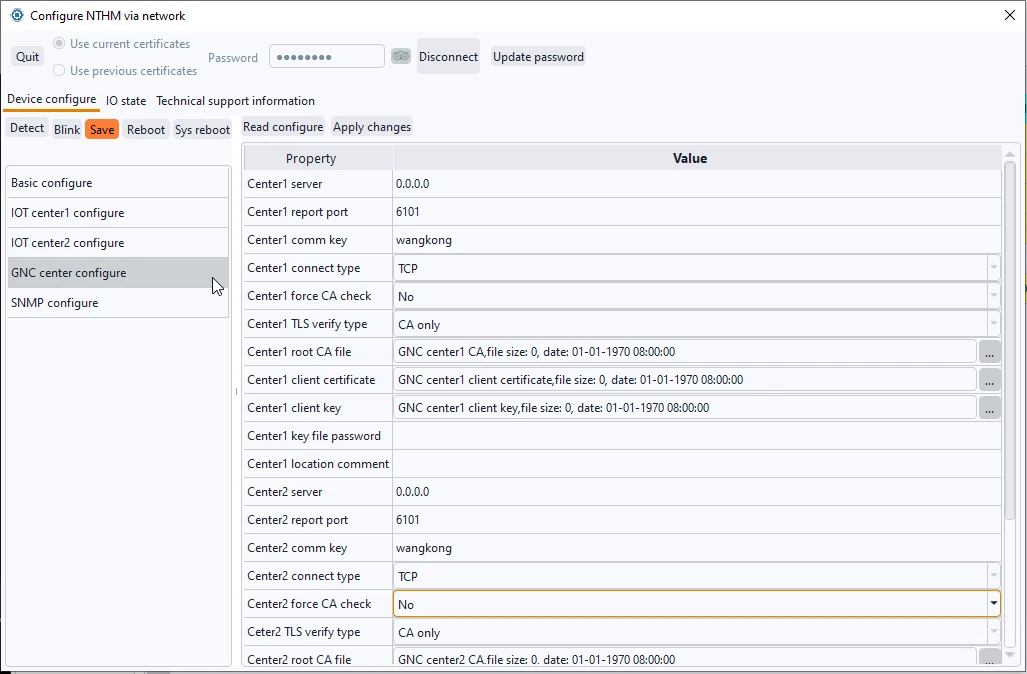
GNC-SCADA software is a powerful data acquisition and monitoring software developed by our company, and we have our own GNC protocol between the equipment and software, which is set up to connect with 2 active and standby GNC centers.
Click GNC Settings → Read Configuration to display the GNC settings. Apply changes, save, and reboot for the new settings to take effect.
The above are the configuration categories that all devices have, and each device has its own unique setting category, and the corresponding configuration refers to the description of the corresponding device — most of which are easy to understand and set up from the graphical interface.
5.4 SNMP Settings
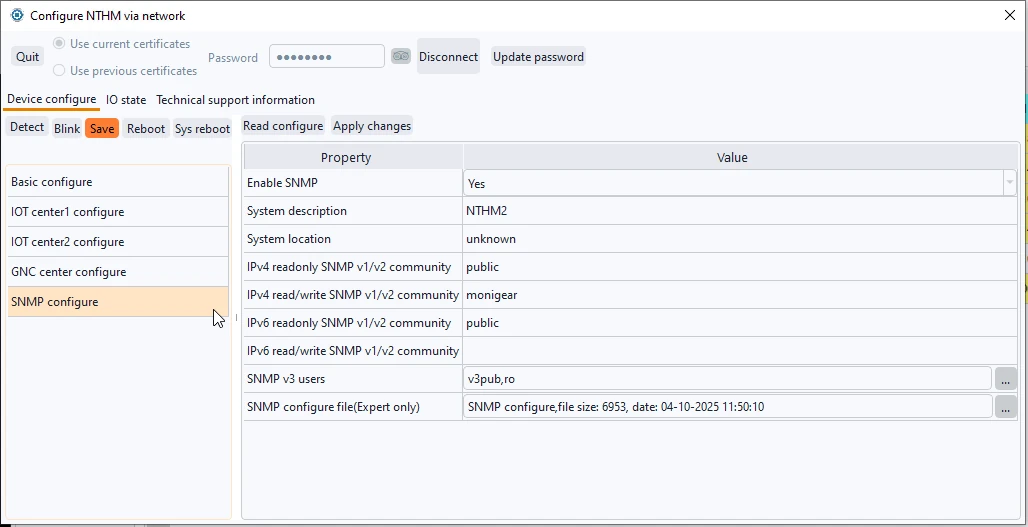
Monigear devices support SNMP protocol, which can be configured in SNMP settings. Set the community, users, and other configurations corresponding to the SNMP version. Once SNMP is enabled, device monitoring information can be accessed through SNMP connections.
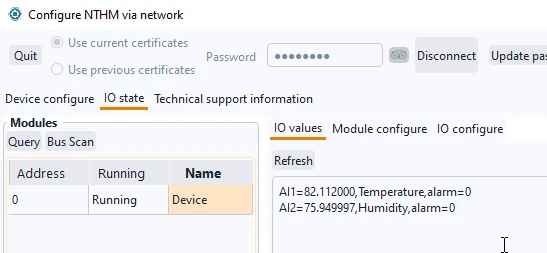
5.5 Viewing Running Status
The running status of the device can only be viewed and configured via network interface. Select the module to view, click the "IO Value" tabs → click "Refresh" button to view all AIO and DIO information of the device.
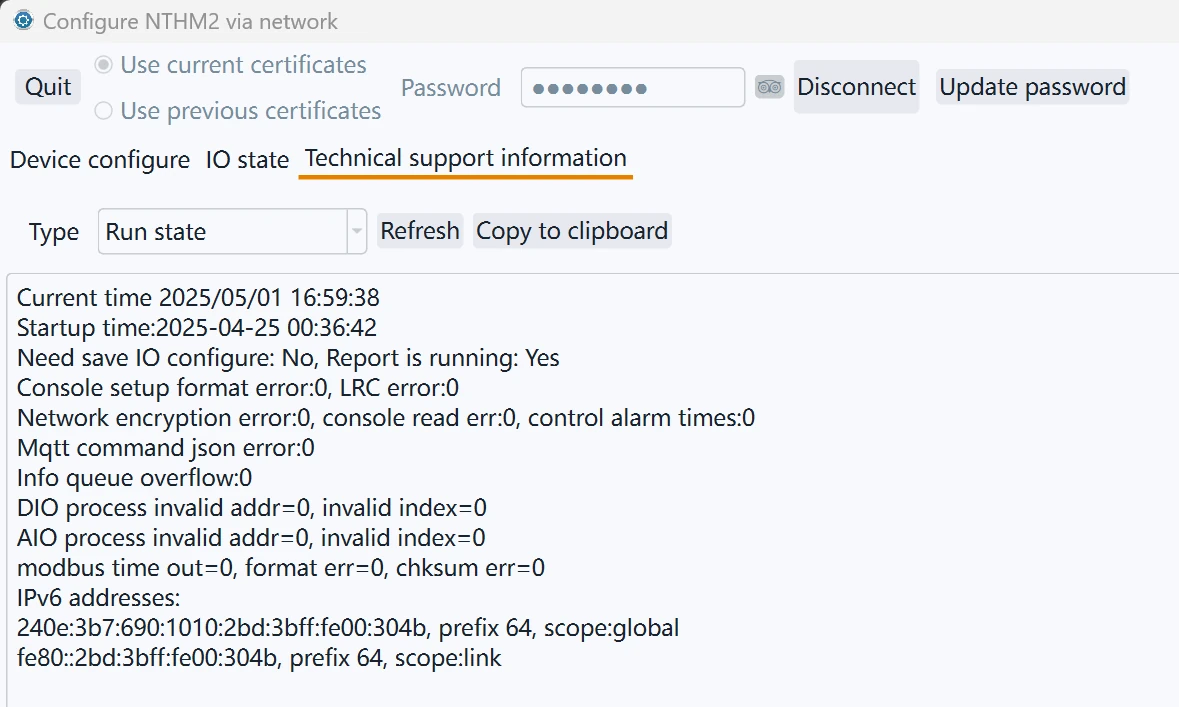
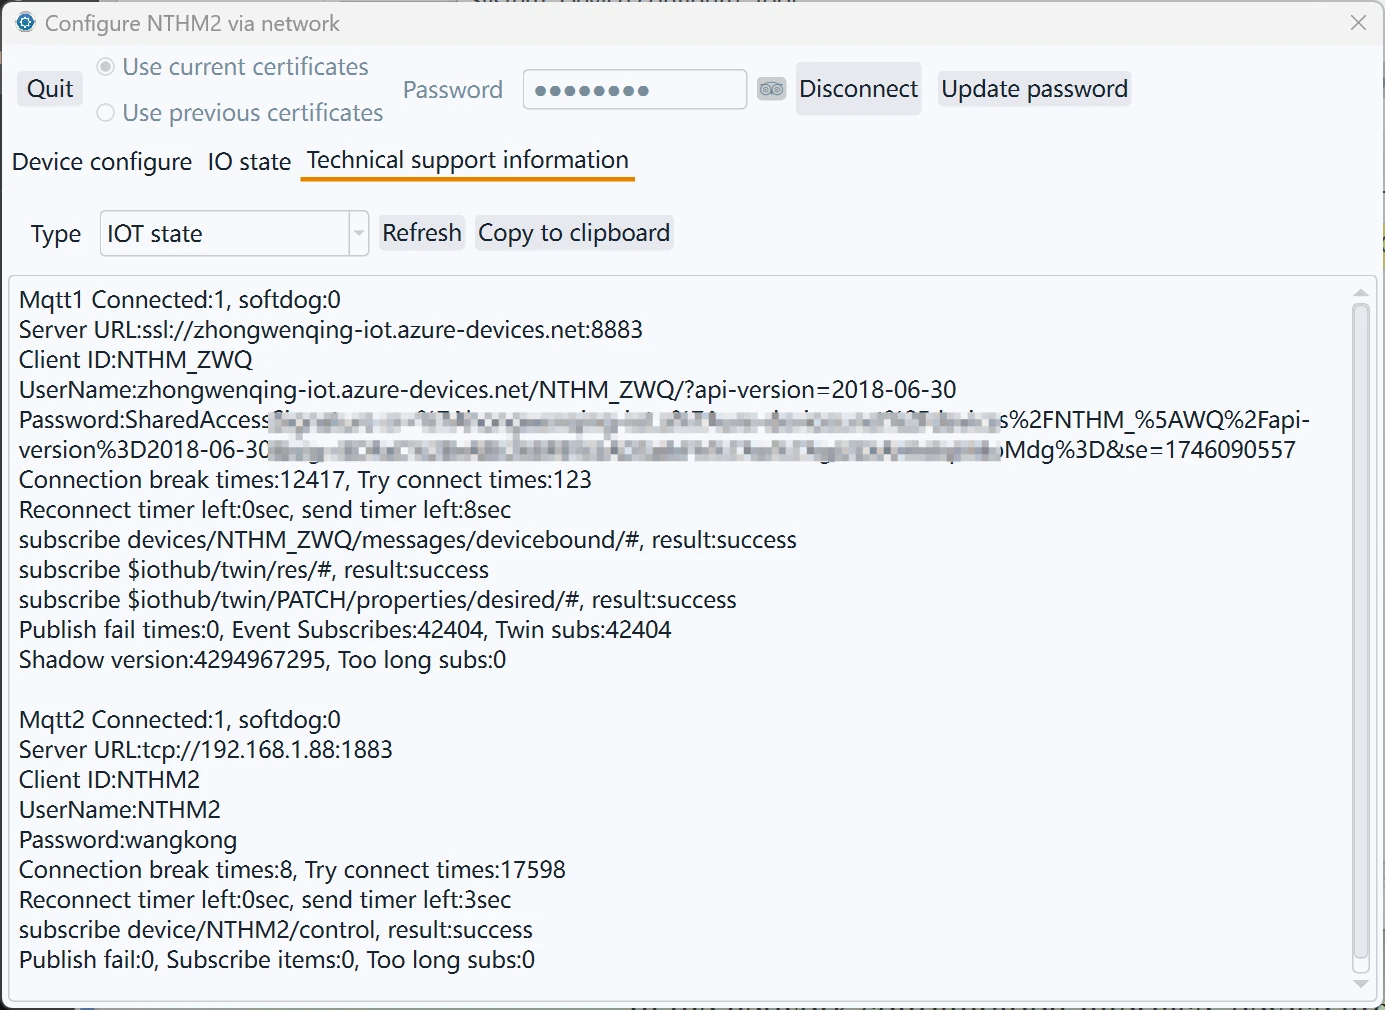
In the "Technical support information" page, you can view run state, IoT state, or Modbus state information. If you meet problems and need our support, please check here first and send us related information, and we can provide support.
Device Upgrade
Our company's network equipment is basically upgradeable to correct defects and add functions. As shown in the figure above, there are two ways to upgrade.
"Online update"
Note: This feature is only supported by firmware released after May 2025. Firmware released before this date can only be upgraded via "factory upgrade". Some versions may display "Check update", but this has been changed to "Online update" to avoid being misinterpreted as encouragement for users to update.
In fact, we do not recommend users upgrade, as upgrading is a risky operation and may cause the equipment unusable. Furthermore, in general, the primary goal for industrial products like ours is stable operation; for work environments where they are already running stably, there is absolutely no need to upgrade.
Most of the time, firmware updates add new functions to make the product suitable for more users. For example, email/IFTTT functionality might be useful to some customers, but these features may be completely meaningless to industrial customers using Modbus TCP/SNMP. Therefore, unless you receive notification from us or have communicated with our technical support via email and are upgrading under the guidance of our technicians, please avoid performing upgrades.
Before upgrading, first make sure there is no IP conflict. Some customers reported that the update failed and finally found that it was caused by IP conflict. In addition, make sure the device can connect to the Internet and can access our website https://www.monigear.com
After clicking "Online update", if there is an update available, a dialog box similar to the following will appear:
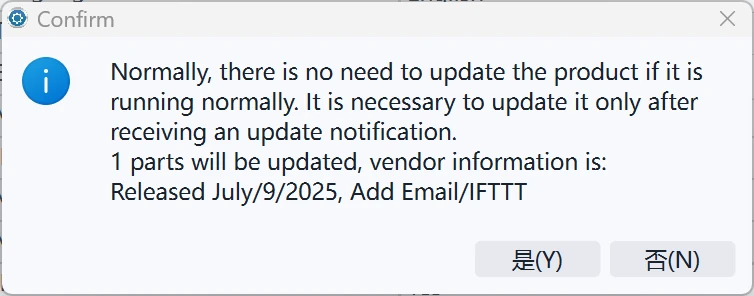
Click "Yes" to start downloading the upgrade file. The time depends on the network speed. It usually takes half a minute to one minute, and the longest time will not exceed 5 minutes. It does not matter if the download fails, and it will not affect the operation of the system. After the download is complete, it will prompt to restart to take effect. Click the "Reboot" button of the configuration tool to restart and take effect.
"Factory upgrade"
This function is not displayed under normal circumstances. It is a function that we use in our own production. Because the upgrade operation is a dangerous operation, the wrong use of the upgrade file will cause the device to completely crash and become unusable. Customers who need this function must contact us, and we will provide additional documents and guidance to enable this function.
We provide ODM/OEM product customization services to customers with certain quantity needs. These specific functions are different from our standard functions and cannot be upgraded by the "Check update" way. They can only be upgraded through the "Factory upgrade" method.
Device Group Classification Management
In the network configuration interface, device groups can be added/deleted under any node path for bulk management.
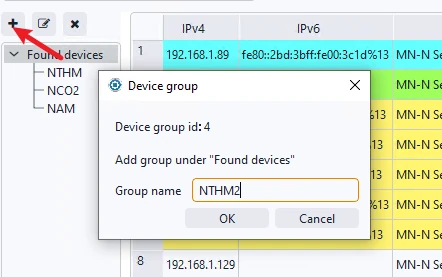
To add a new device group node, click the + sign, enter the desired name, and click OK. To delete, click the × sign. If the group contains devices, it cannot be deleted.
To add devices to a group, use the Add button to add a new device, or drag devices from Discovered Devices to the desired group node.
Device Template Configuration Function
In actual project deployments, you may encounter the following situation: many devices are used, and the configurations of each device are very similar, and configuring the devices individually may take a lot of time. For example, an operator has hundreds of small equipment rooms, each of which is monitored by an MN-NIO. Each NIO is connected to 8 digital sensors, but no analog sensors are used. The monitoring is done by SNMP v2c trapping to a network management center. To reduce the workload of on-site construction personnel in such situations, the template configuration function can be used.
Note: This function is only supported on devices with configuration version 4 and above; earlier devices do not have this function. The specific usage process is as follows:
8.1 Generating a Template
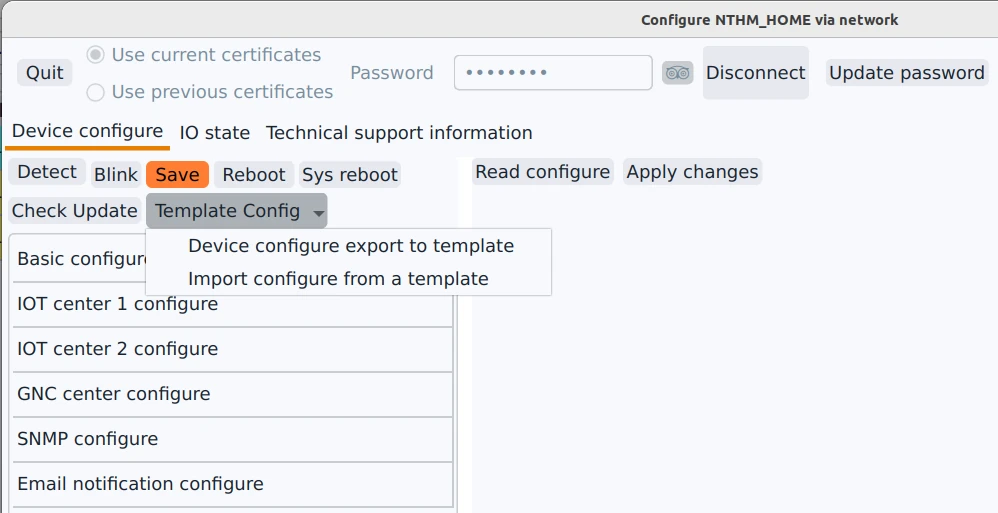
First, configure all parameters of a device according to its final usage environment, including enabled functions, specific alarm configurations for each DIO/AIO, etc. Then, select the export function from the "Template Configuration" dropdown menu in the configuration interface.
Then select the filename to save it; the default is a .json extension.
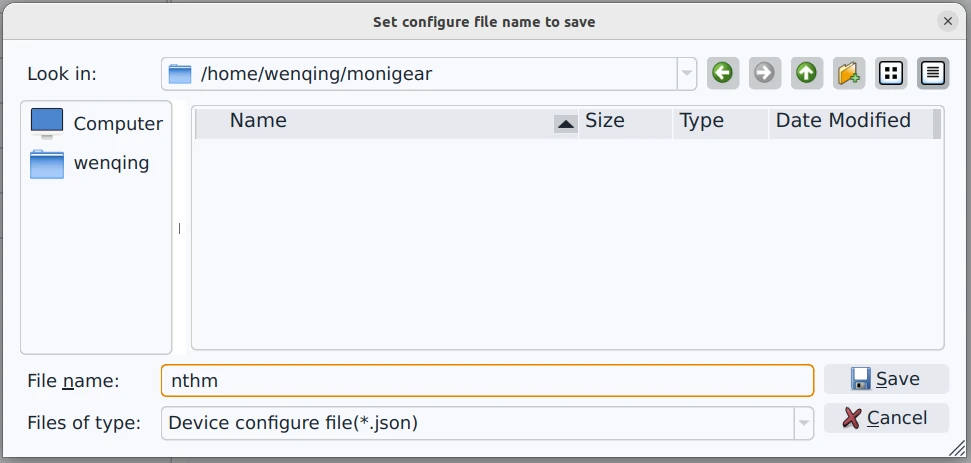
The saved JSON file can be used to edit and generate templates, or as a backup file for device configuration.
8.2 Edit Template
The template is a JSON file, mainly consisting of the following sections:
"config"contains"section_Config"and"section_Email", which respectively configure the main device settings and the email notification function."aiocfg"contains the configuration for all analog supervisory points."diocfg"contains the configuration for all digital supervisory points."mqtt1cfg"and"mqtt2cfg"correspond to the connection configurations for the two IoT centers, respectively.
The template file is UTF-8 encoded. Be careful not to let the editor used to edit the template change the file encoding.
The template can be modified as needed. Generally, just remove settings that are not needed by the actual device configuration. For example, if the NIO analog monitoring points are not used, the entire "aiocfg" section can be deleted. The logic for importing configurations using the template is as follows: key-value pairs existing in the template will be set according to the template's values; values not in the template will retain their original values on the device.
Generally, modifying a template involves the following two steps:
- The
configsection is mandatory, but the values for "host name", "host ip", and "BacnetID" correspond to the device name, IP address, and unique ID within the BACnet system, respectively. These values should be unique to each device; therefore, these values should be removed from the template file. - For the settings of digital and analog supervisory points, retain the settings for the monitoring points that are used, and delete those that are not.
Avoid manually modifying the content; instead, configure it in the graphical settings interface before saving the template to minimize the chance of errors. If the JSON format is corrupted during editing, loading the template will fail. Don't worry, simply regenerate the template and edit it again.
After making the modifications, it's better to change the file extension to .cfg to distinguish it from the saved individual JSON configuration files.
8.3 Configuring New Devices Using Templates
After editing the template, it can be directly loaded and used when configuring a new device.
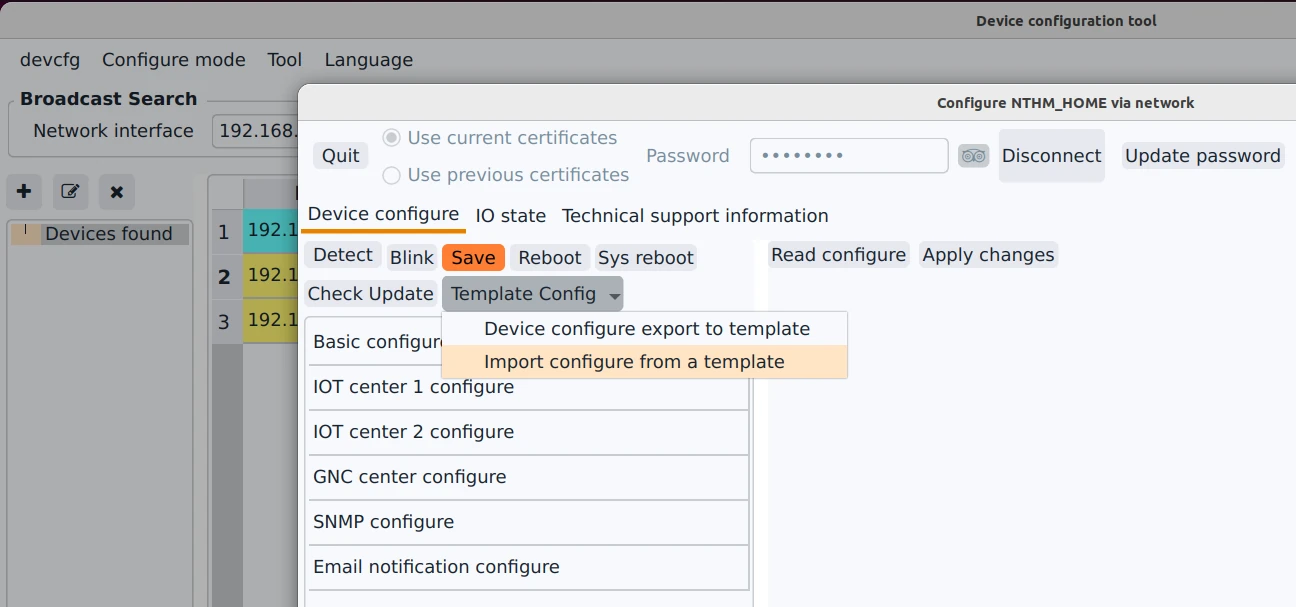
Then select the template file to load.
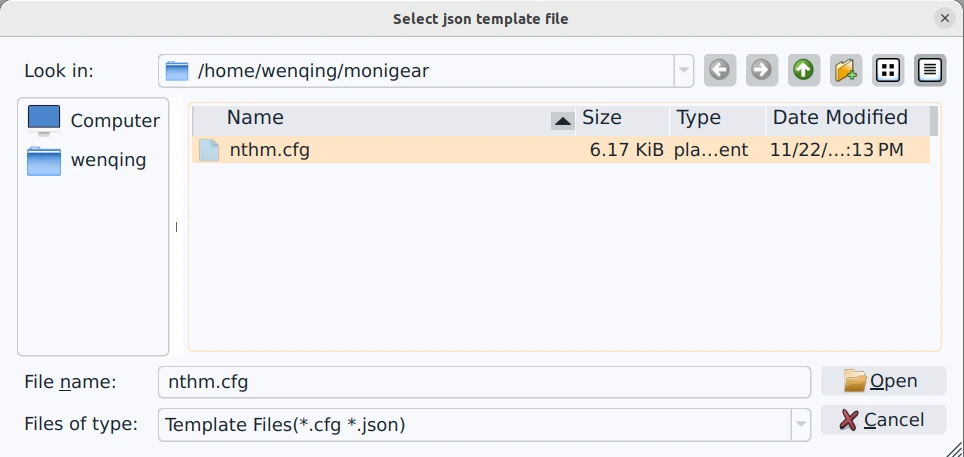
If there is a problem with the template format, a message will appear indicating that the template cannot be loaded. If the template is correct, the following message will appear, indicating that unique settings are required for each device:
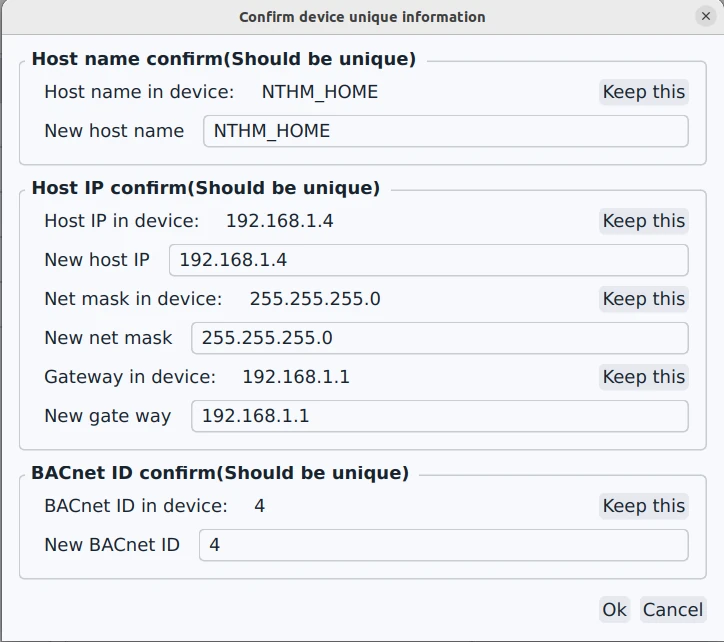
Note that this interface differs depending on the saved configuration. If the template uses DHCP, the "Host IP Confirm" section will not appear; if BACnet is not enabled in the template, the BACnet ID section will also not appear.
After inputting the correct unique information for the device, select "OK" and the template will be downloaded to the device. If there are no errors, the following message will appear; if there are errors, an error message will be displayed.
Then you can check whether the configuration is correct in each of the settings.
FAQ
1) System Error Solutions
If the configuration tool does not open normally and a system error occurs, prompting that VCRUNTIME140.dll is missing. Installing the VC 2015-2019 redistributable component package will fix it.
2) Unable to Discover Devices via Network
Ensure the firewall is set to a private network. If unable to discover Monigear devices, check if the firewall allows the software to communicate on the private network.
If the system has another firewall, make sure UDP port 6104 is allowed.
3) Flash quit when connecting / Connection crashes
If you can't find a device in the Discovered Devices device group node when you find a device over the network, or if the connected device crashes in the device configuration interface. The reason is that the time of the device is abnormal — not the current time but the start time of Unix 1970, which is not within the validity period of the digital certificate, which caused the connection failure. At this time, the device should be restored to factory default, the IP assignment should be reset, and the time synchronization should be re-executed during the application of the new IP to the device, and then the device can be re-found / connected.
4) Installation directory permissions issue
Some users' computers have different security group policies. The currently logged-in user does not have write permissions in the software installation directory. At this time, the software may report problems and some operations cannot be completed. There are two ways to deal with this situation. One is to ask the administrator to authorize the current user to grant write permissions in the directory where the software is installed. The other is to run the configuration tool software as an administrator. The latter is recommended because the tool software needs to bind a UDP network port, and this operation also requires higher permissions to run correctly.
5) Cannot connect to device for configuration after reopening the tool
This situation may occur when a virtual machine is installed on the Windows system or when there are multiple network cards. It is possible that the index order of the network cards has changed after the system is restarted. Because if there is a device with an IPv6 address, the connection will be set up via IPv6 first, and the saved IPv6 information contains the network card index number. Therefore, the connection configuration may not be possible after the index number changes. This situation is rare. The solution is to search for the device again. After the search operation, the network card index number will be updated and the connection can be normal.