Monigear App V1.0 User Guide
Monigear is a professional equipment monitoring and management tool designed for commercial and industrial scenarios. The current V1.0 version focuses on lightweight basic features, with practical capabilities like one-click WiFi setup for devices, LAN device discovery, real-time data monitoring, dynamic data charts, and quick device location. It's simple to use and can quickly meet basic on-site equipment monitoring needs.
The software offers an easy entry point for professional users to access advanced device functions. All Monigear hardware natively supports mainstream industrial communication protocols like Modbus TCP, SNMP, BacNET, MQTT, REST API, email, and IFTTT. Future app updates will continue to roll out, gradually adding advanced features like device configuration, remote device management, historical data queries, and alert notifications.
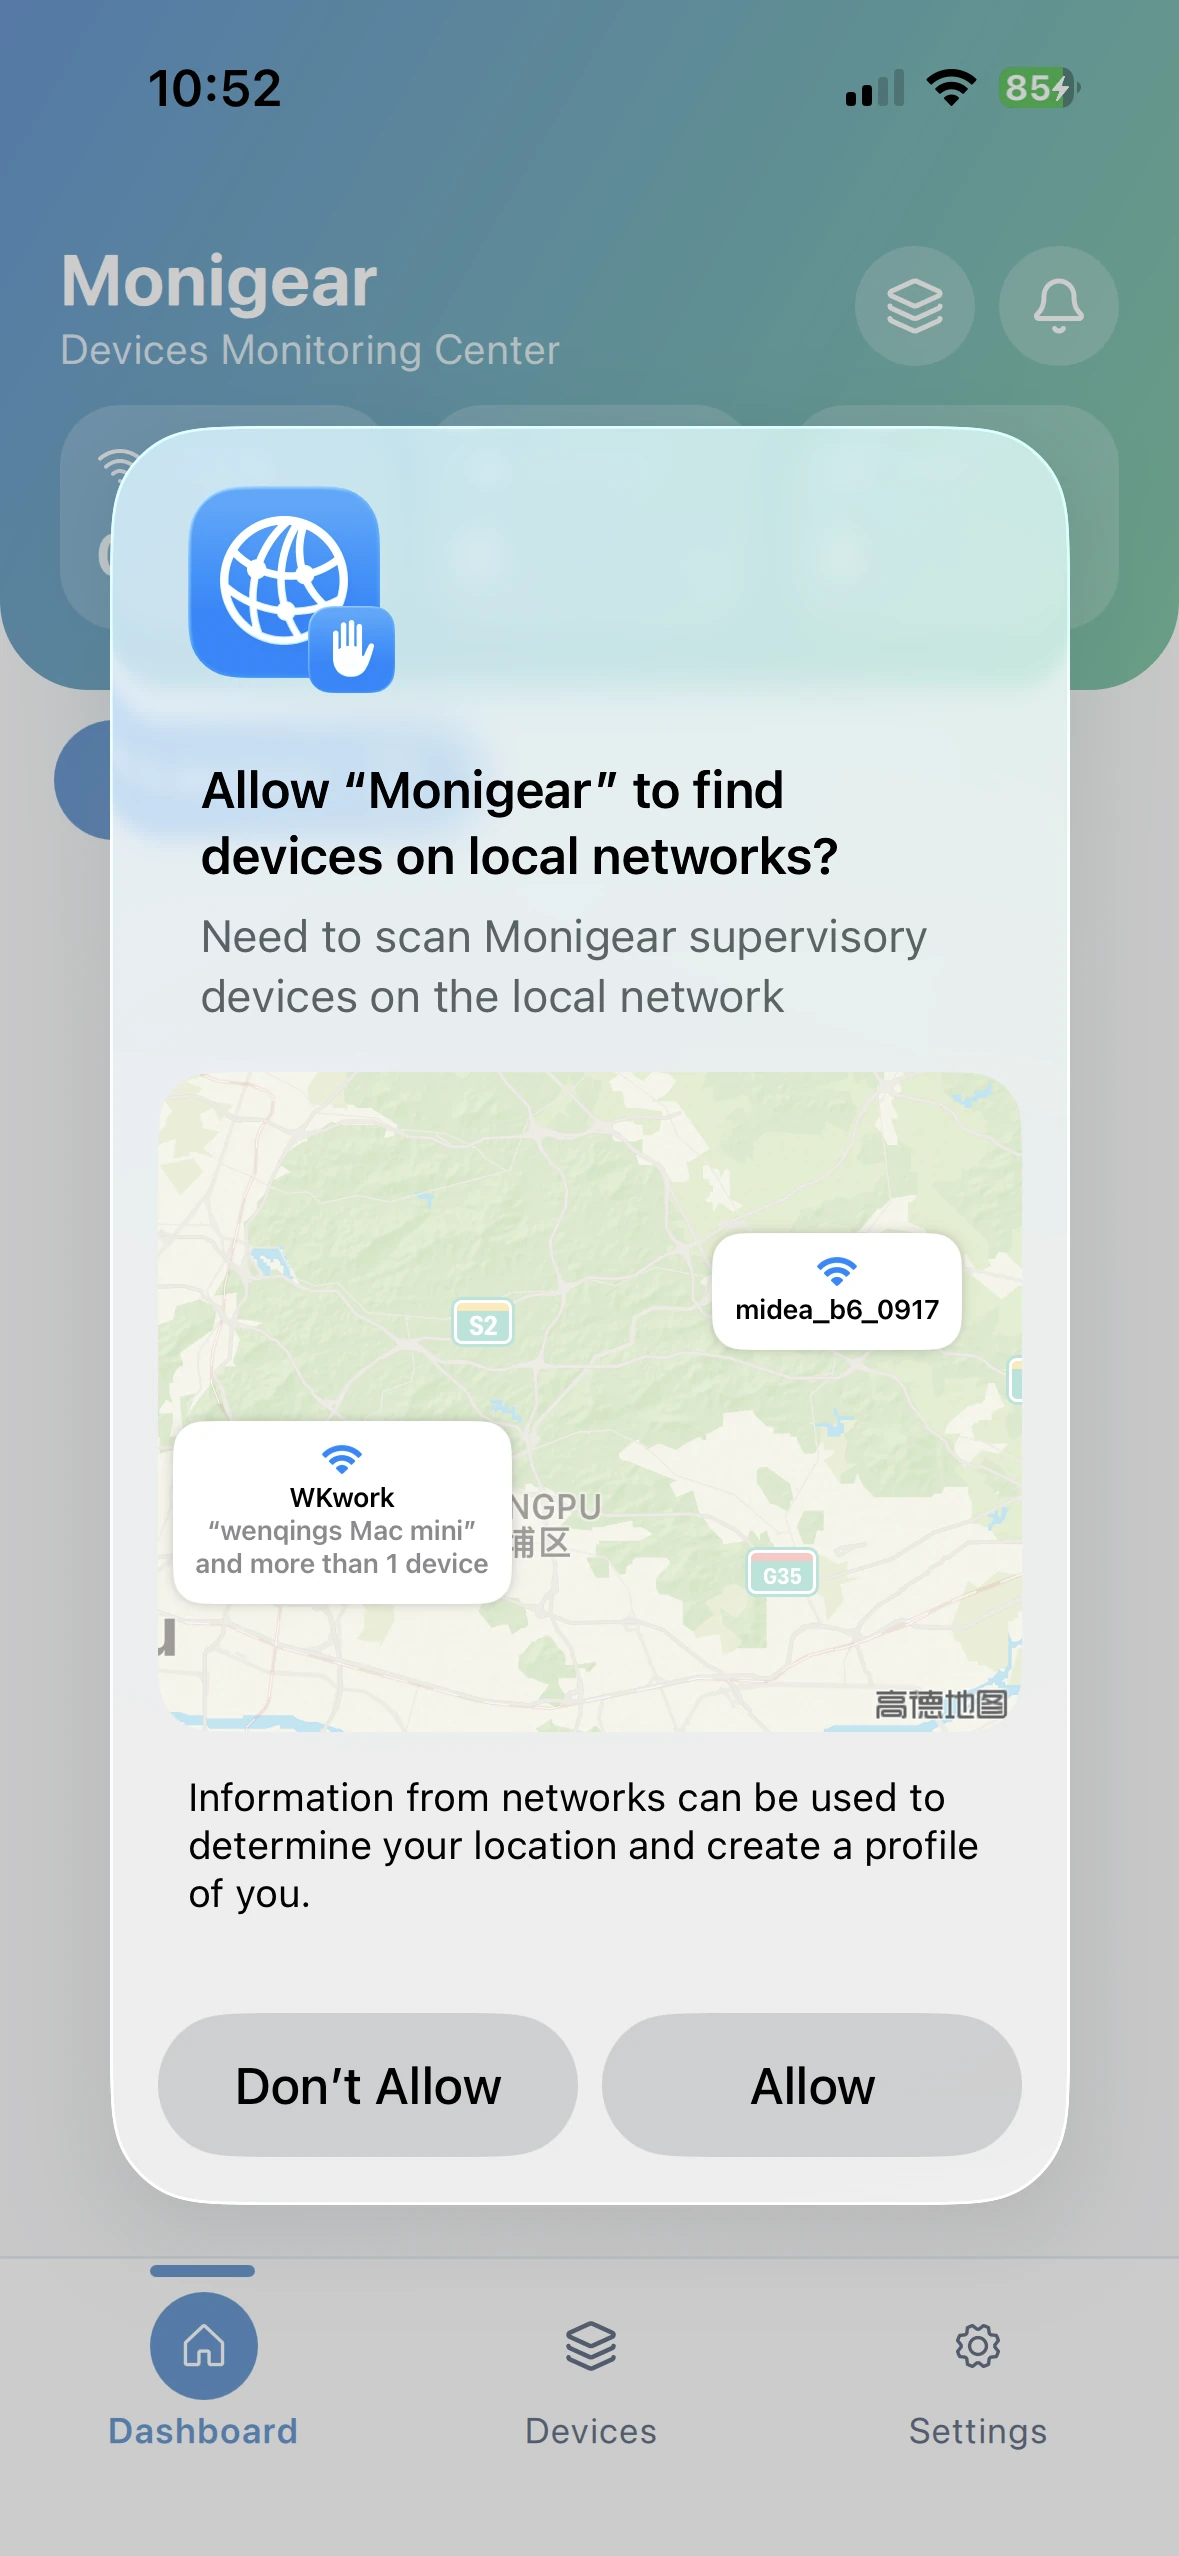
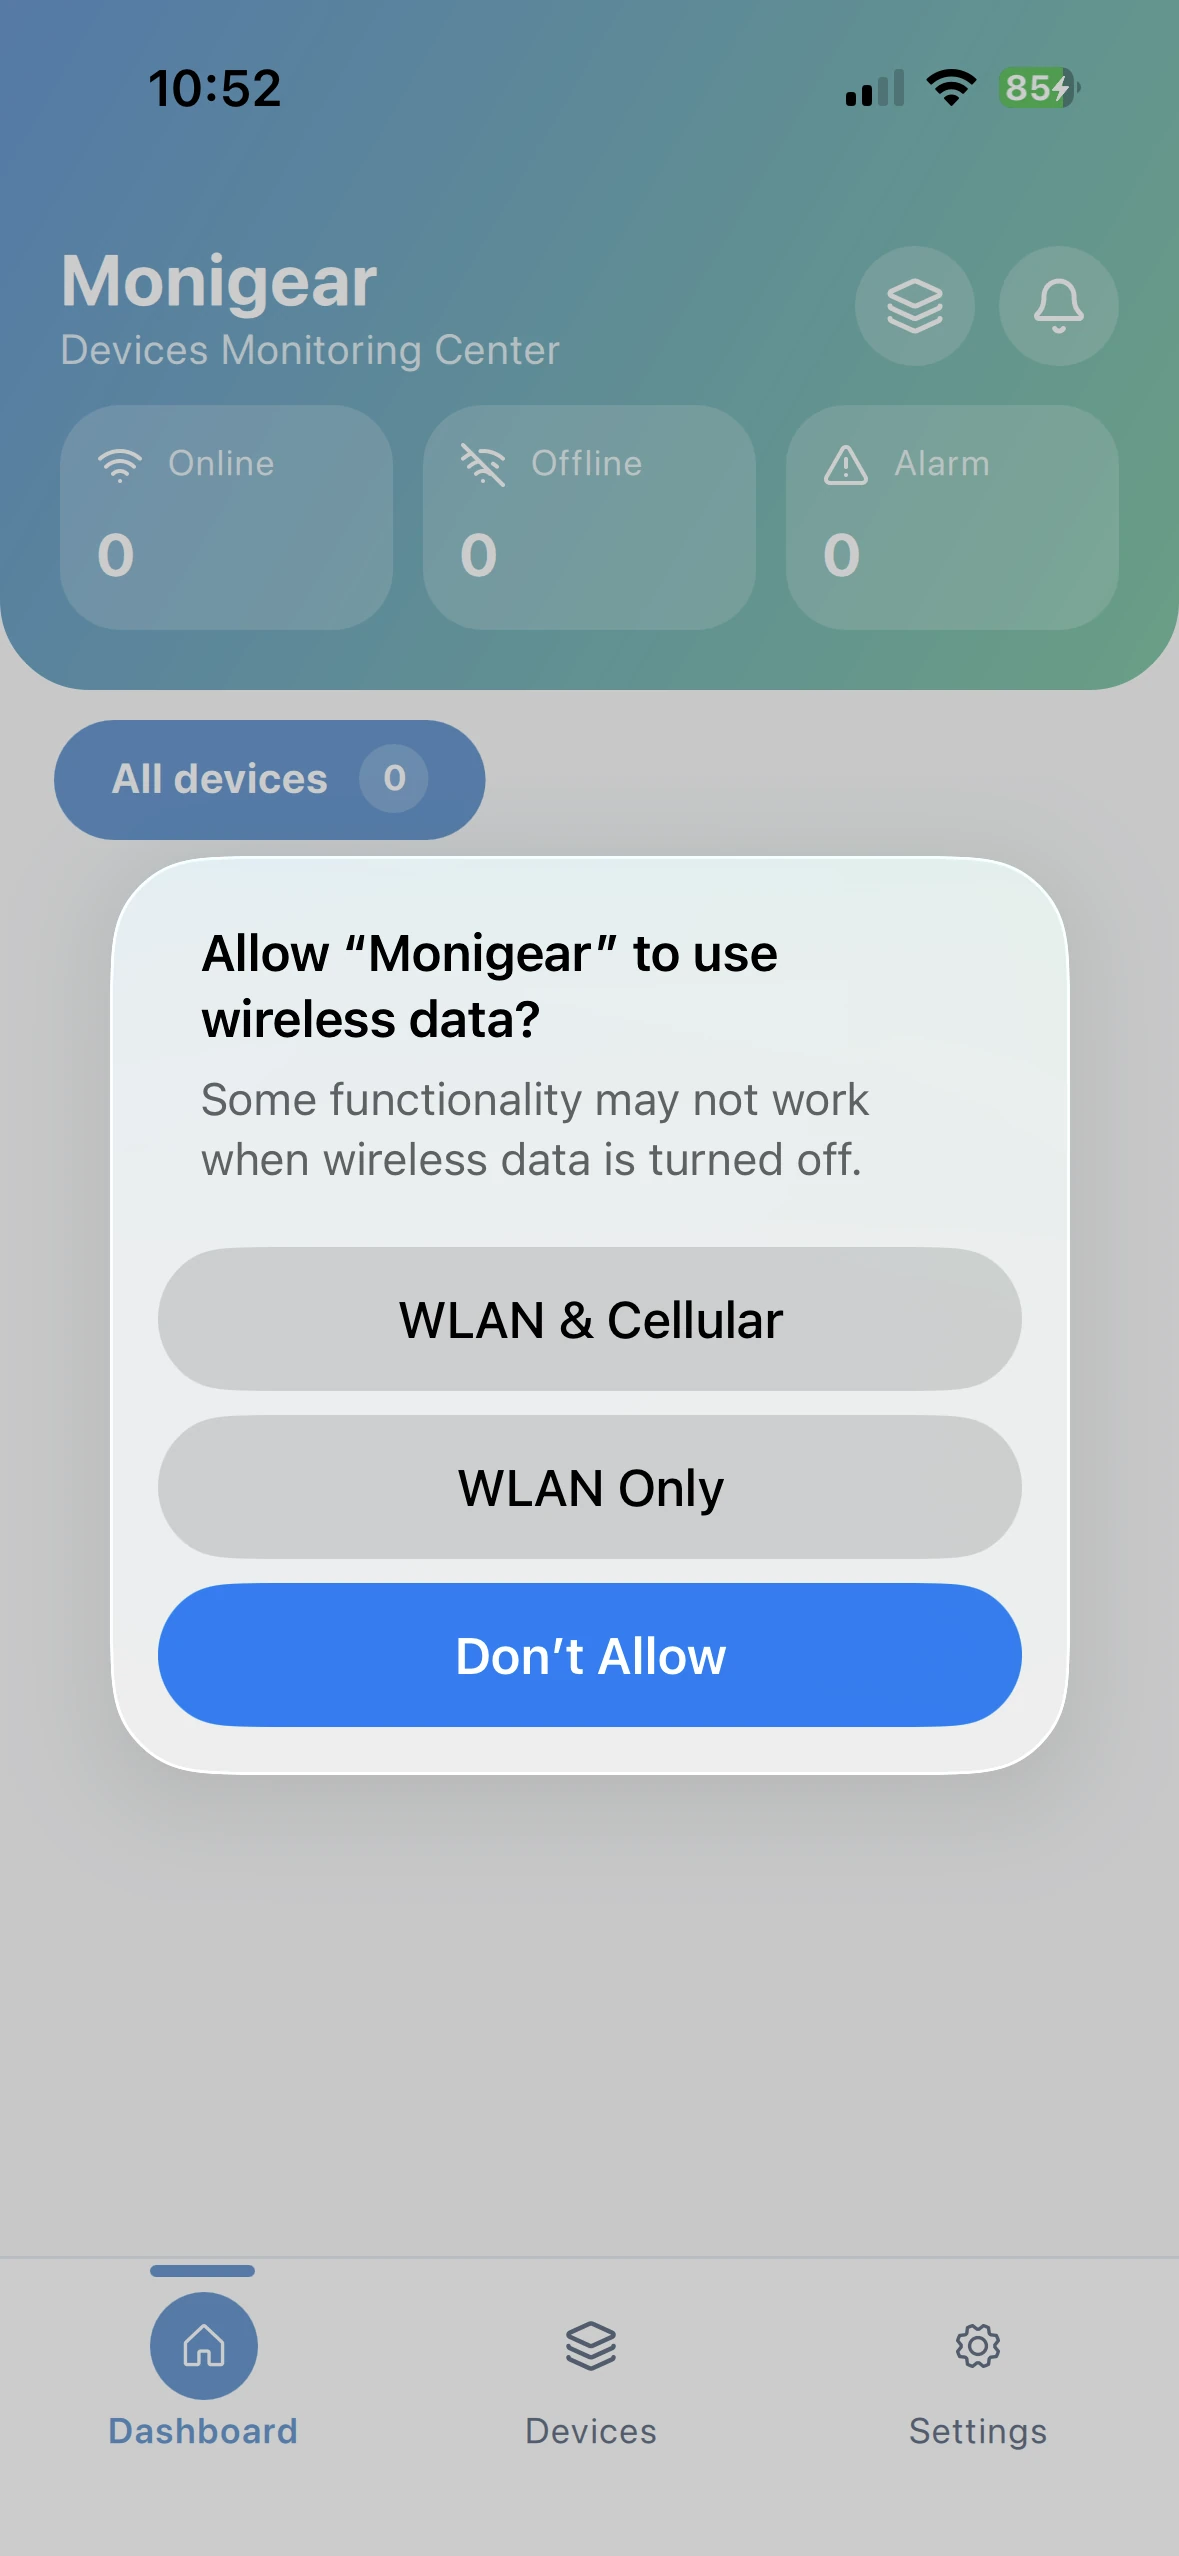
When iOS users run the app for the first time, they'll be prompted whether to allow discovering local network devices—tap Allow; then whether to allow using mobile data, choose WLAN & Cellular.
Device Network Setup
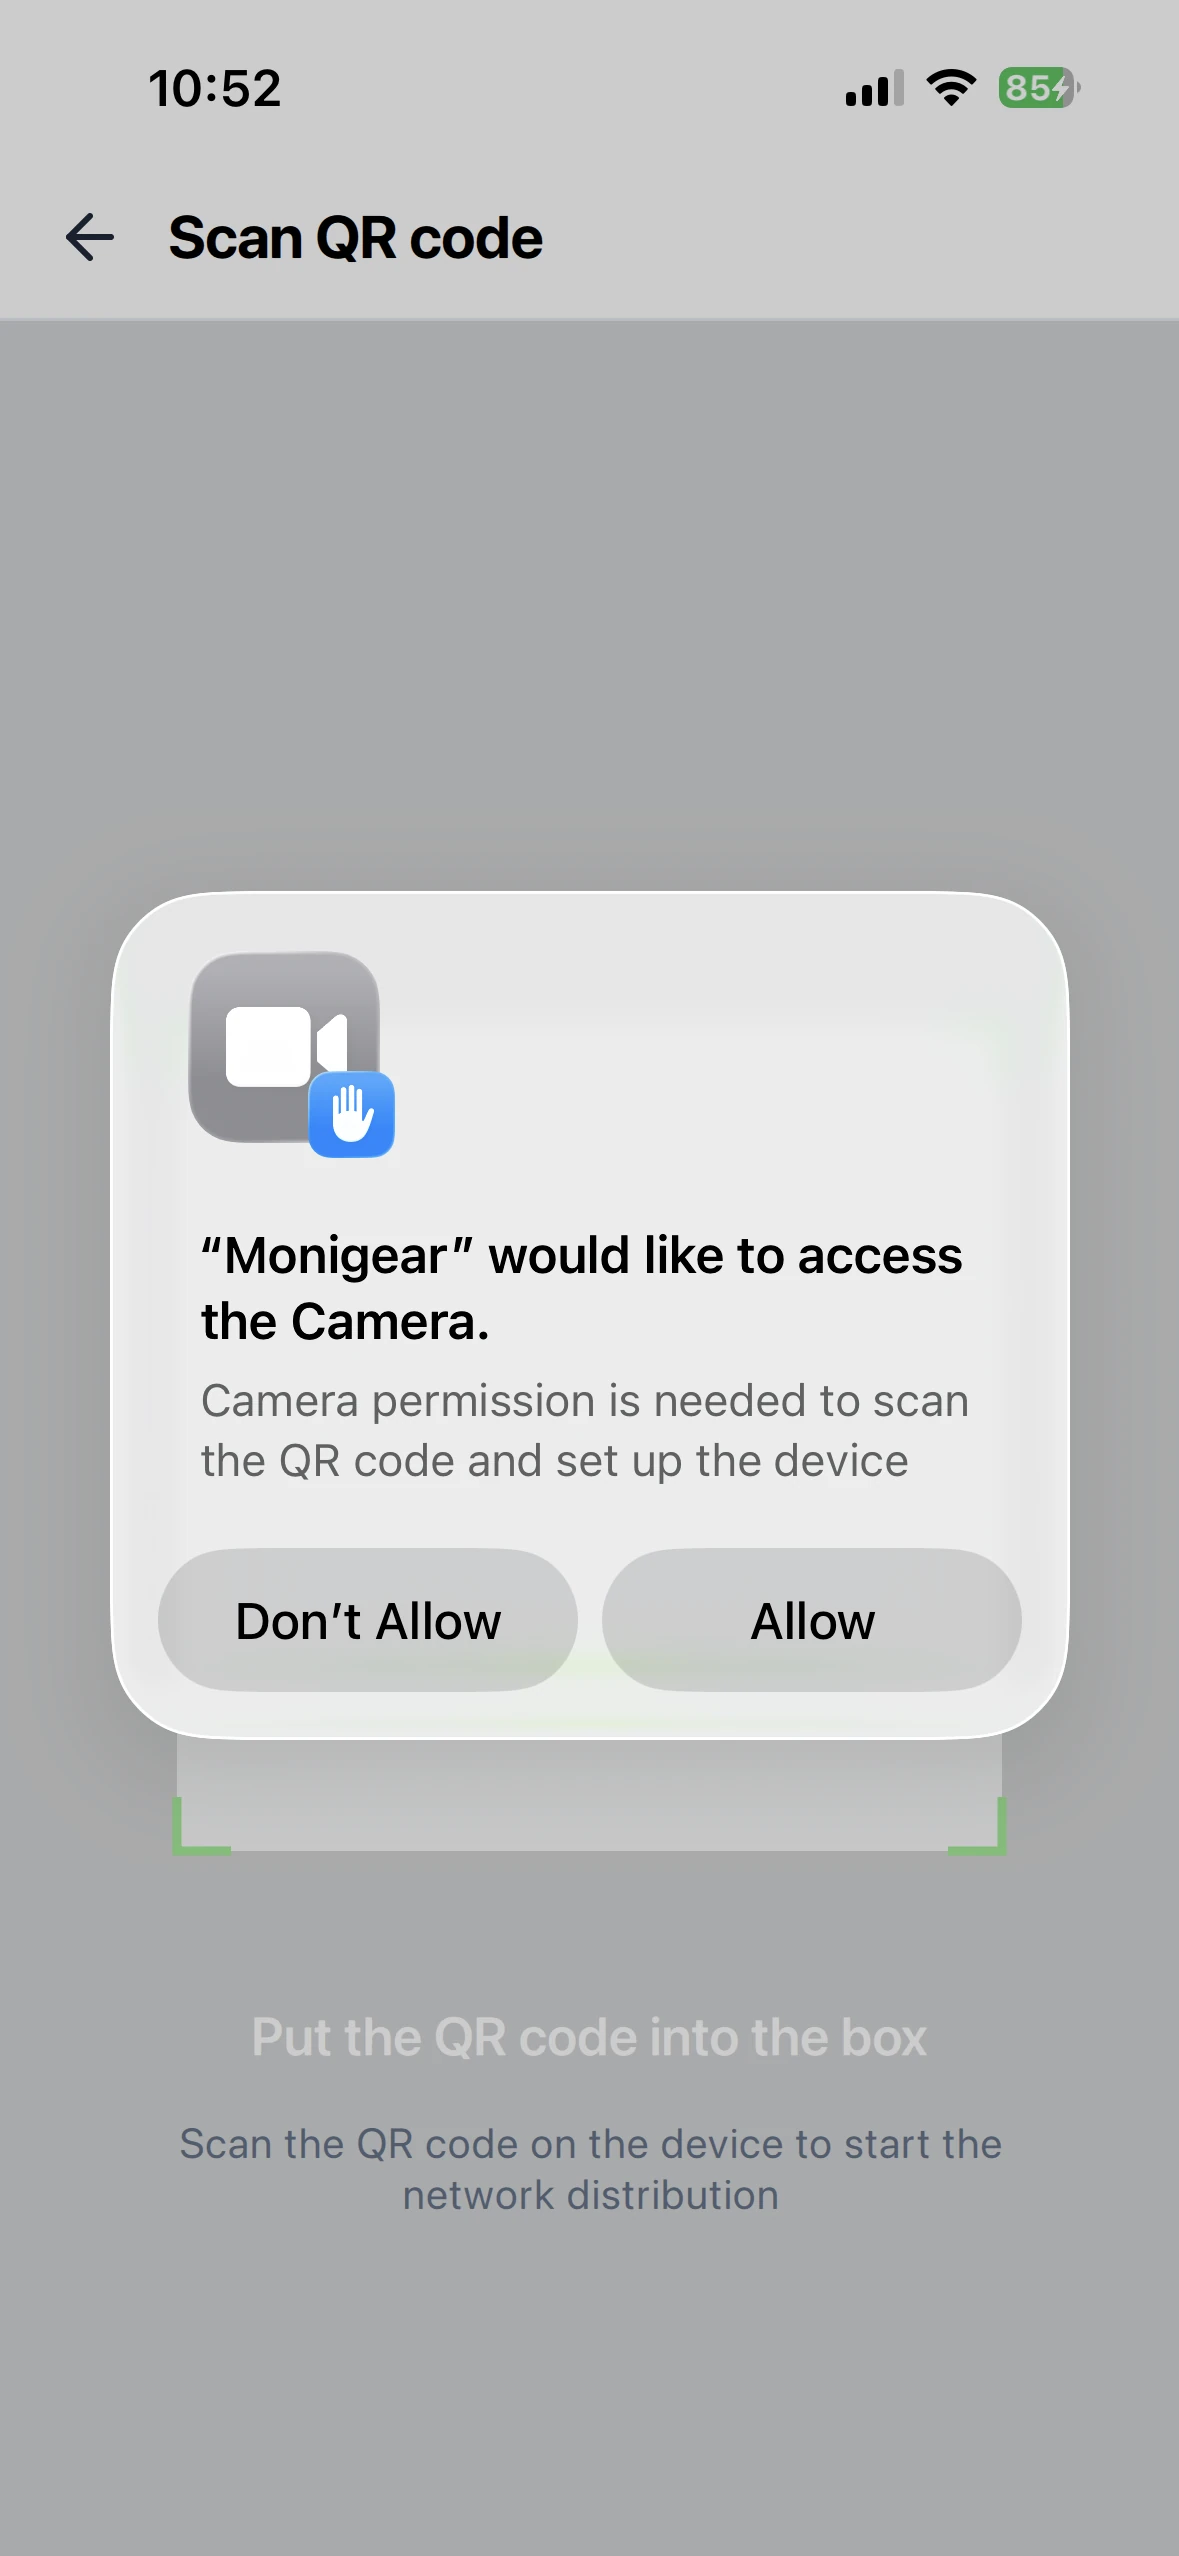
Tap the scan button in the top right corner of the device list page to open the scanning page. The first time you open the scan page, you'll be asked if you want to allow access to the camera—please choose Allow.
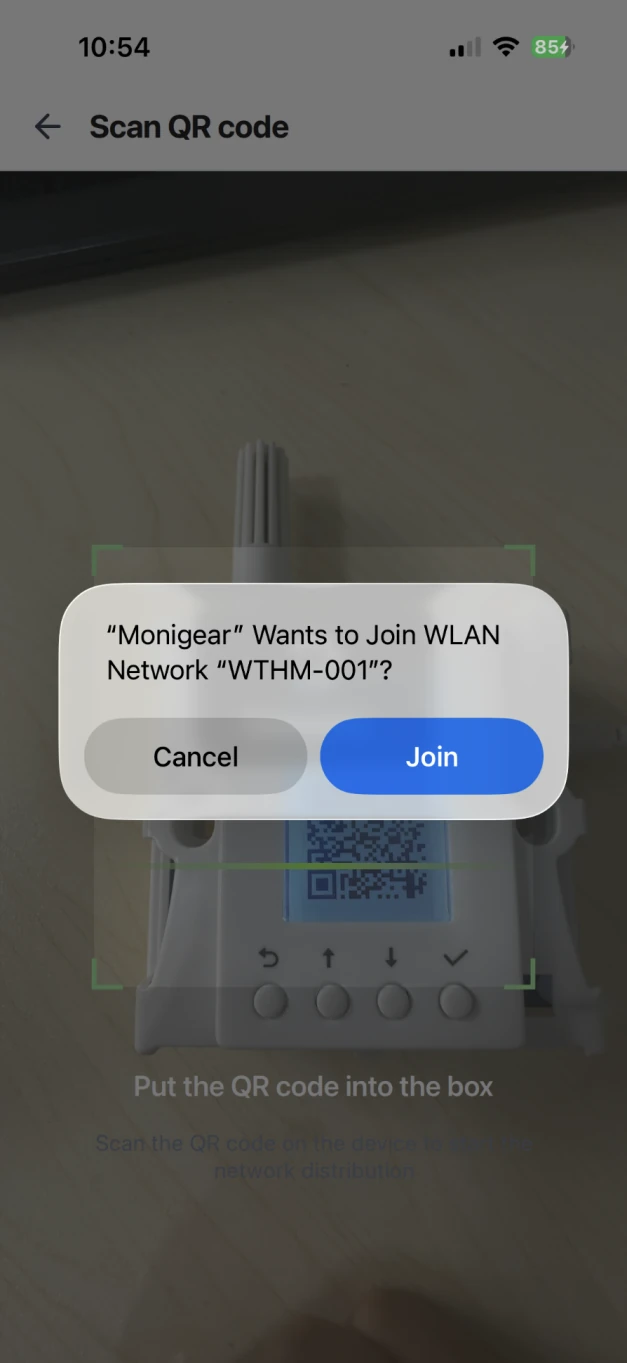
Click the device button to enter network setup mode, scan the QR code on the screen, and once the connection is successful, the page will automatically jump to the configuration upload page.
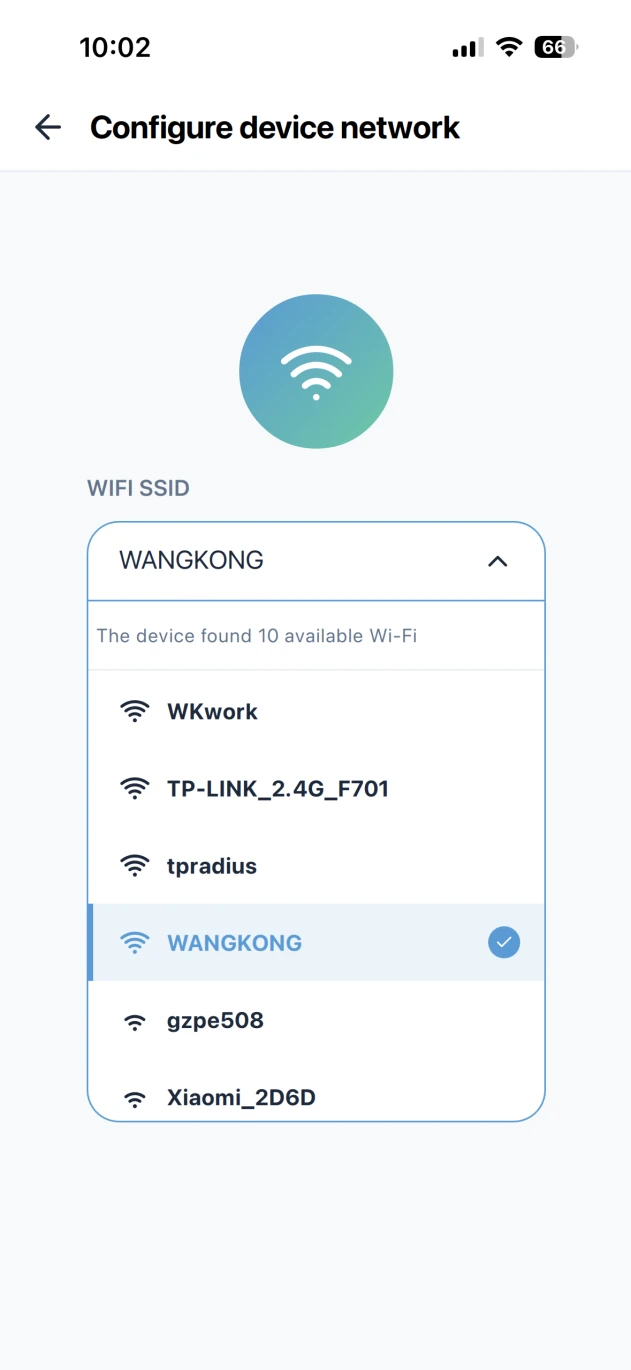
You can manually enter the WiFi SSID, or click on the SSID input box to see a dropdown menu listing the available WiFi networks on the device (note that the device only supports connecting to 2.4G WiFi and does not support 5G WiFi. Usually, you should select from the available WiFi list on the device, unless it's a hidden network or other special cases that require manual input).
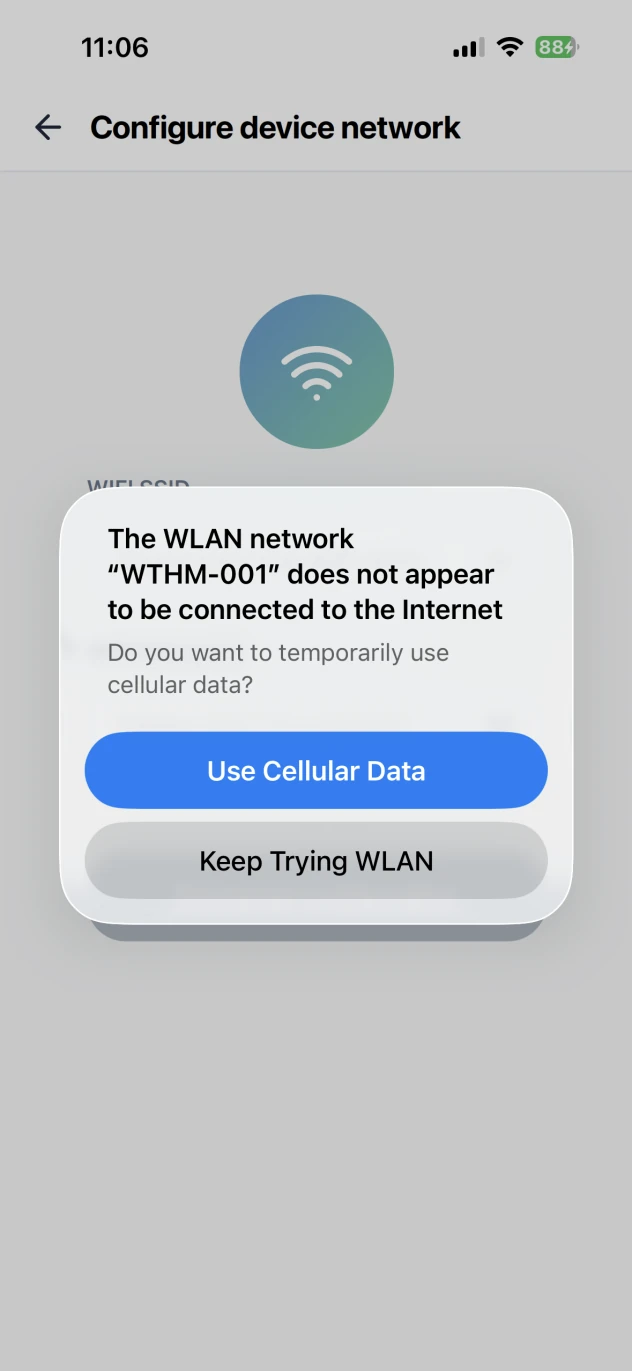
When iOS connects to the device's WLAN network for the first time, it will check the network availability. So before the system finishes the check, the app can't read the device's Wi-Fi list yet, you'll need to wait a bit.
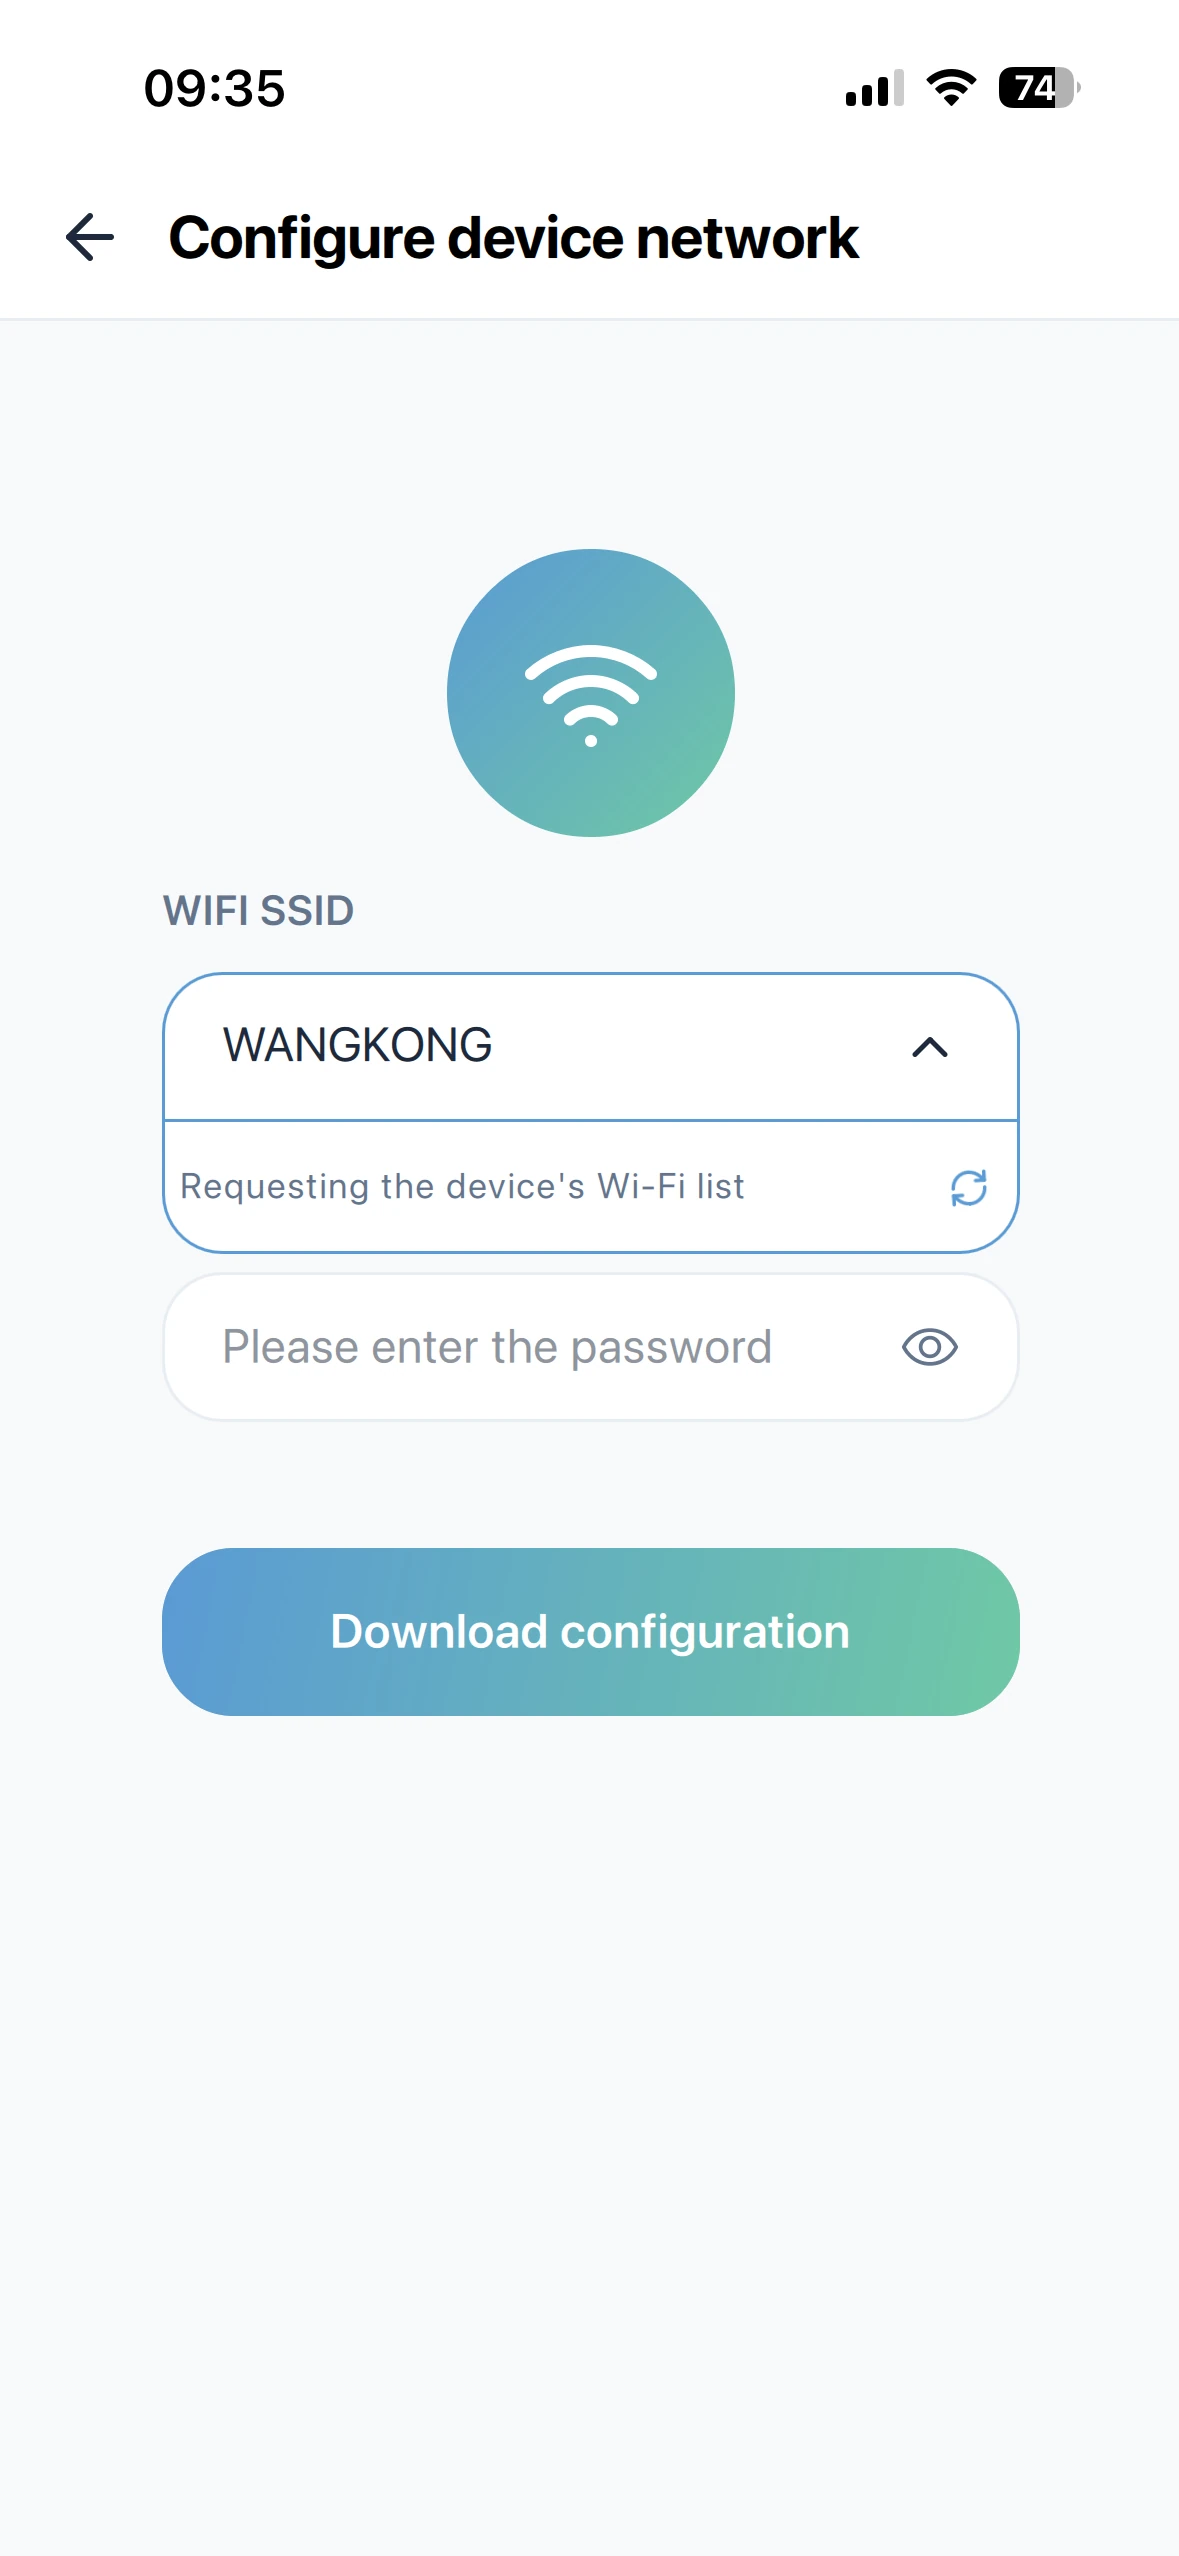
When the IOS system finishes checking network availability, a pop-up will appear saying it can't connect to the Internet. Click 'Keep Trying WLAN,' and you'll see the list of available Wi-Fi networks on the device.
Choose a Wi-Fi SSID, enter the password, and click 'Download configuration' to send the settings to the device. The app will remember the Wi-Fi SSID and password you used successfully last time, so the next time you set up the network, you can just download it directly.
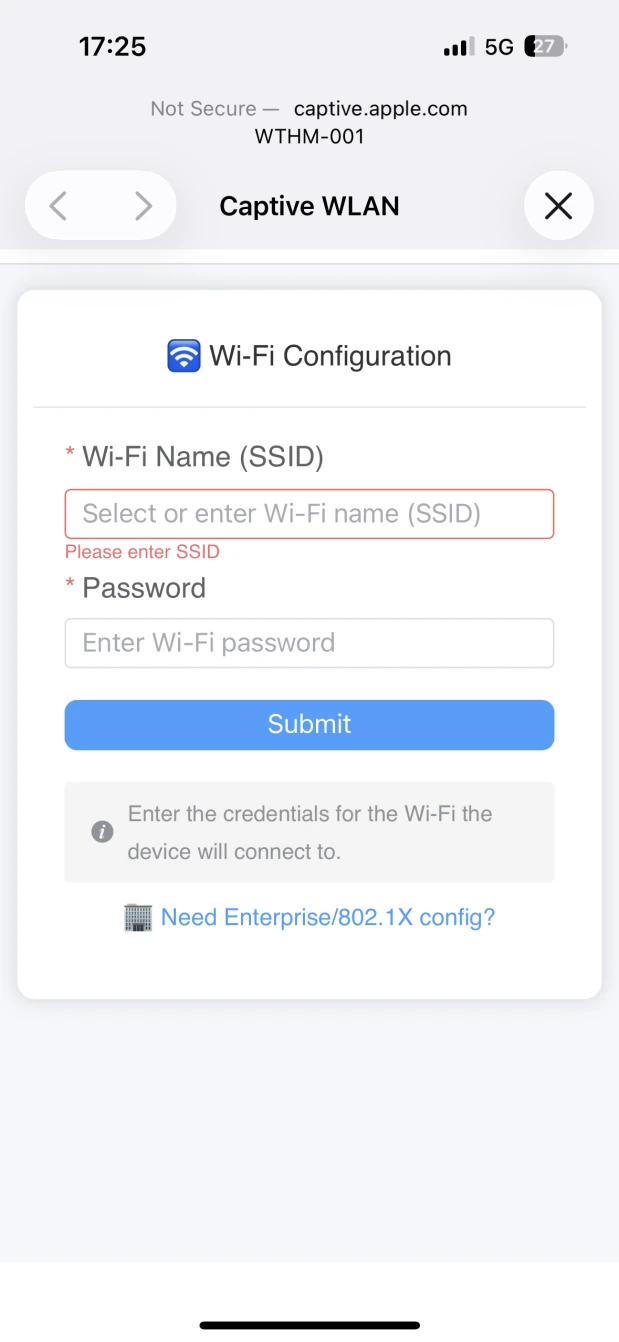
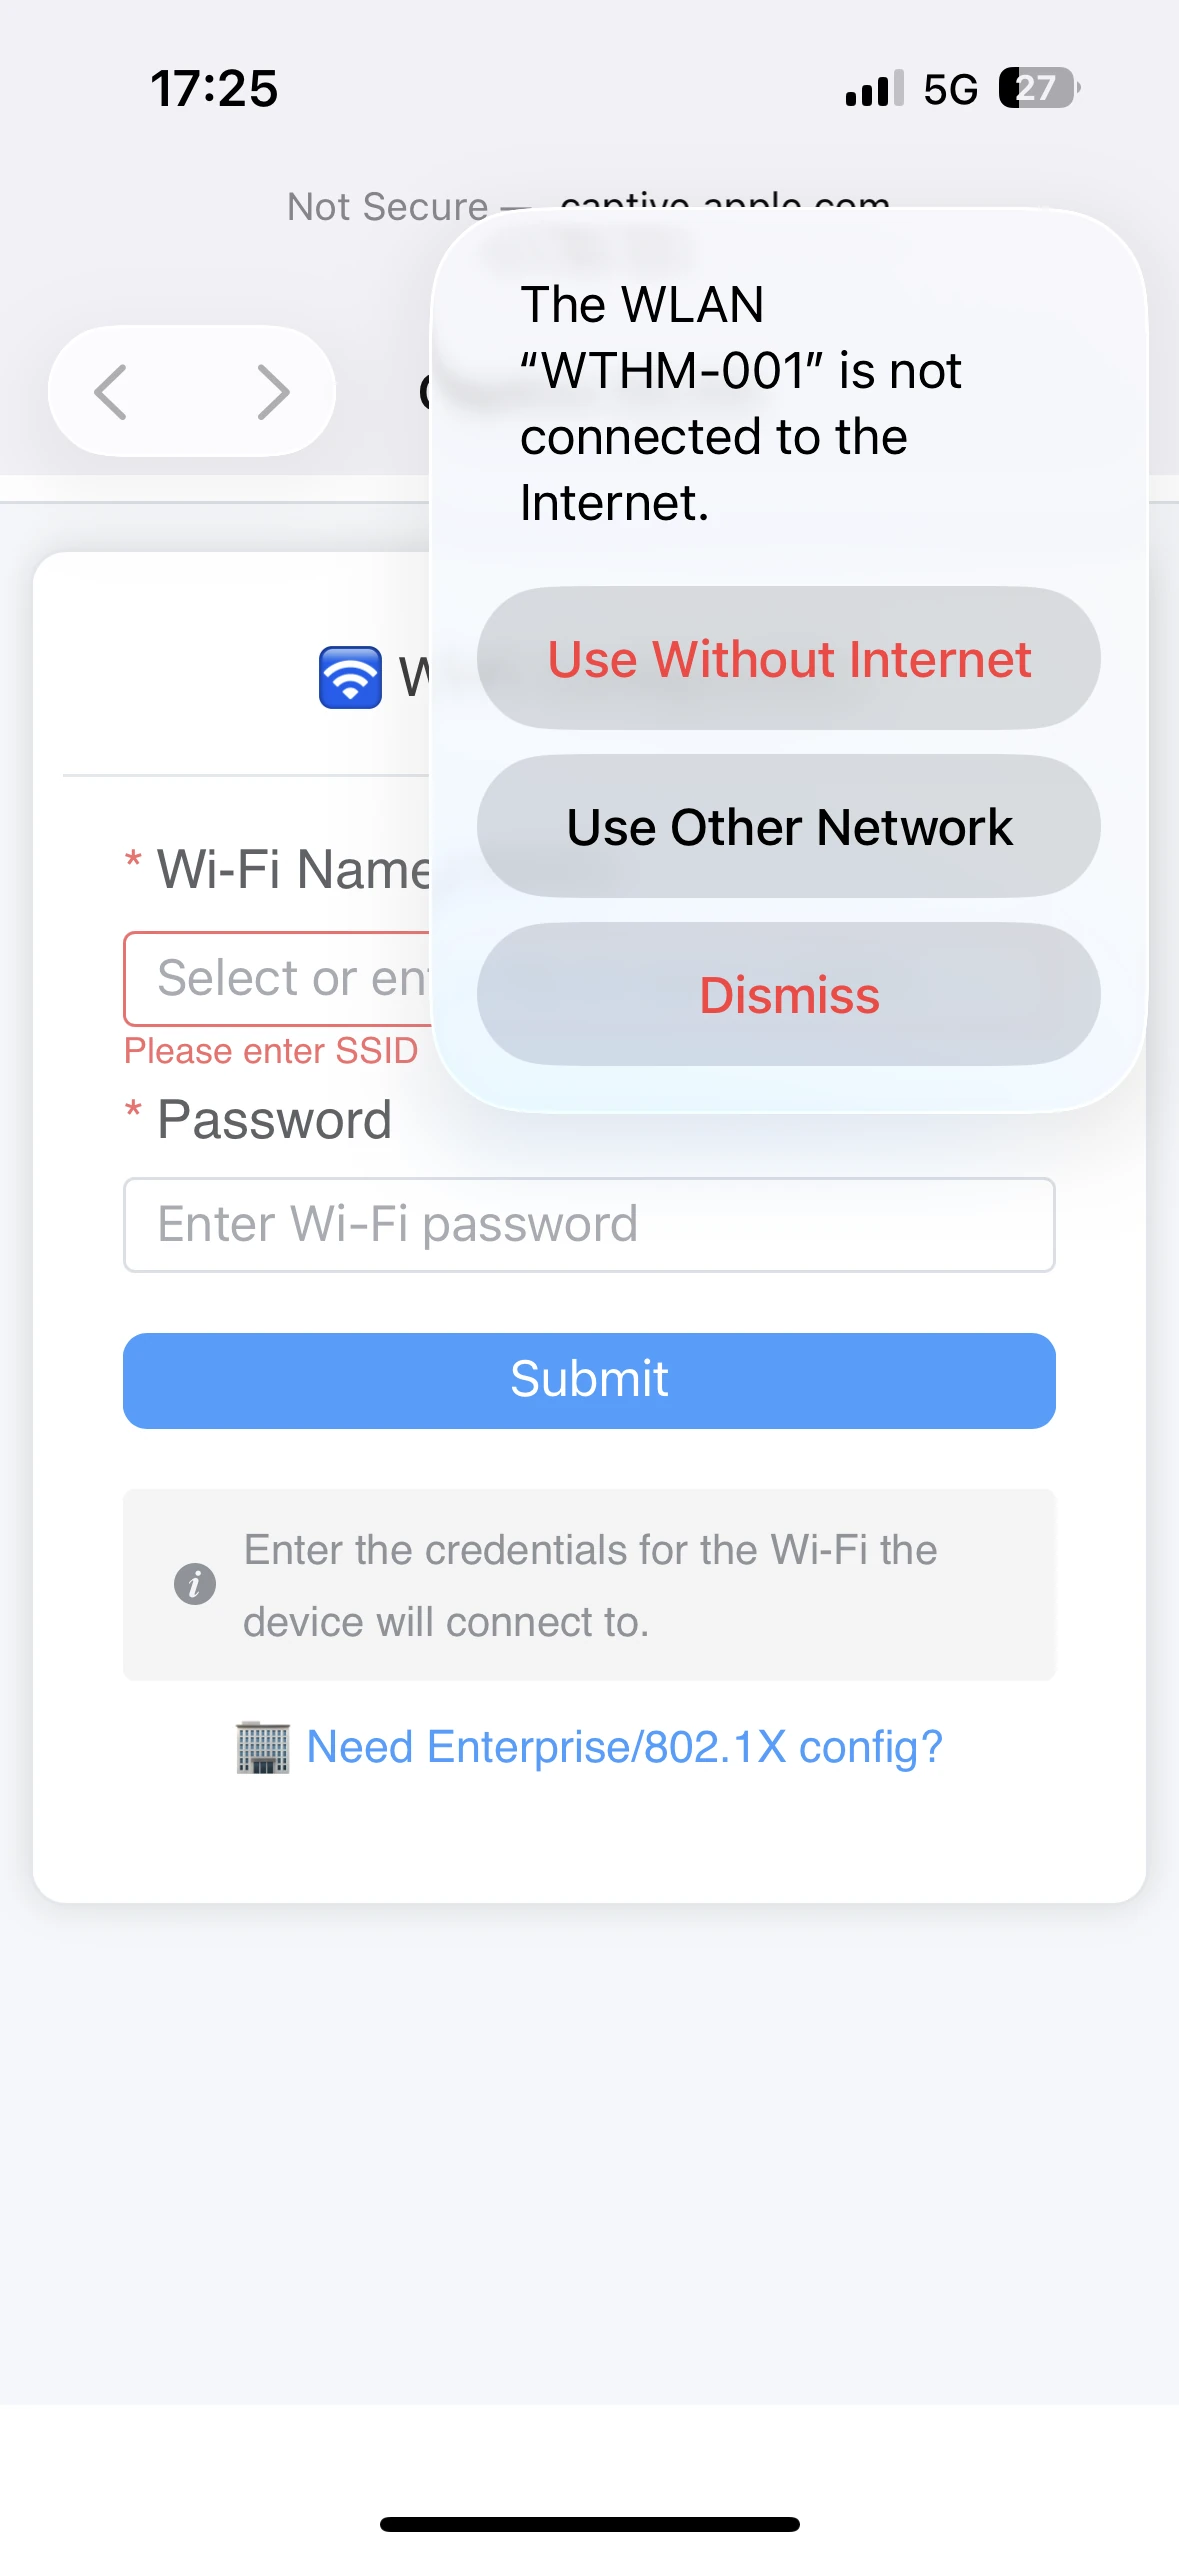
If you're using an older version of the device, it uses a WiFi Captive Portal to set up the network. Usually, you would scan the device QR code with your phone's camera, which triggers the portal to jump to the built-in web setup page (but this method doesn't work reliably on all phones).
Please click the '×' at the top right of the Captive WLAN page, select 'Use Without Internet,' and then go back to the APP configuration page to continue with the next step.
After the network setup is complete, you can follow the page prompts to go to the Find page to search and add devices, or continue scanning to set up the next device. Once all devices are set up, you can add them all at once. (Note: since all devices have the same WLAN name, if multiple devices enter the network setup mode at the same time, scanning the QR code will randomly connect to one of the devices' WLAN for setup.)
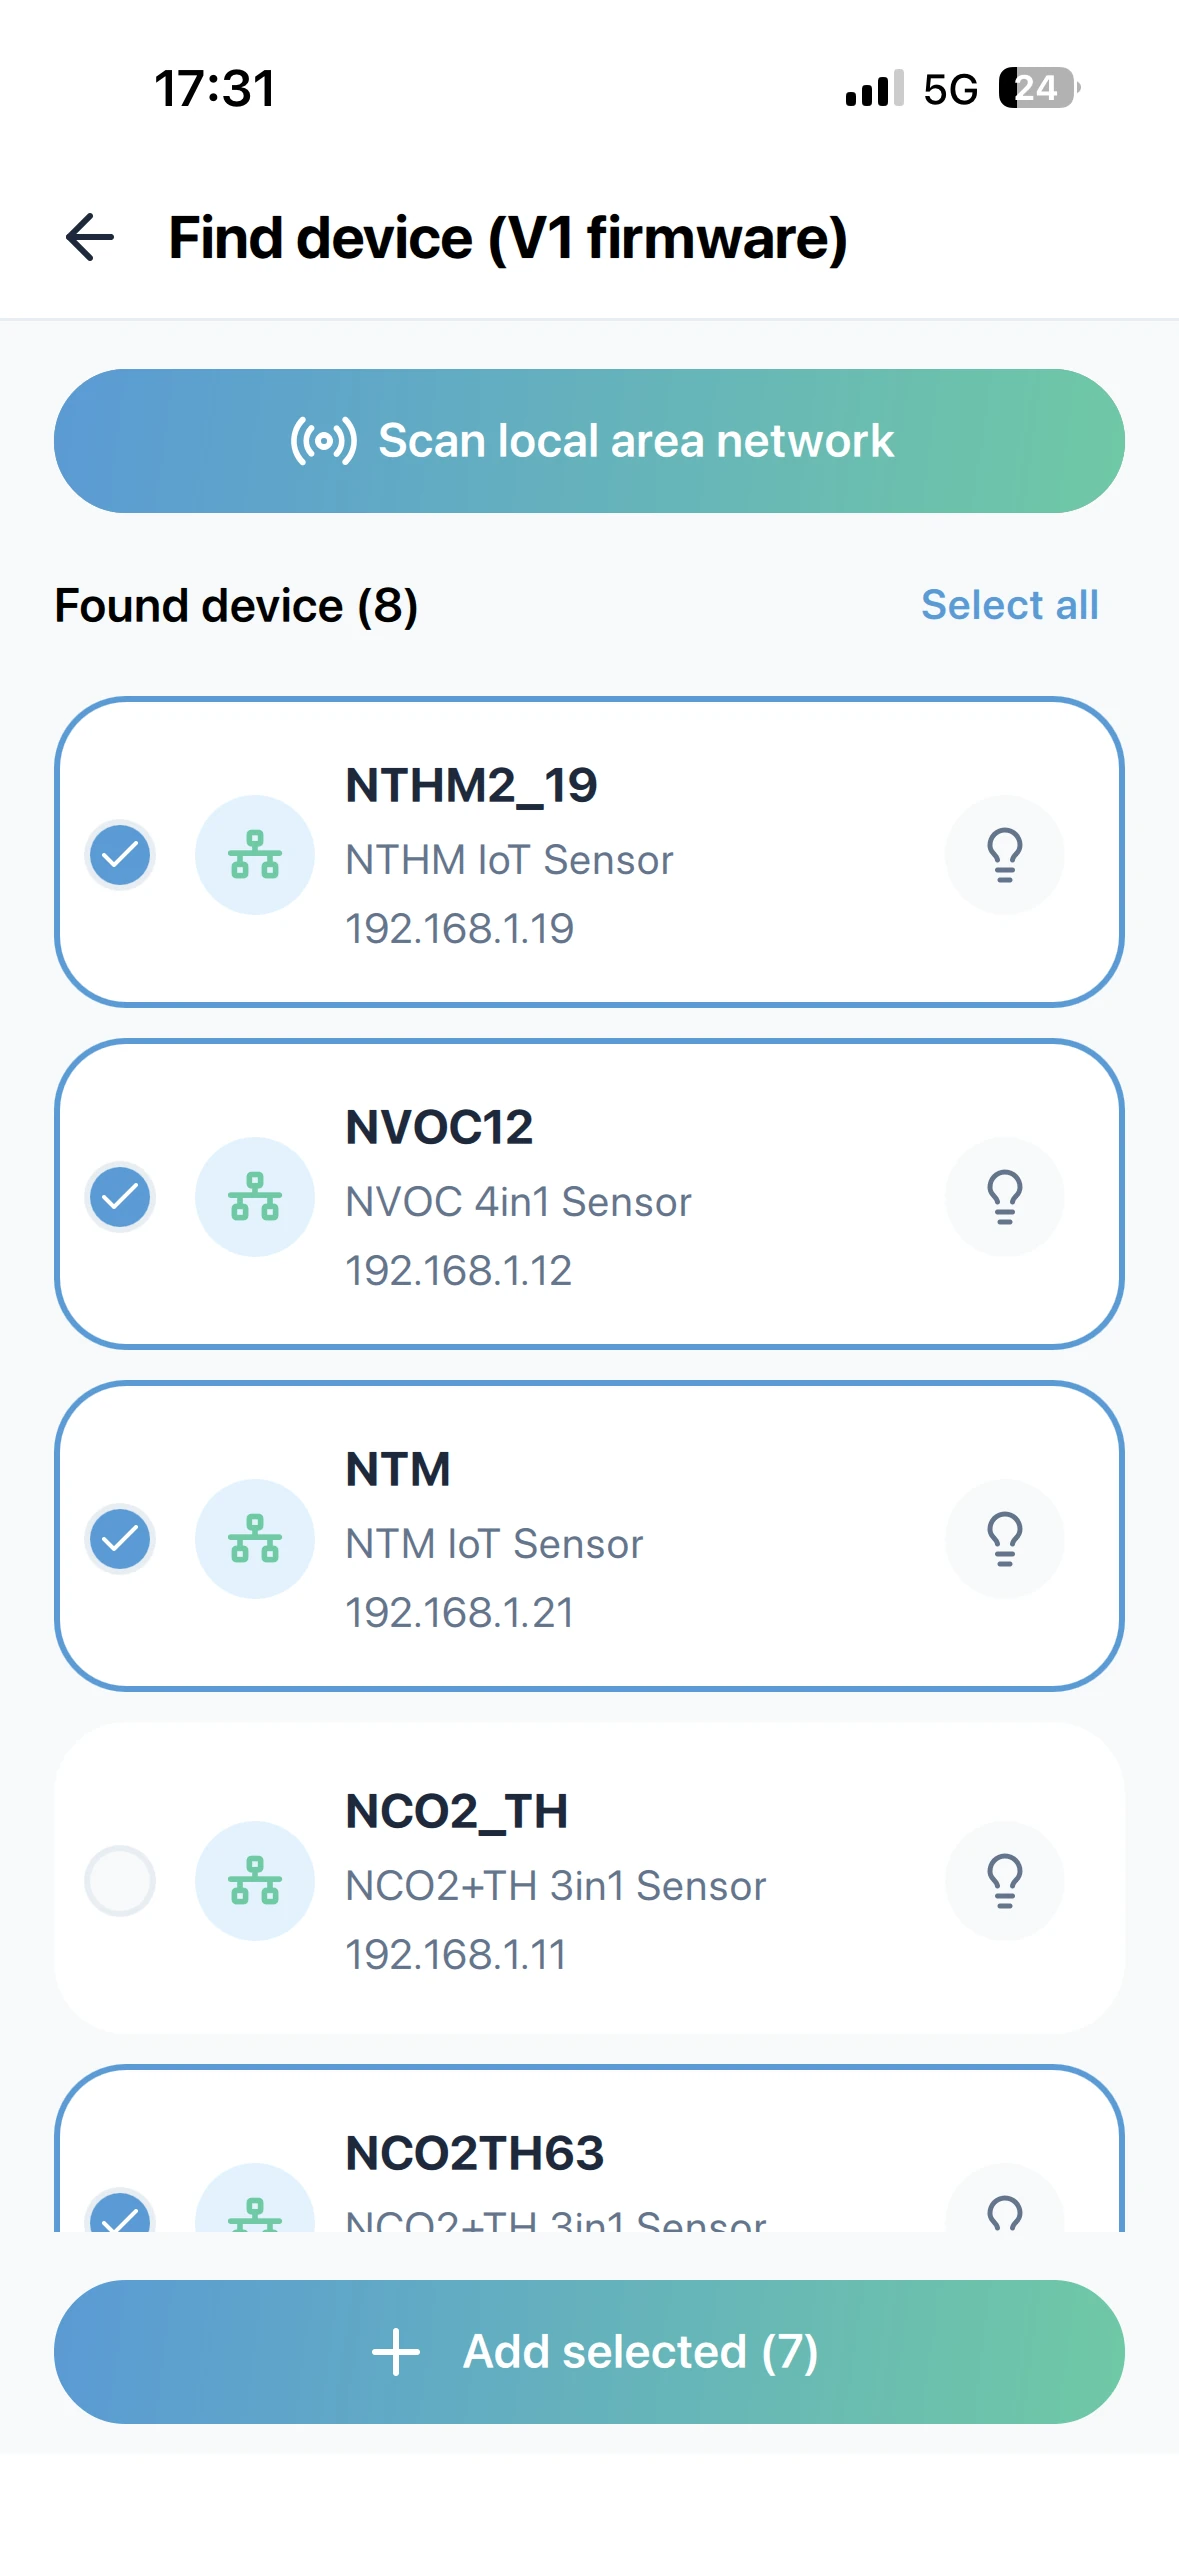
Add Local V1 Device
Click the Find button in the top right corner of the device list page to go to the discovery page, then click Scan local area network to find devices on your local network. Broadcast-discoverable devices include both POE and WIFI versions, like NTHM and WTHM.
Sometimes, if the device has a weak network signal or the router drops packets, the device might not show an IPv4 address, so you can try scanning a few more times.
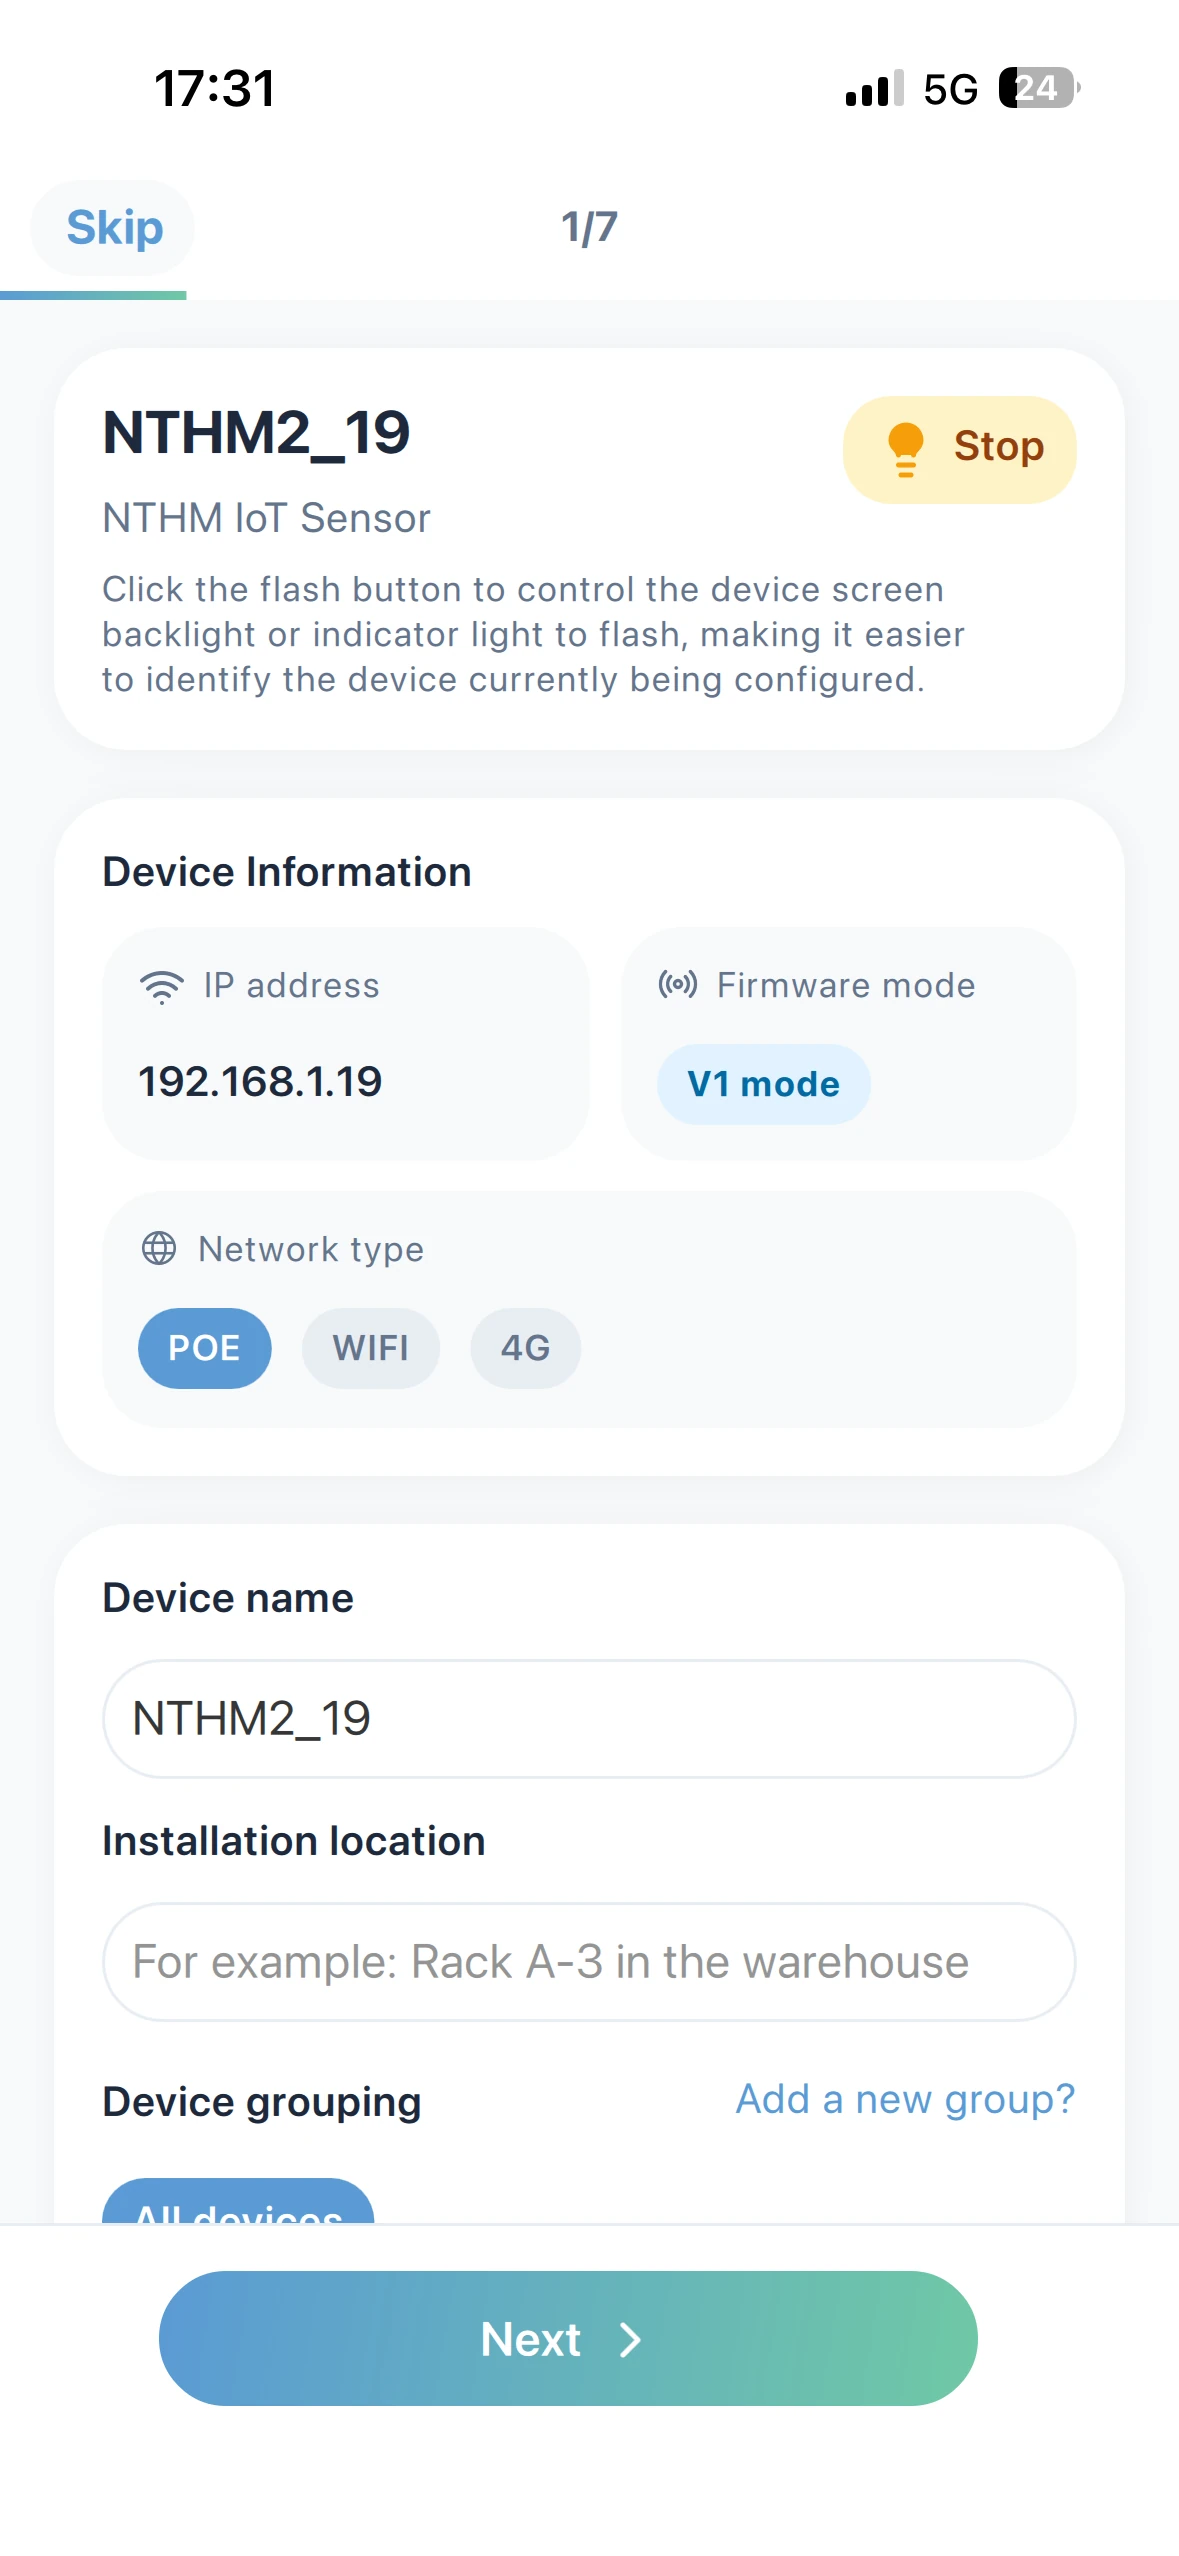
Select a device from the list of discovered devices and add it. You can further edit the device name, installation location, group, and other info on the initial setup page according to the prompts.
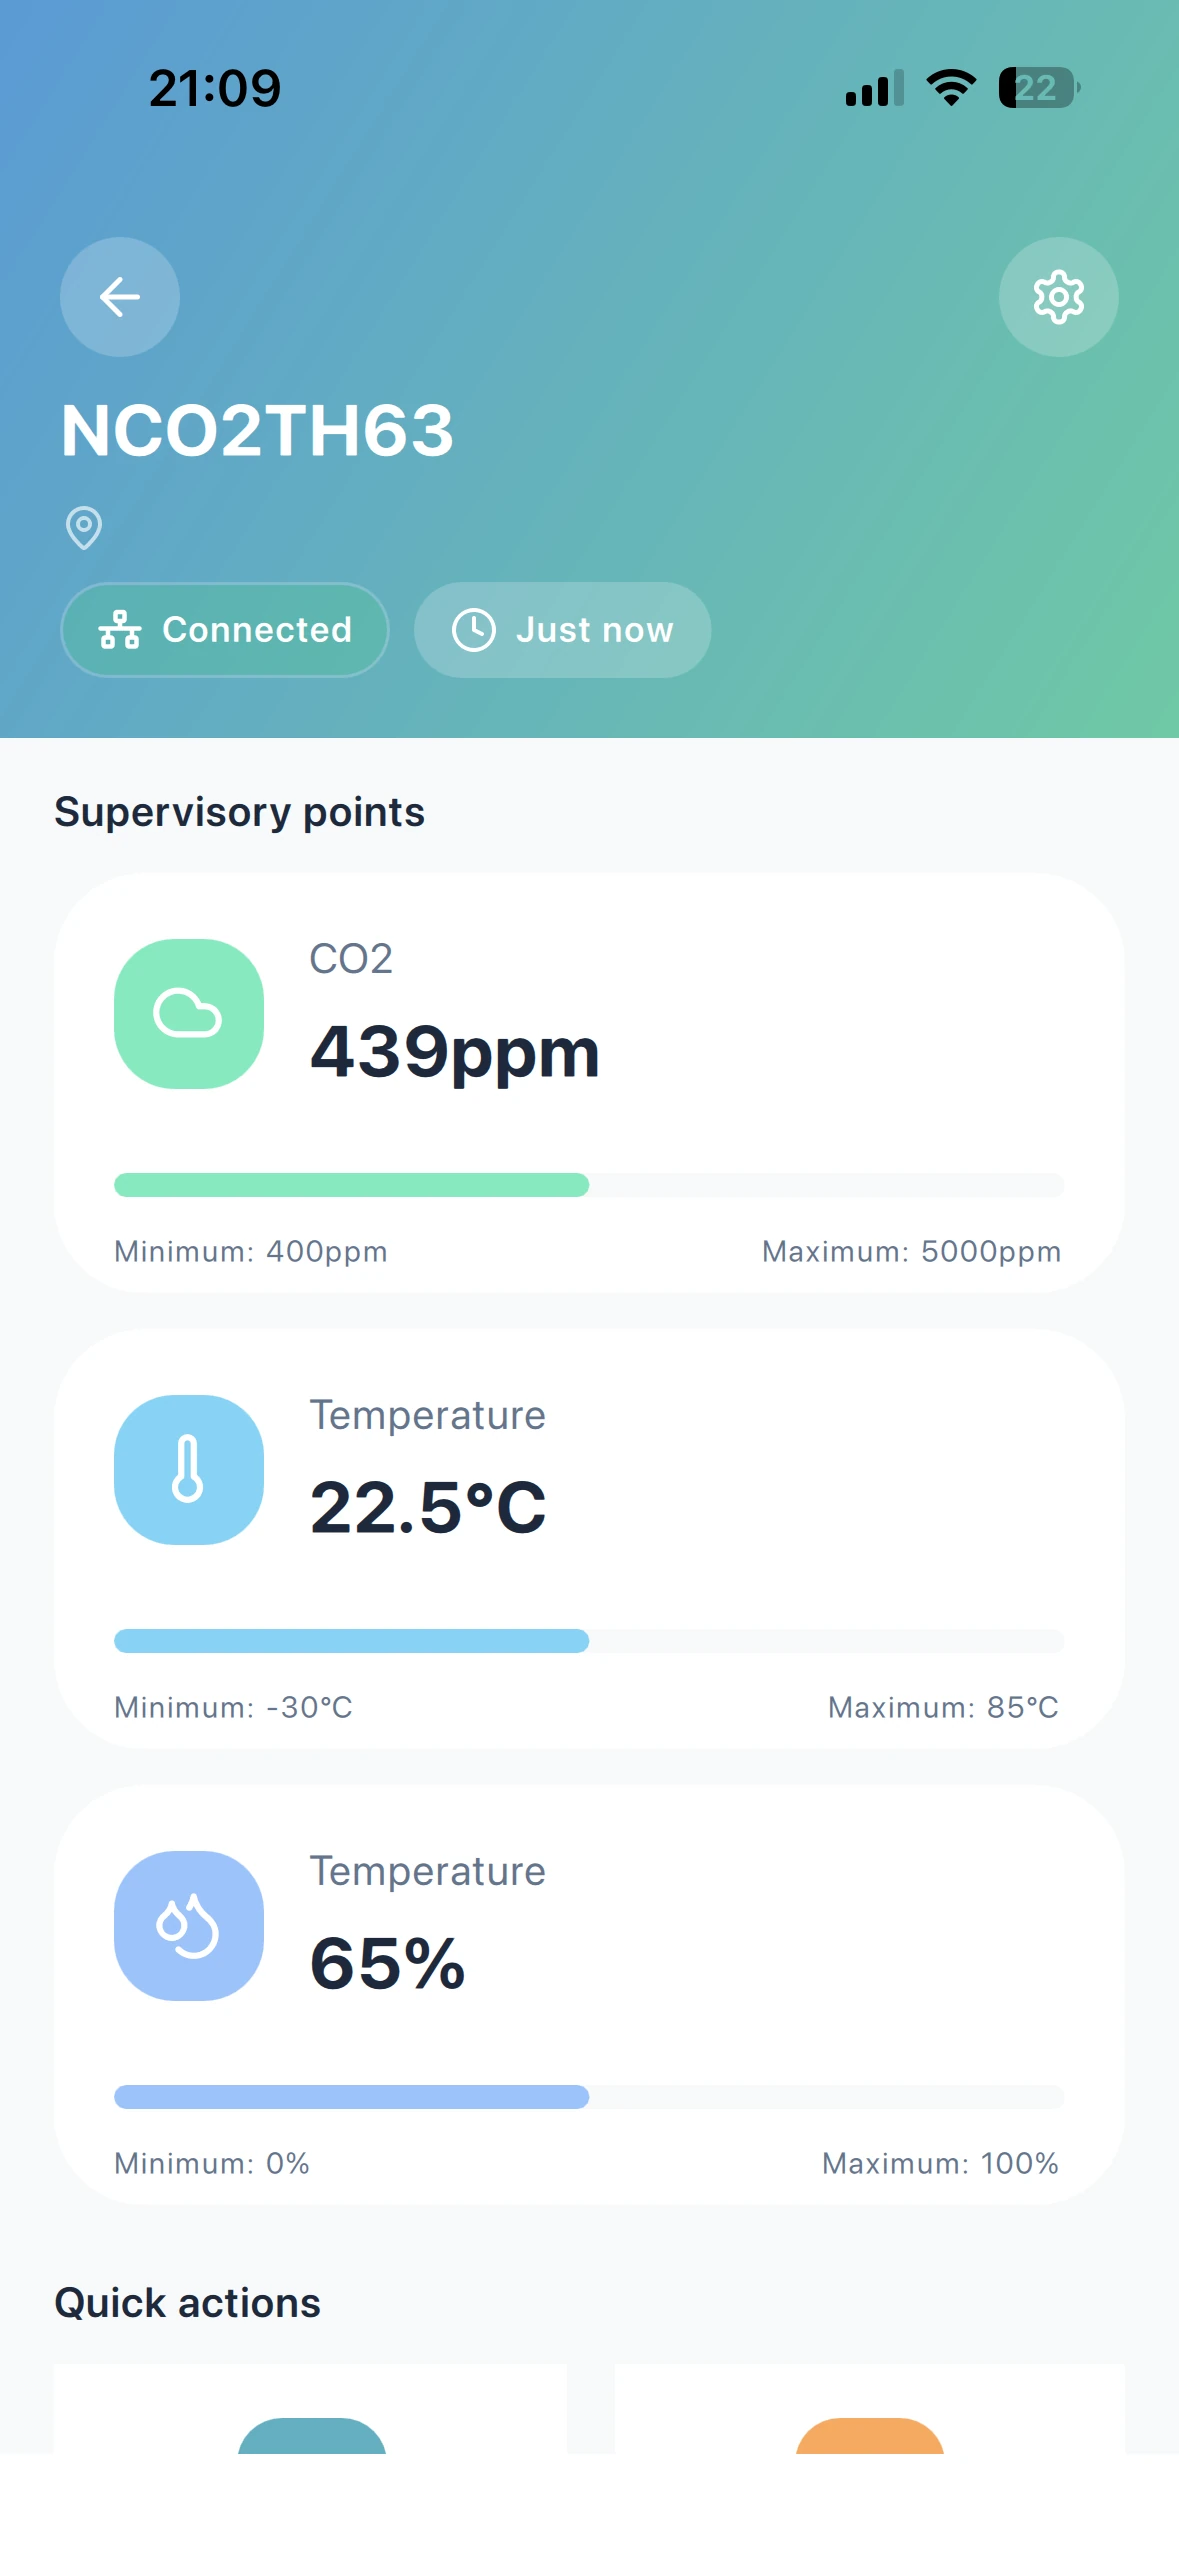
View Devices and Data
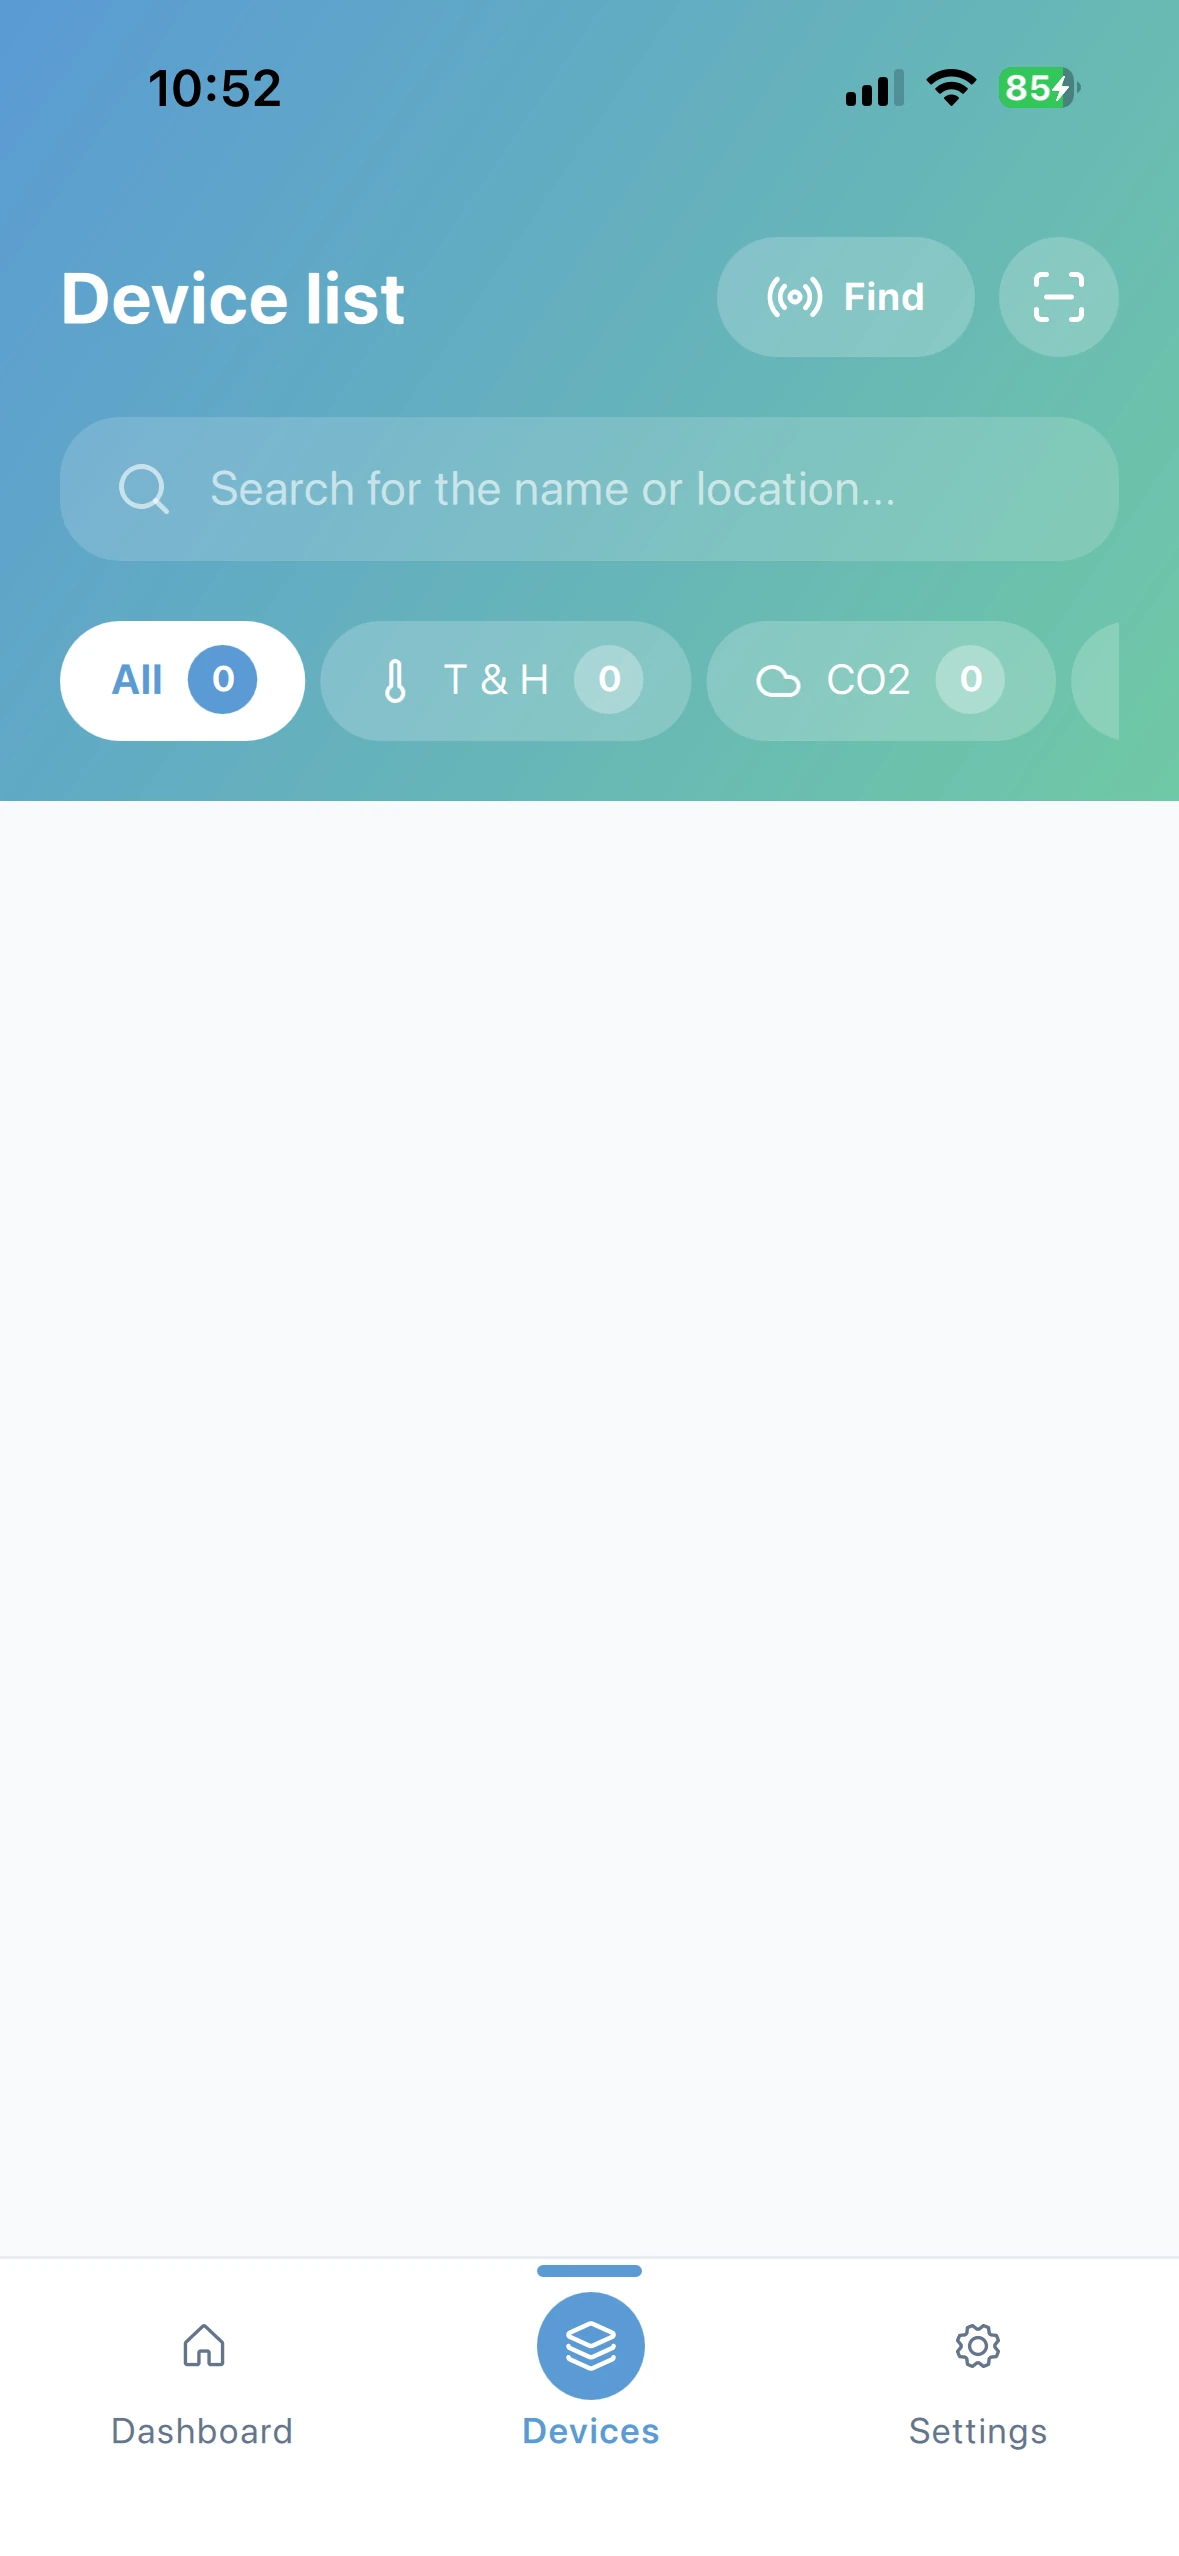
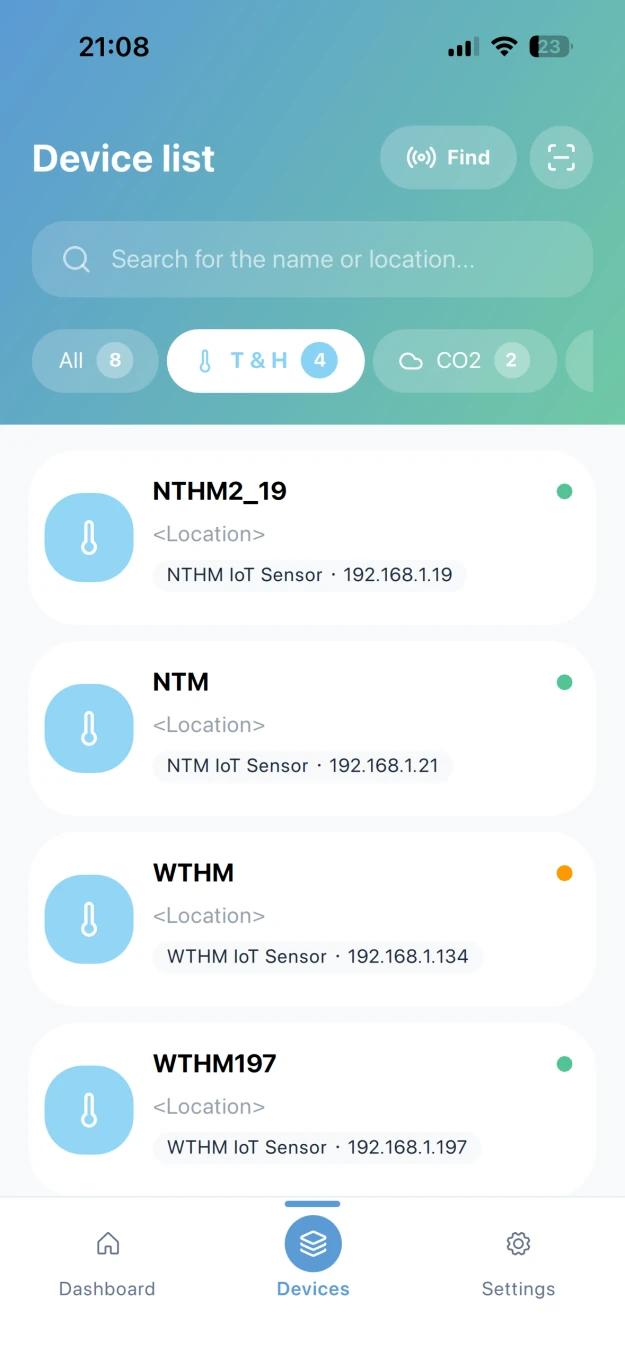
On the Dashboard page, you can add and display user-defined categories. On the device list page, devices are shown by product type, and you can search by device name or installation location to find a device.
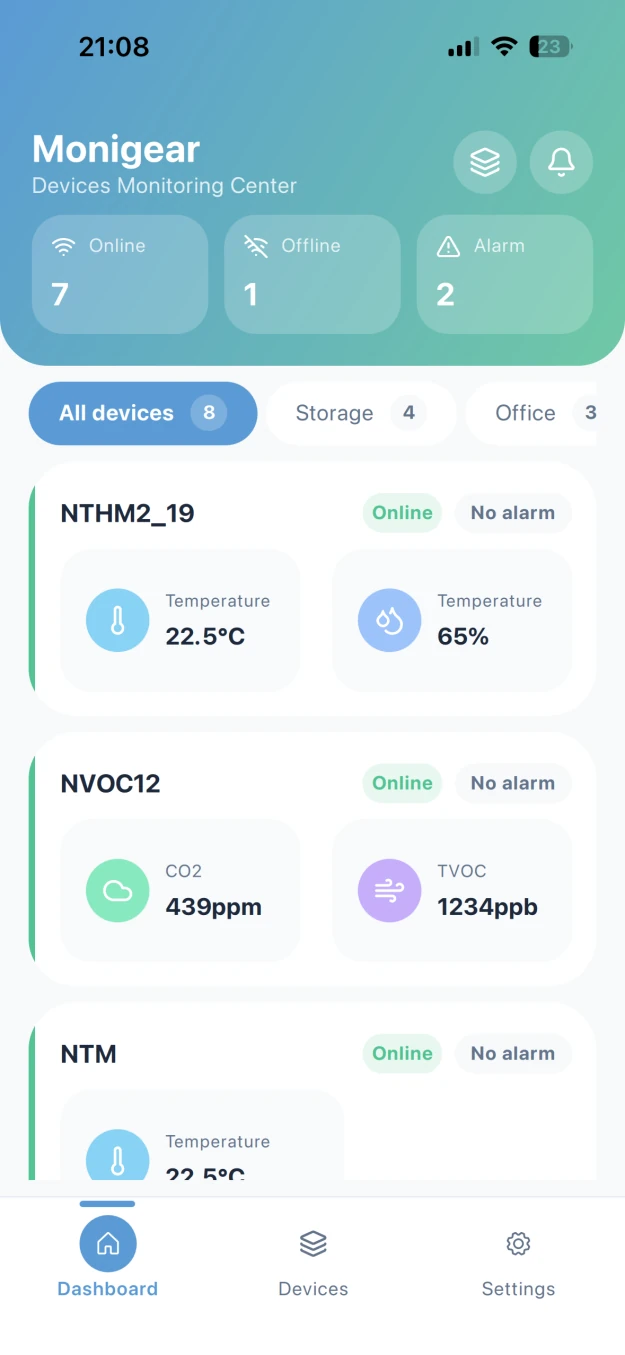
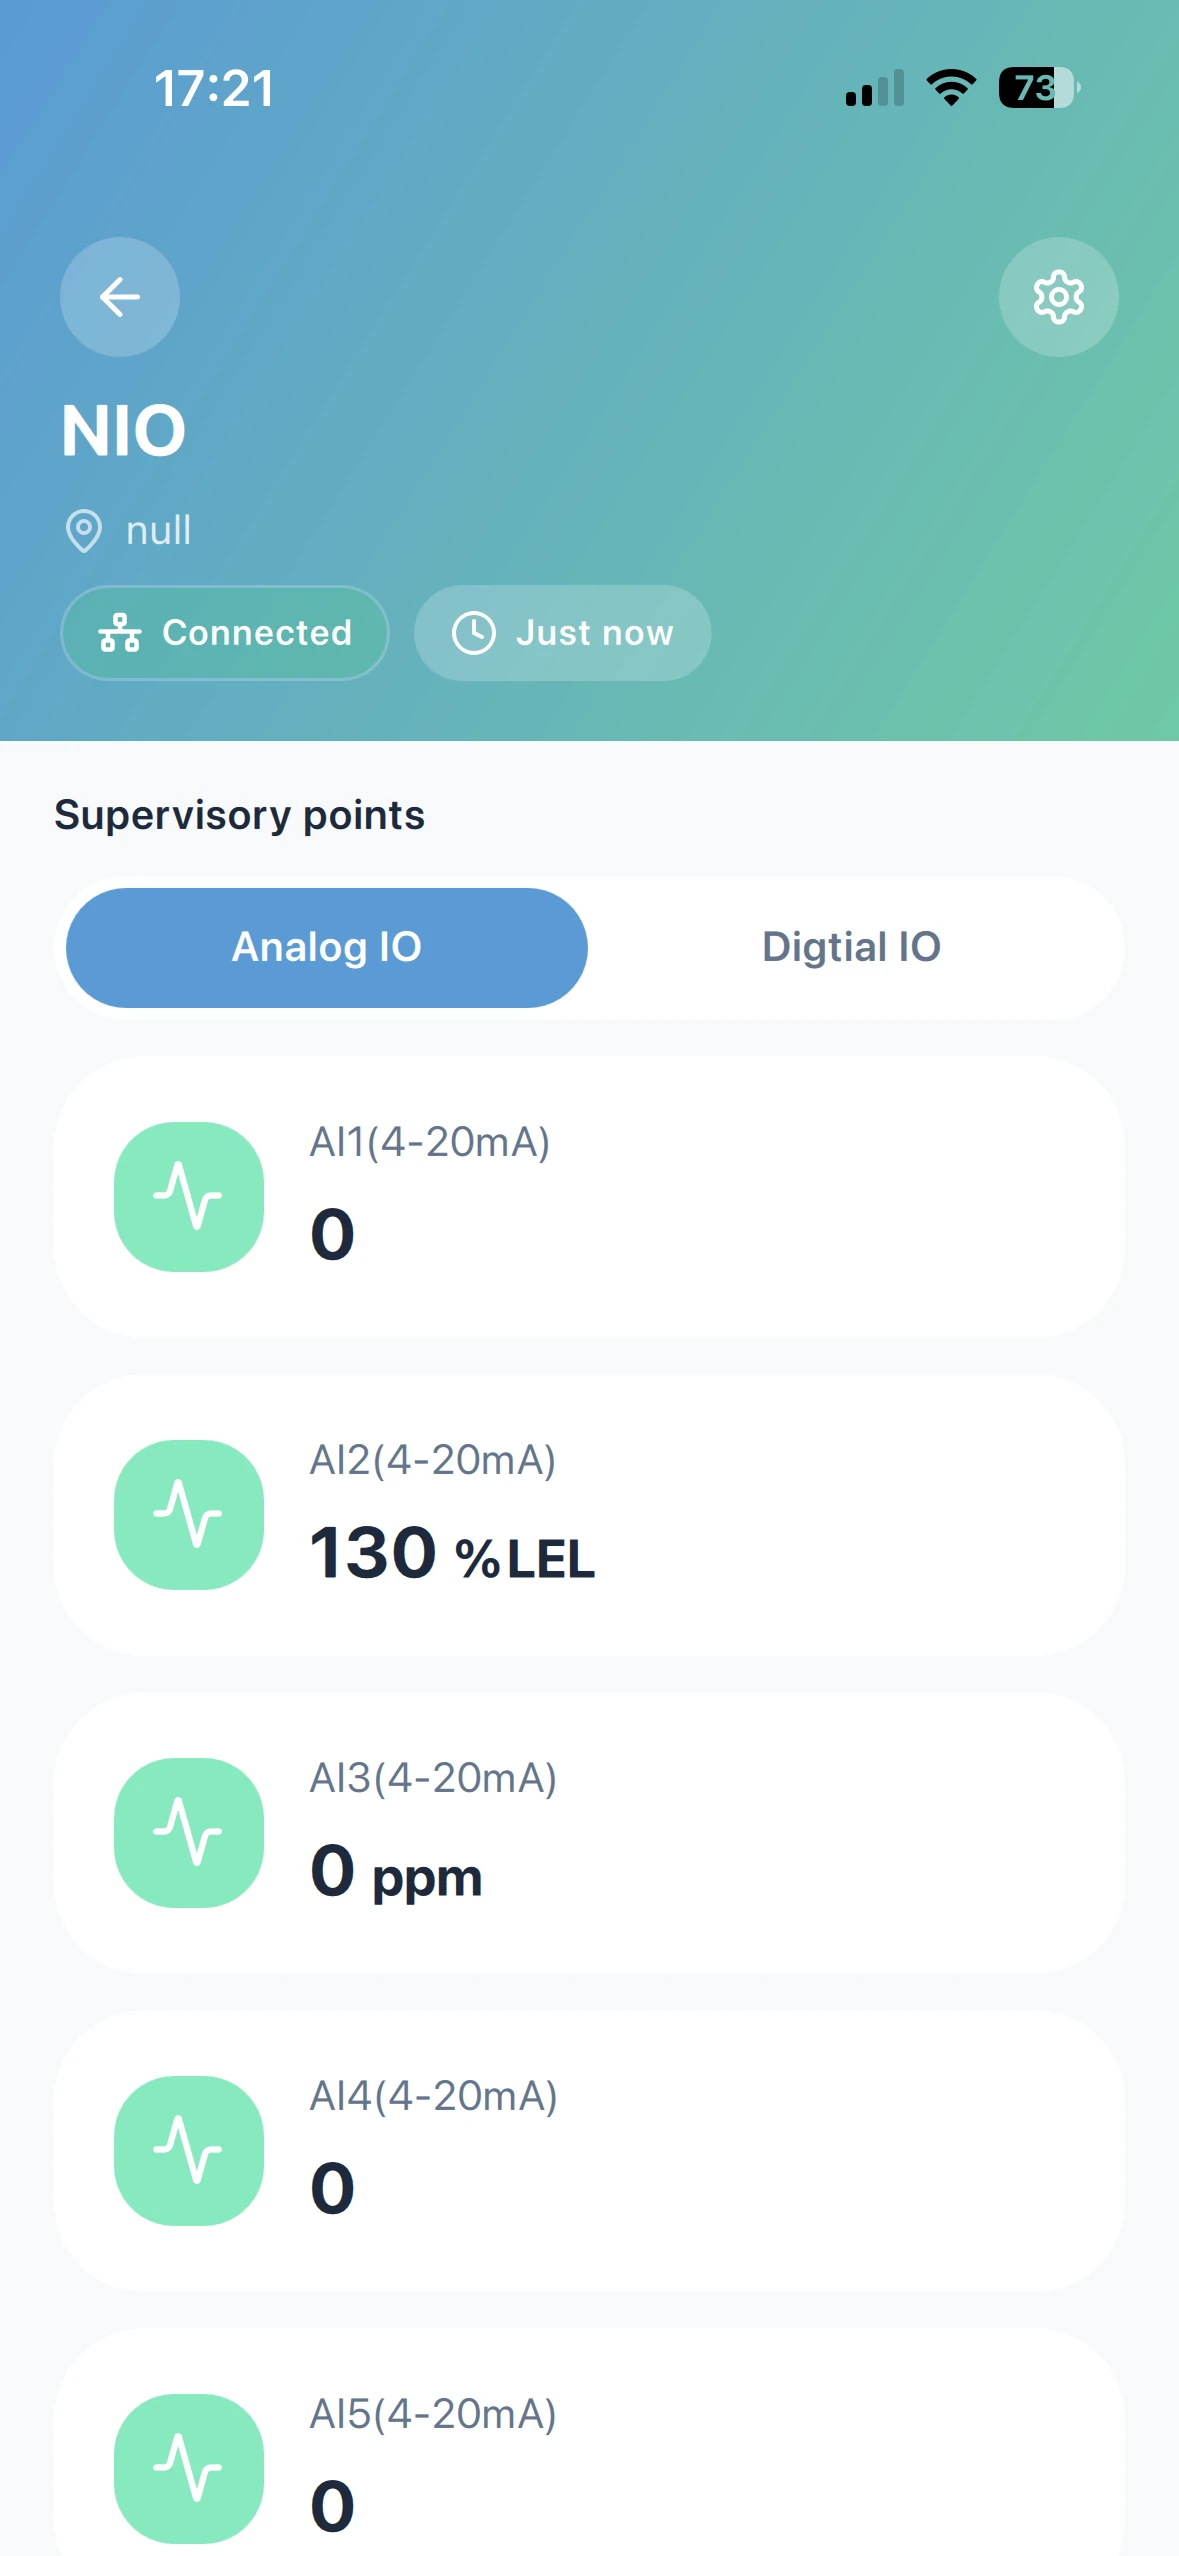
Click on the device card to go to the device detail page and see all the monitoring data. Then click on a monitoring data point card to go to the monitoring point detail page and check the analog data curves.

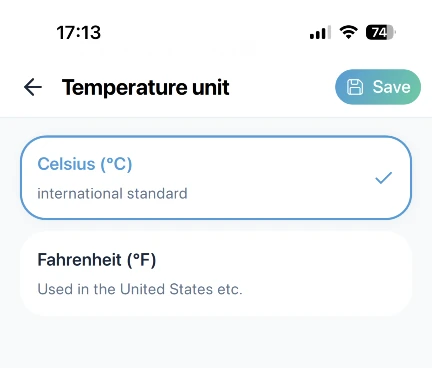
Temperature Units
To be compatible with older devices, when you switch the temperature unit, the app will automatically convert the temperature readings from standard devices (like N/WENS, N/WTHM, N/WOC2, N/WVOC, etc.). The values shown in the app might be different from those on the device screen. If you want to change the temperature unit on the device itself, please use the desktop network configuration tool.
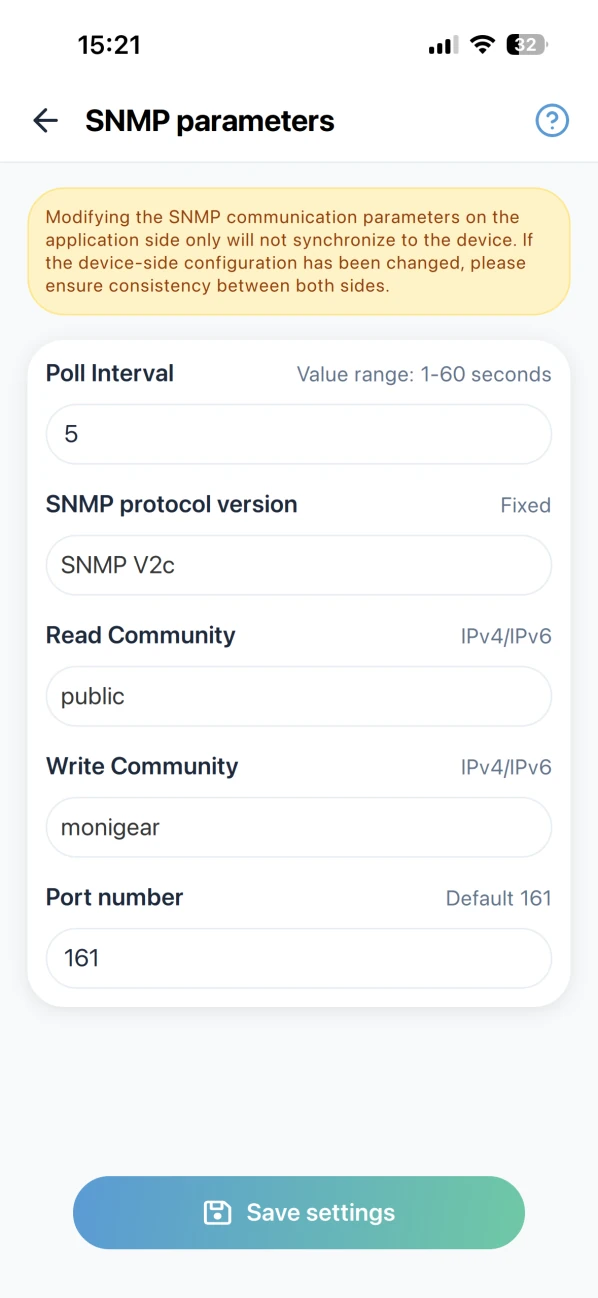
Local Communication Settings
If you're a professional user and have already modified the device's SNMP settings using the desktop network configuration tool, you might need to sync those changes in the app as well (the app doesn't store SNMP Read/Write Community for each device individually; we assume users use the same Community for all devices on the same network to make centralized management easier).
Remote Control
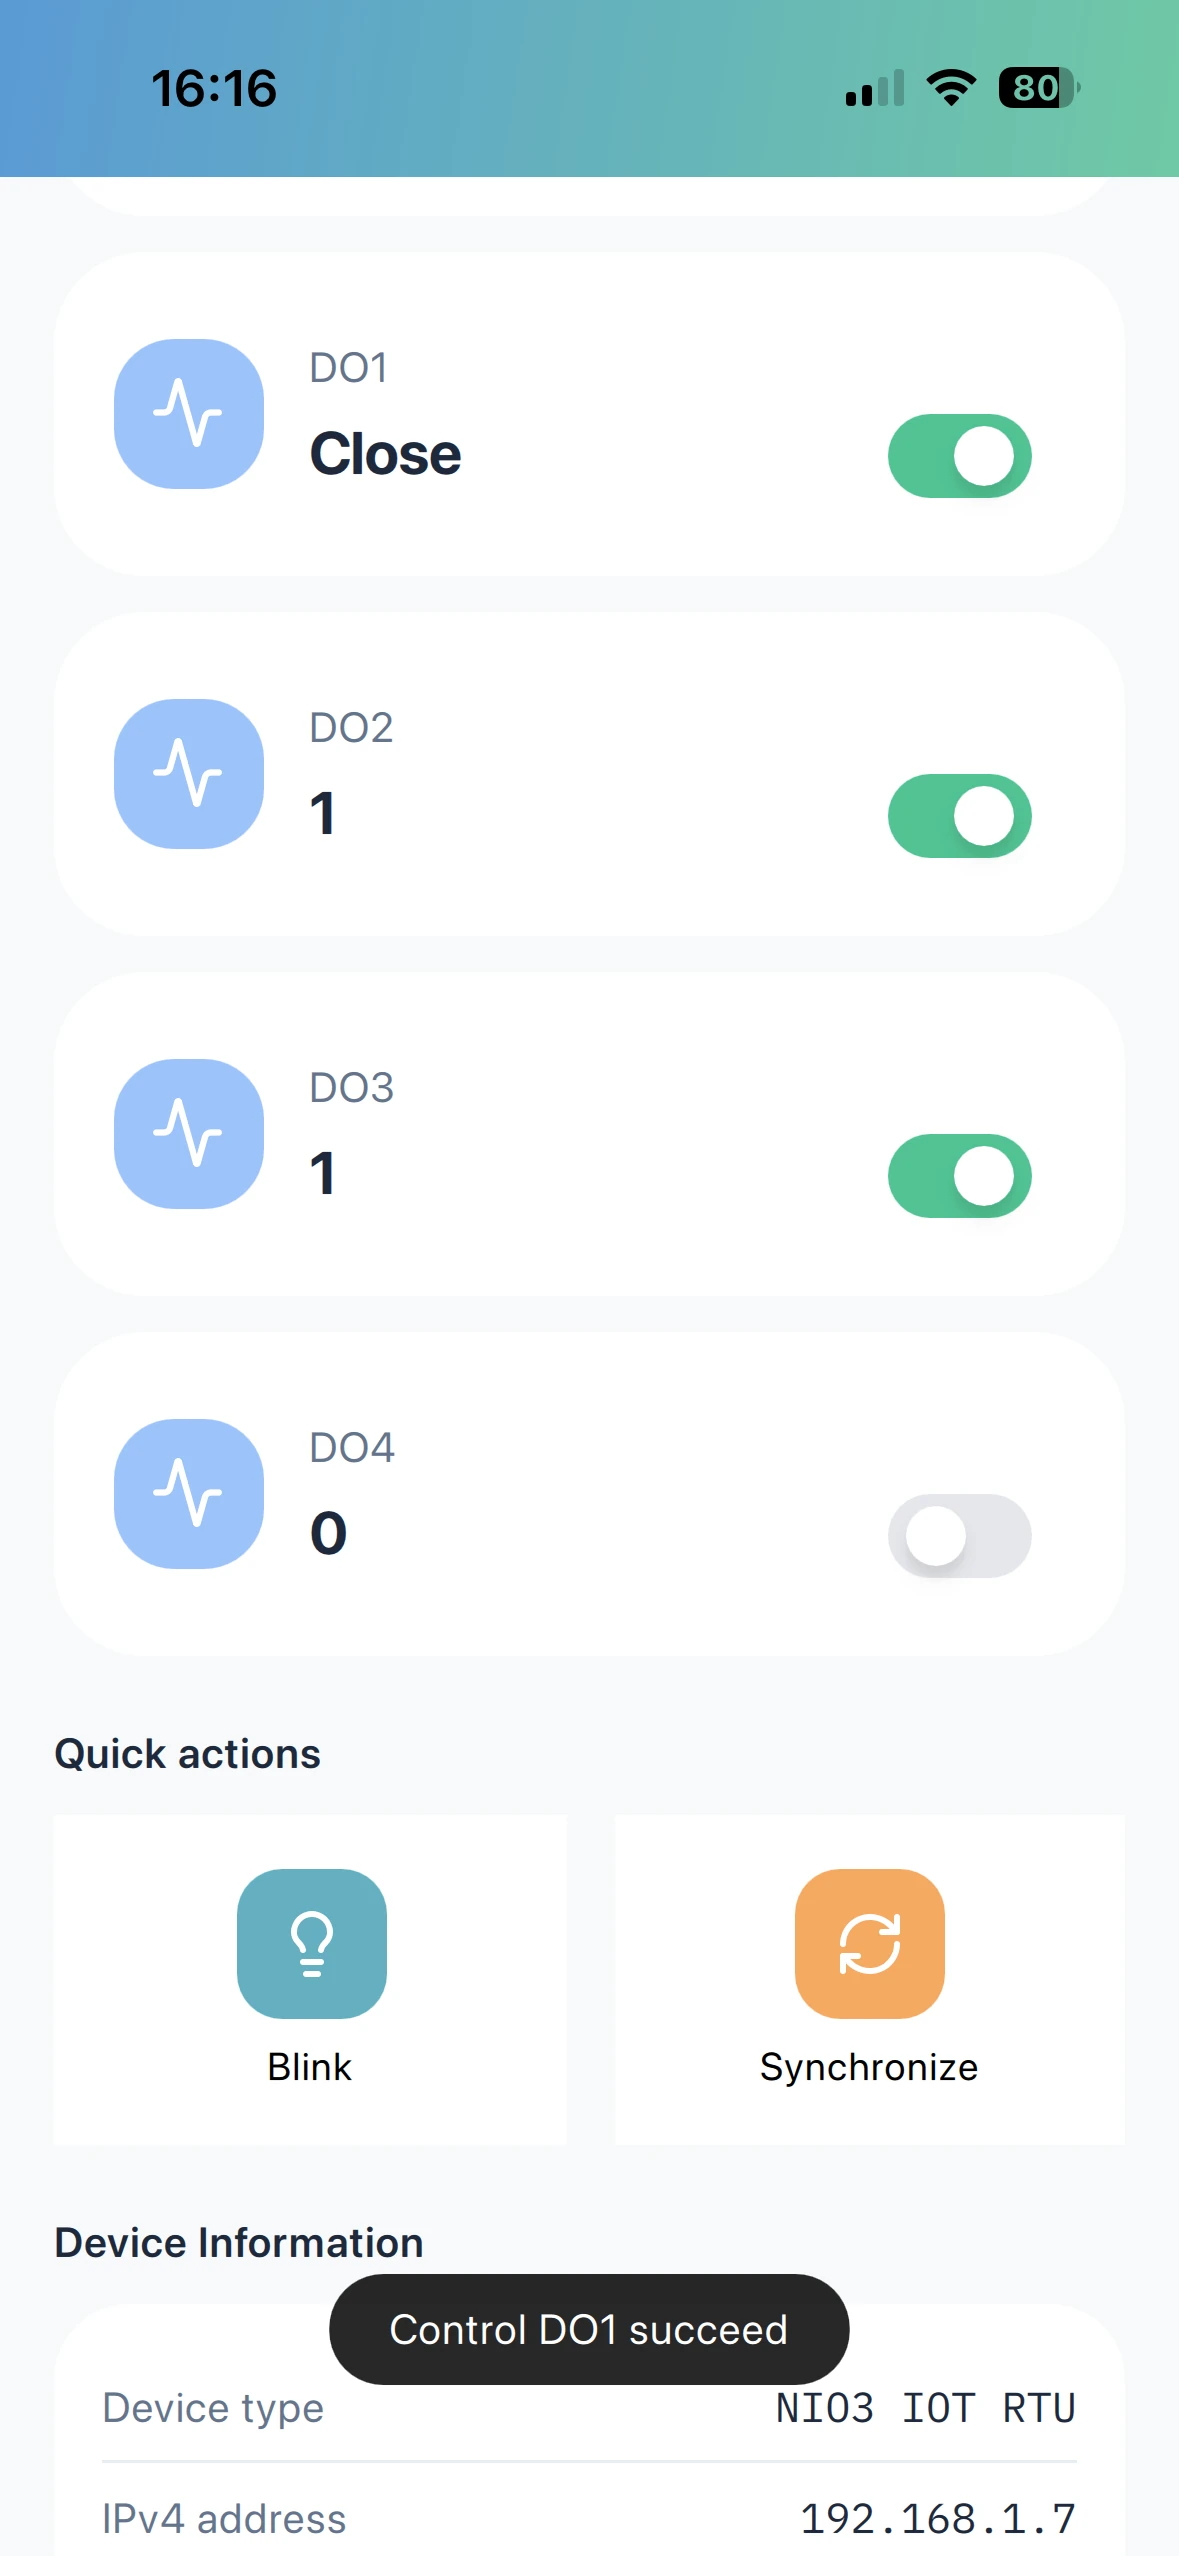
The app also supports discovering and adding MN-NIO devices (with 8 digital inputs, 4 digital outputs, 8 analog inputs (4-20mA)), allowing you to view the current status of each IO port and remotely control the 4 relay output ports.