Monigear IFTTT Setup Guide
1. Overview
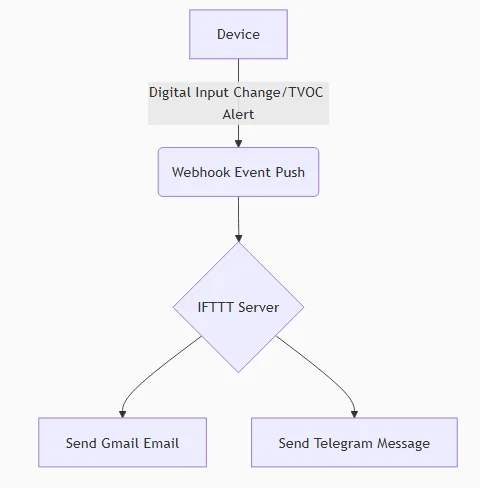
Monigear series network devices support internet automation through IFTTT (If This Then That), allowing sensor data (such as temperature and humidity, gas monitoring, digital IO, etc.) to be linked with other smart devices, cloud services or applications. Users can customize trigger conditions (Trigger) and execution actions (Action) through the IFTTT platform, and expand device functions without additional development.
Applicable scenarios:
Trigger notifications (email, SMS, App push) when temperature, humidity, and gas content exceed thresholds
Link with smart home devices (such as air conditioners, humidifiers, fans)
Data synchronization to the cloud (Google Sheets, Notion, etc.)
Preconditions
The device can connect to the Internet and complete the initial configuration.
The user has a valid IFTTT account and can use Webhooks.
Device settings
There are two places related to IFTTT in Monigear's device configuration tool. The first one is in the basic configuration, as shown in the figure below. There are mainly three items related to IFTTT, among which ca-bundle is shared with the Email function and is a collection of CA certificates used to access https websites, please refer to Email configuration howto. Whether to enable the IFTTT function, this is not enabled by default.
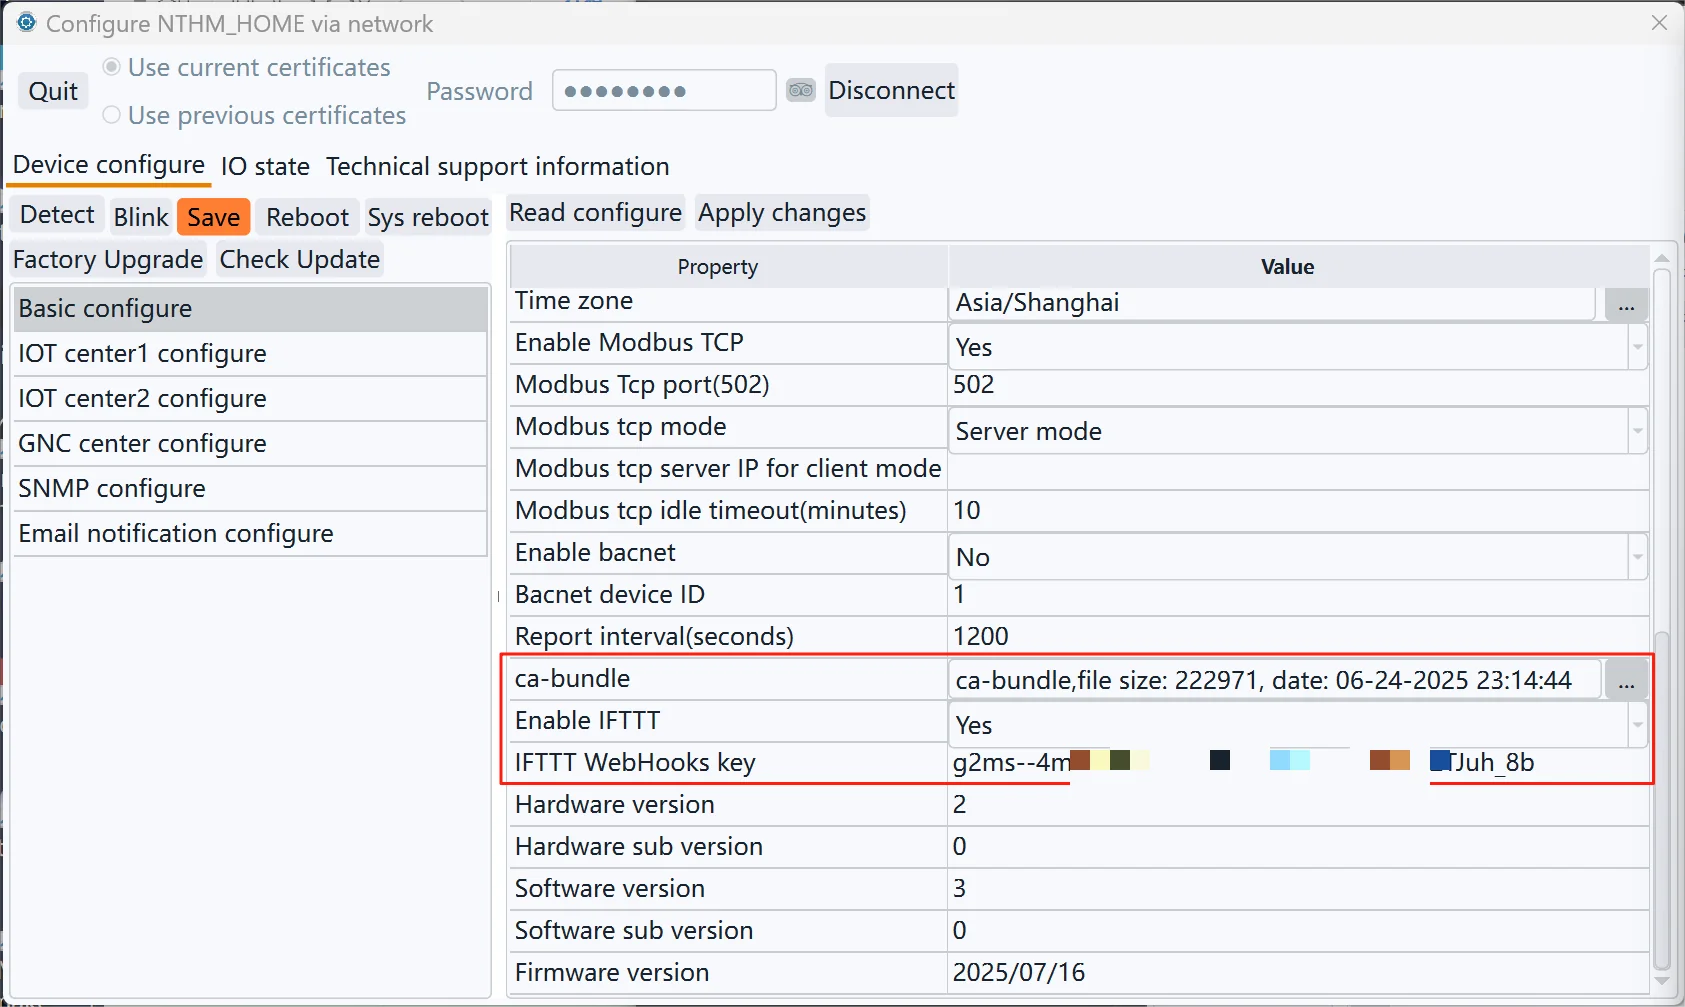
The most important one is the IFTTT WebHooks key, which can be obtained according to the following steps.
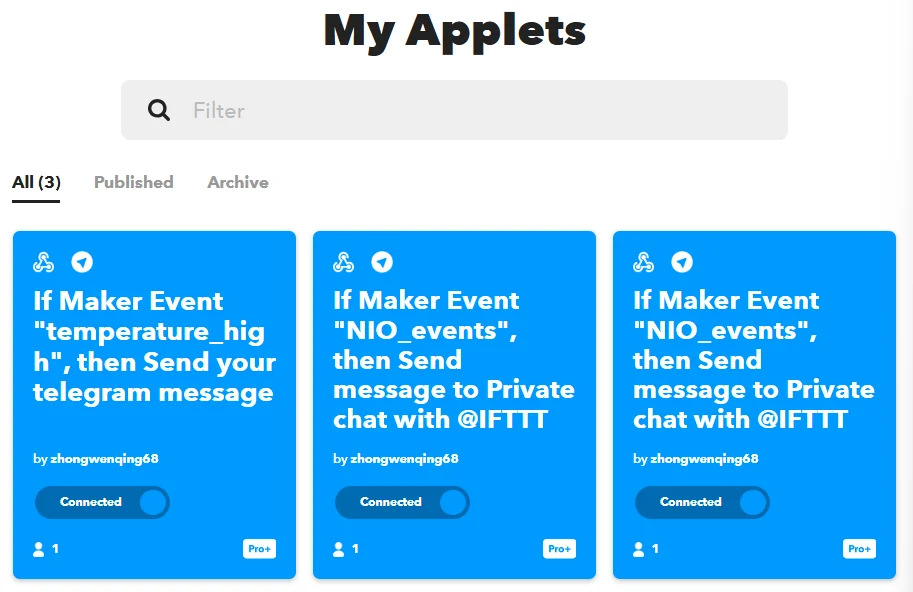
Open your IFTTT account and select the applet you want to associate with this device from the Applets you published, similar to the following figure
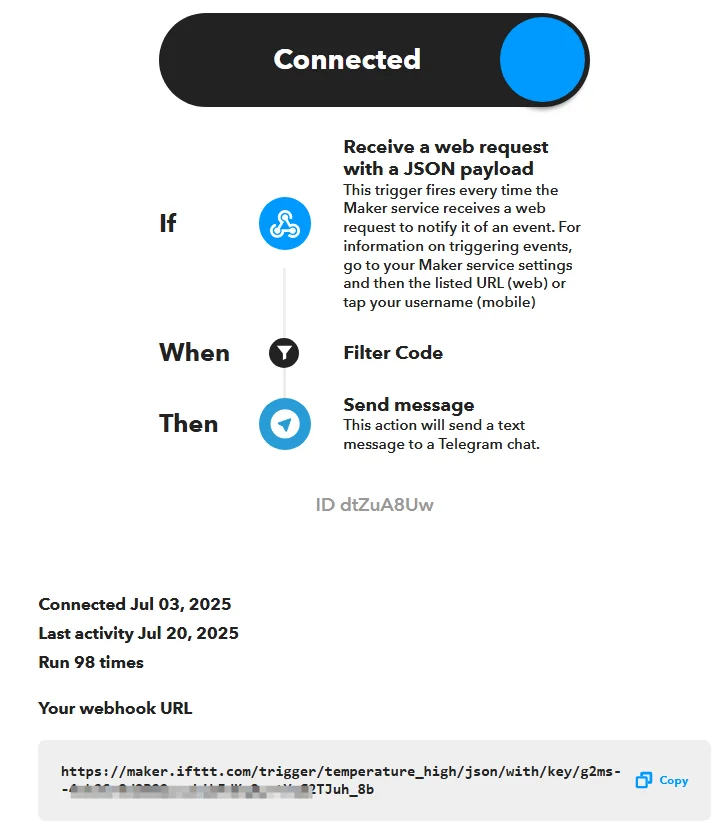
After opening, it will look like the following picture. The string after "key/" is mosaiced, which is the string that should be filled in the configuration tool. This is your own key, which needs to be kept safe from others.
Another place is related settings for supervisory points (such as temperature)
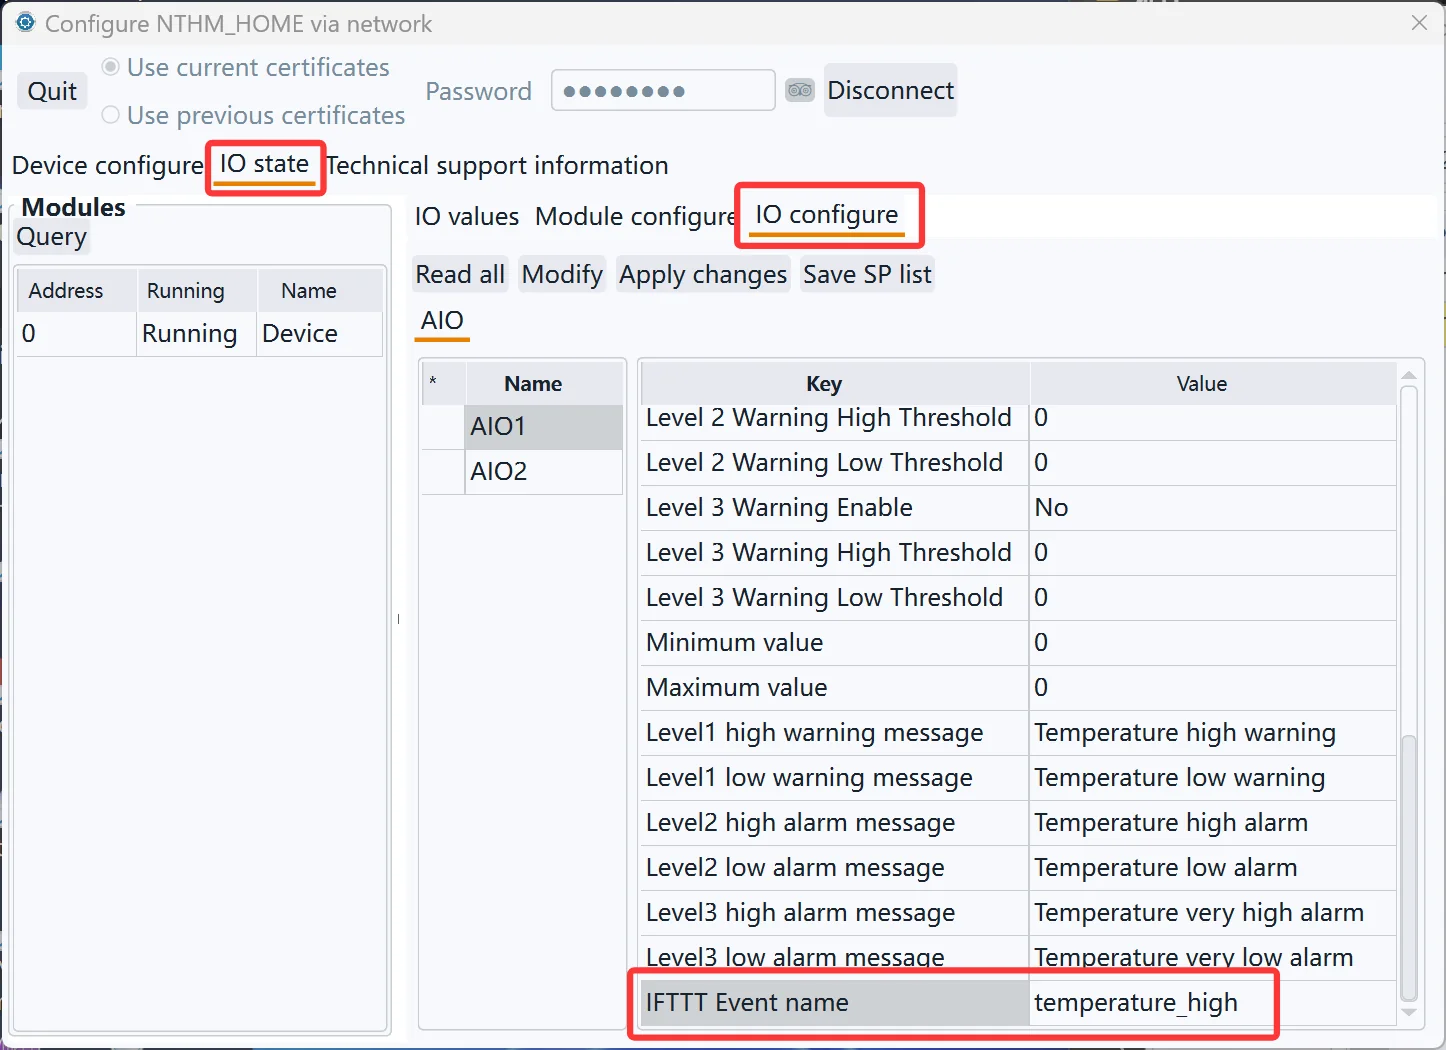
Because the generation of events is related to the setting of a single supervisory point(SP), please also refer to the relevant content in the Email notification document. The way to generate events is exactly the same as the Email notification function, so the event name setting of IFTTT falls on the single SP setting here.
The item “IFTTT event name” here should be the event name of the applet in IFTTT. Because the JSON data sent by our device contains more content (including device name, monitoring point name and other information), if there are many supervisory points that need to configure IFTTT events, you can actually share one event name, and then use simple programming on the IFTTT server to distinguish which device sent the event.
Settings in IFTTT server
IFTTT(If This Then That) is an automation platform that connects different applications, devices and services to automate tasks based on simple "trigger-action" rules. It has a wide range of applications, such as integrating and publishing telegram and twitter messages, and combining with various smart home platforms such as Google Assistant, Amazon Alexa, Philips Hue, etc. Here we briefly introduce how to send messages using Gmail and Telegram.
Example 1: Send notification via Gmail after receiving an event
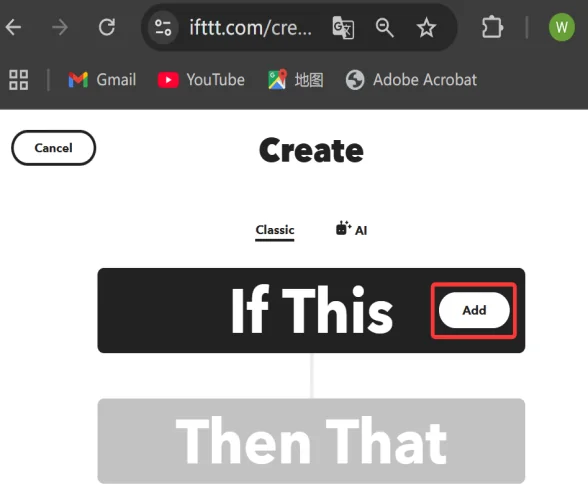
Create a newapplet
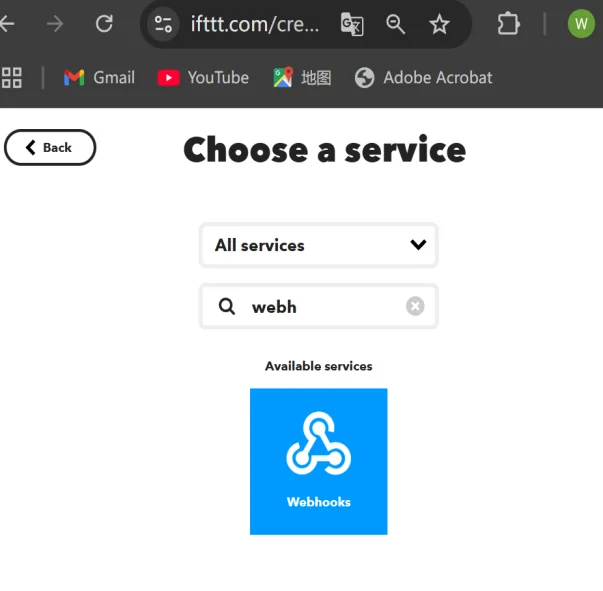
webhooksAs shown below, click Add in "If This" and search for webhooks when selecting a service.
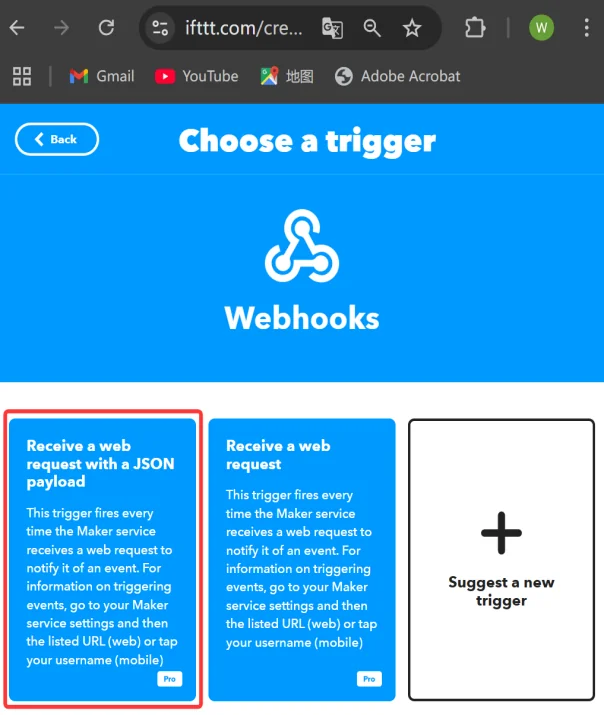
When selecting the trigger type, select "Receive a web request with a JSON payload"
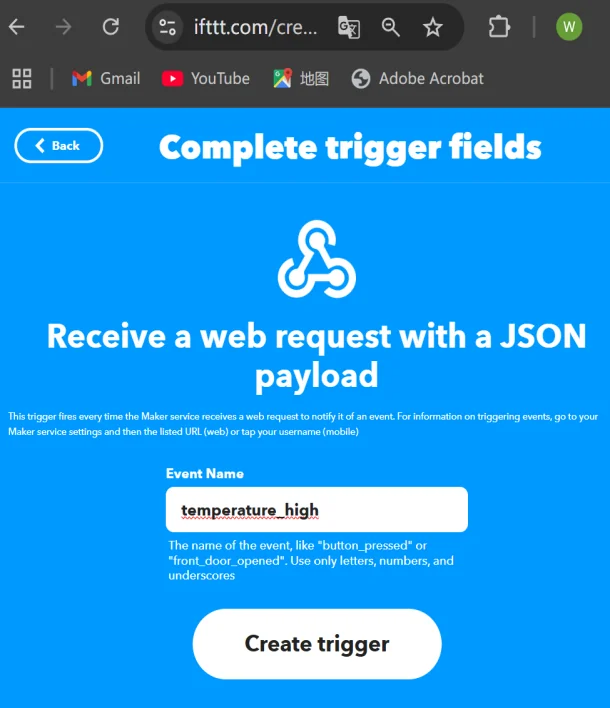
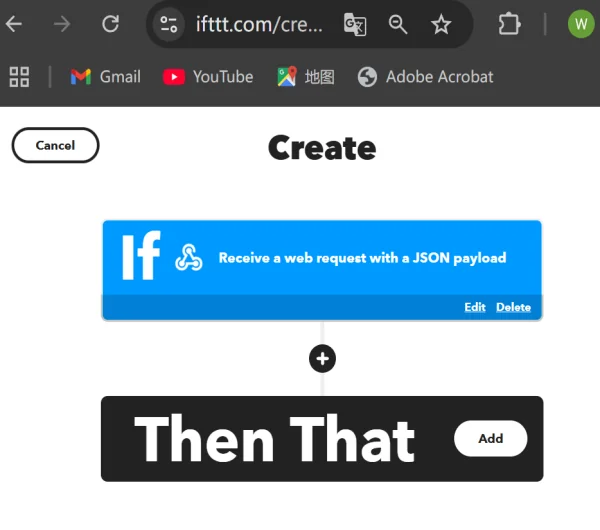
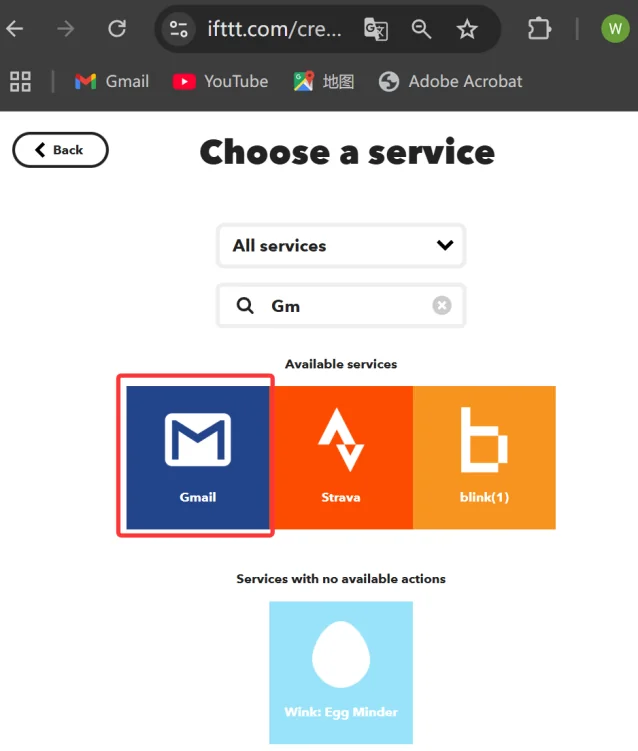
Enter the event name (this is the event name to be filled in the SP point), and then complete the “IF” related settings. Then “That” part searches for Gmail
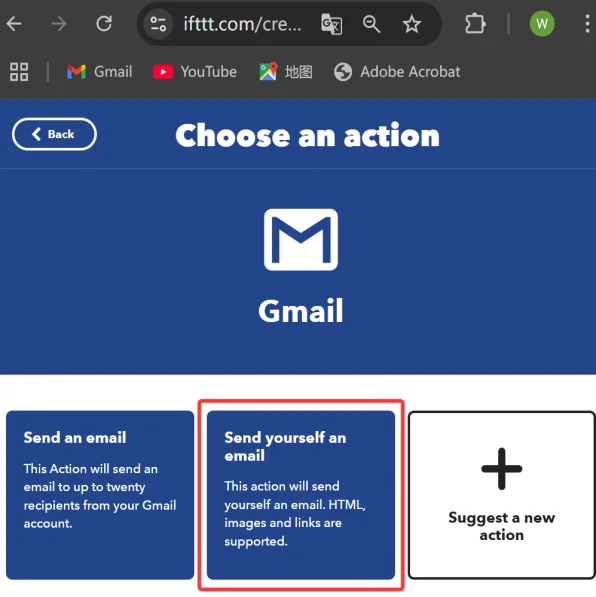
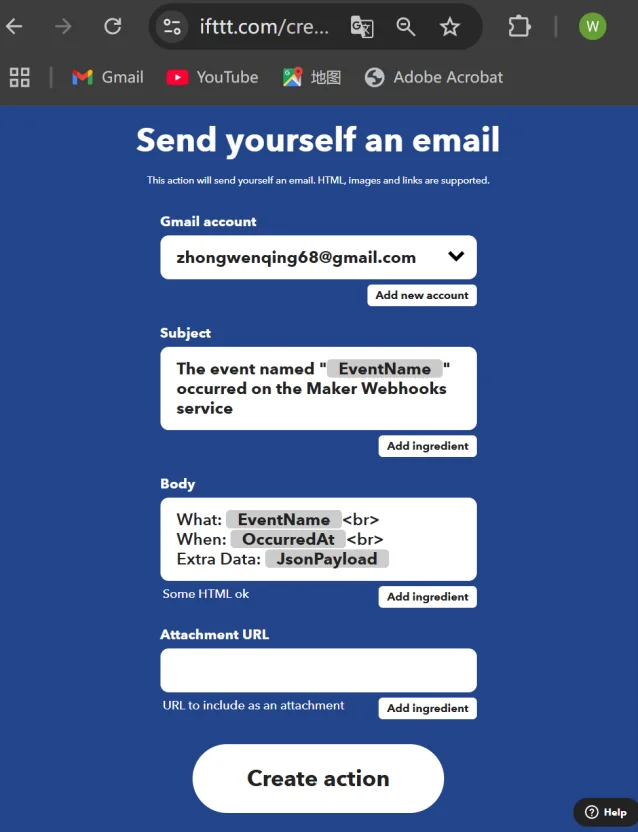
I choose "Send yourself an email" here, or you can choose "Send an email" on the left. After selecting "Create action" in the next step, the basic applet is actually completed. However, such an email seems to contain a lot of data. Therefore, it can be further optimized by adding a filter code.
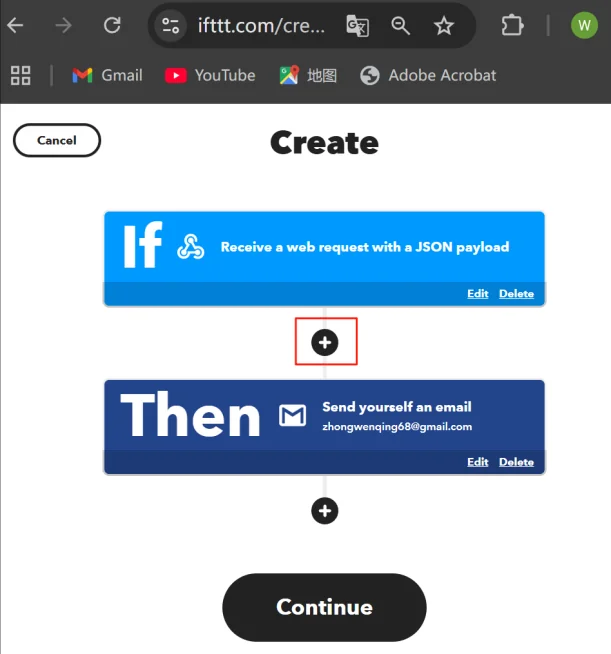
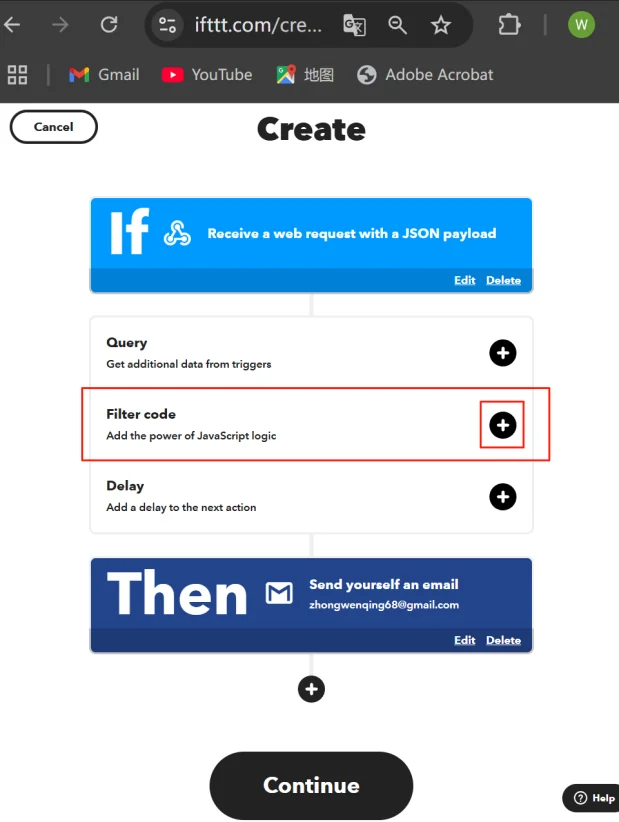
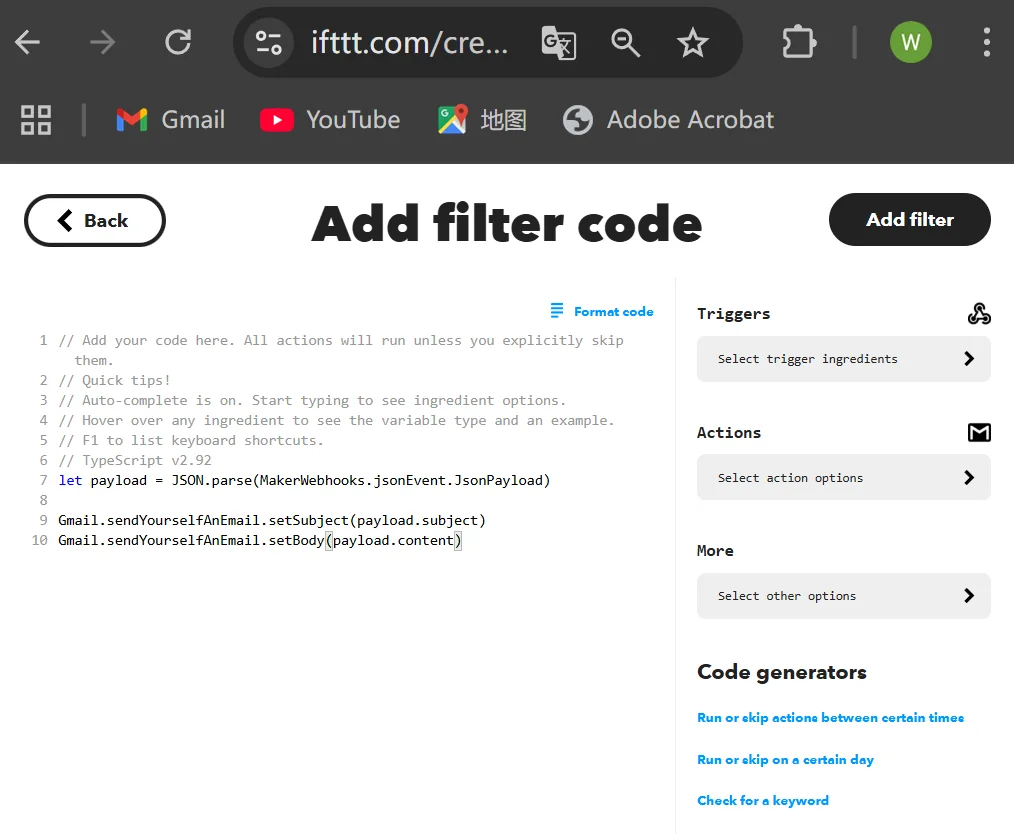
After clicking the plus sign to add the Filter code, you can edit and add the following code. For specific programming, please refer to the IFTTT documentation
| let payload = JSON.parse(MakerWebhooks.jsonEvent.JsonPayload)Gmail.sendYourselfAnEmail.setSubject(payload.subject)Gmail.sendYourselfAnEmail.setBody(payload.content) |
|---|
The JSON data our device sends to the IFTTT server via webhooks contains the following parts:
| subject | The title of the event, including the device name and the change in the alarm level |
|---|---|
| content | Detailed information, including supervisory point current value and pre-set alarm information content |
| other | It is a nested JSON data, including the following content, which may be increased as needed in the futuredev-device nameSP-Supervisory point name, For example:NTHM,A0_1 is temperature,A0_2 is humidity, sort according to the SP type, module address and indextime-timestamp, Int64, seconds since 1970/1/1value-supervisory point current value, analogue SP is double, Digital IO is 0/1newAlarm,oldAlarm: The alarm levels corresponding to the changes in the alarm events |
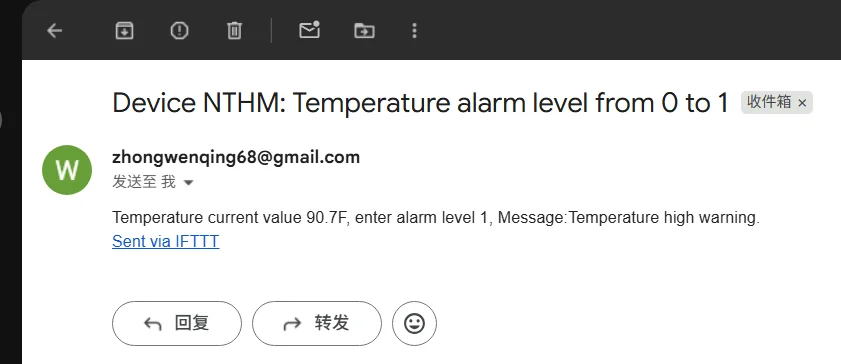
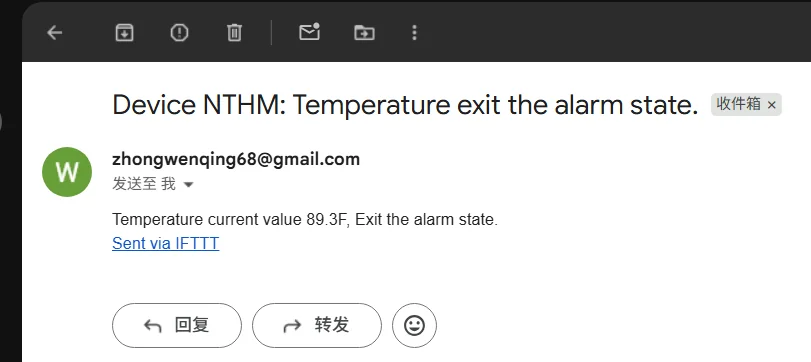
The following picture is an example of using blowing to trigger the NTHM temperature alarm to send information after everything is set up.
Example 2: Send a message to Telegram
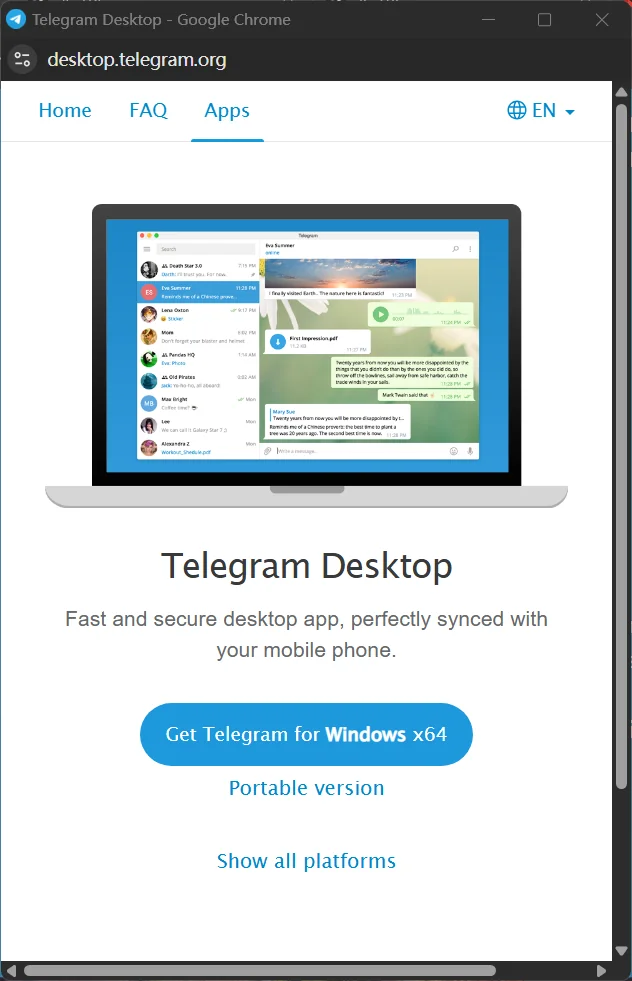
The process of creating an Applet on IFTTT is exactly the same as in Example 1. The only difference is that when creating an action, need choose the service provided by Telegram. I operated on a PC, so the following steps to install Telegram desktop will appear. The following steps must first install Telegram destktop and then enable Telegram's IFTTT chat bot.
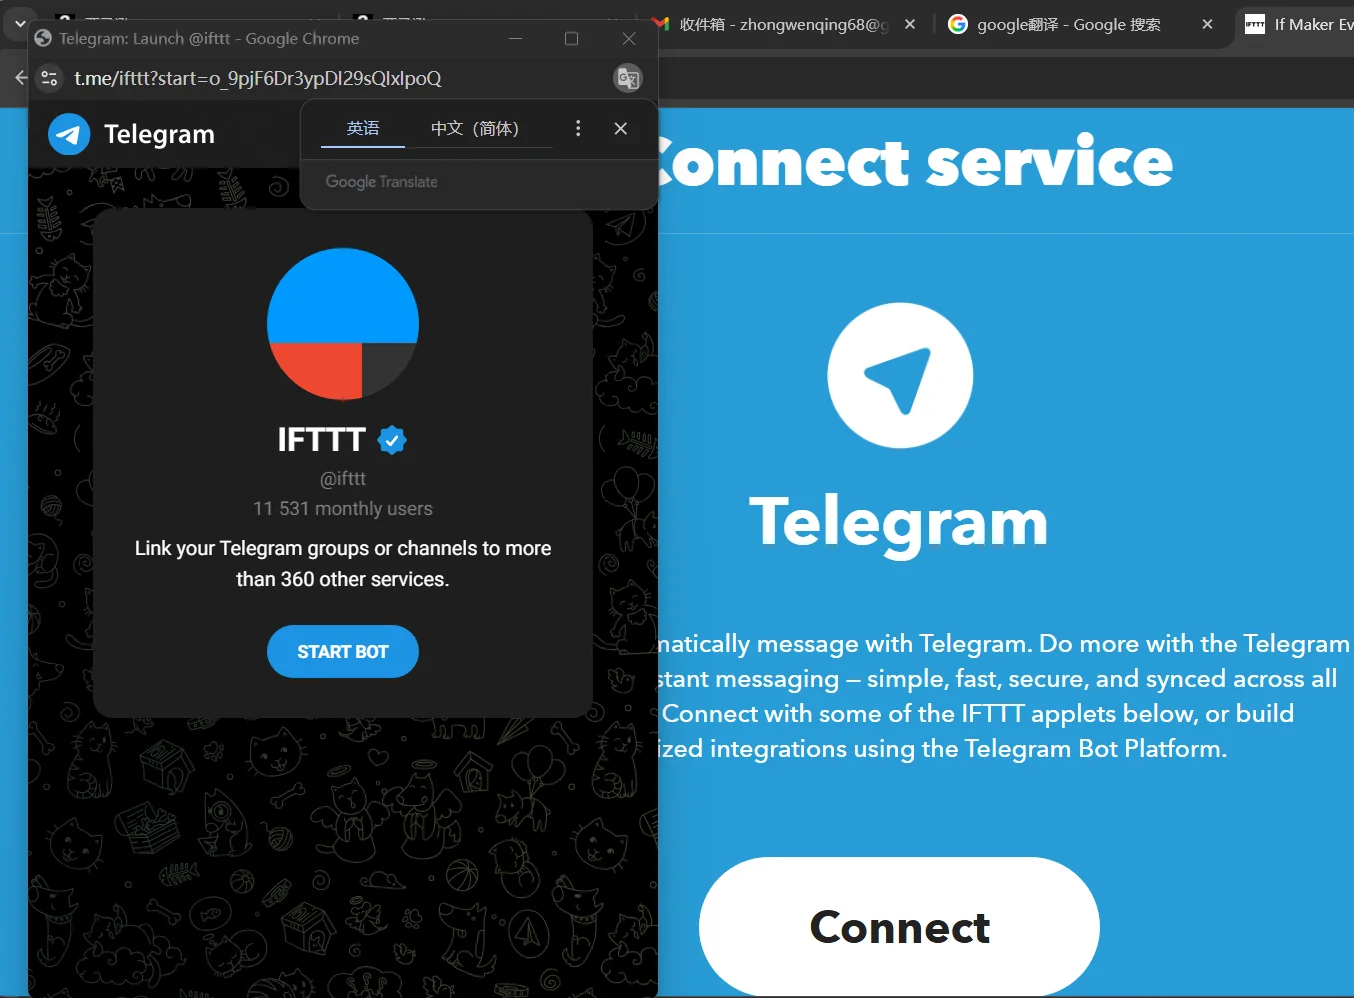

You need to click "Authorize IFTTT" before you can receive the information.
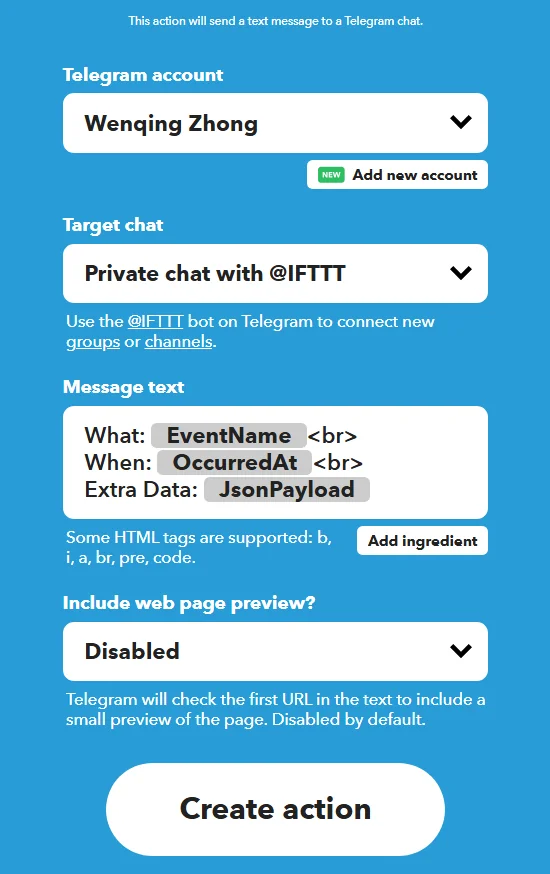
The above picture is similar to Example 1. After creating it, you can also add a filter code between This and That.
Add the following code
| let payload = JSON.parse(MakerWebhooks.jsonEvent.JsonPayload)Telegram.sendMessage.setText(payload.content) |
|---|
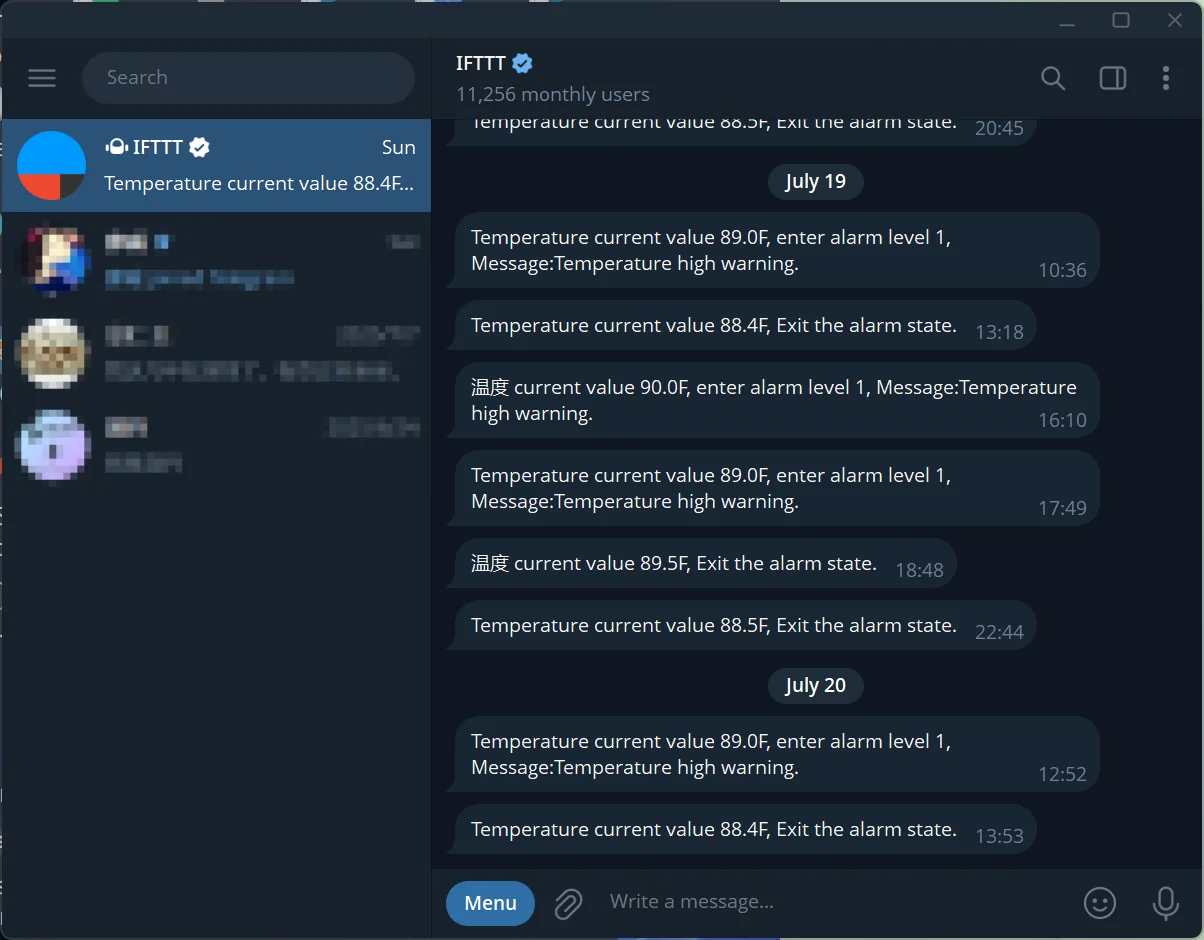
This is an example of a message being received