Monigear Home Assistant Integration Guide
Section 1 How to integrate Monigear series network sensors into Home Assistant
Home Assistant is an open-source smart home automation platform focused on localized control and privacy. It integrates with thousands of smart devices and services, allowing users to manage and automate a wide range of IoT devices, such as lights, sensors, cameras, and thermostats, through a unified interface.
Home Assistant's core advantages include:
Local operation: Reduce dependence on cloud services and improve response speed and privacy.
Cross-platform support: Compatible with multiple protocols and devices such as Zigbee, Z-Wave, MQTT, and Wi-Fi.
Powerful automation: Supports automation rules based on time, device status or external events.
Extensibility: Flexibly extend functionality through add-ons and custom integrations.
Our Monigear series of network sensors can be easily integrated into Home Assistant via MQTT, allowing users to:
Monitor sensor data (such as temperature, humidity, and air quality) in real time on a unified dashboard.
Create automation rules (such as triggering alarms or linking other devices when sensors detect anomalies).
Work seamlessly with the existing smart home ecosystem to enhance the overall intelligent experience.
Our devices are compatible with Home Assistant after August 2025. If you don't see this option during configuration, please contact our technical support to enable this feature by upgrading firmware of your device. If you don't want to upgrade, you can still integrate with Home Assistant using the method described in Section 2.
Install MQTT-related addons on Home Assistant
If you have already installed it, you can skip this step. You can install Mosquitto or EMQX. Here we take Mosquitto as an example
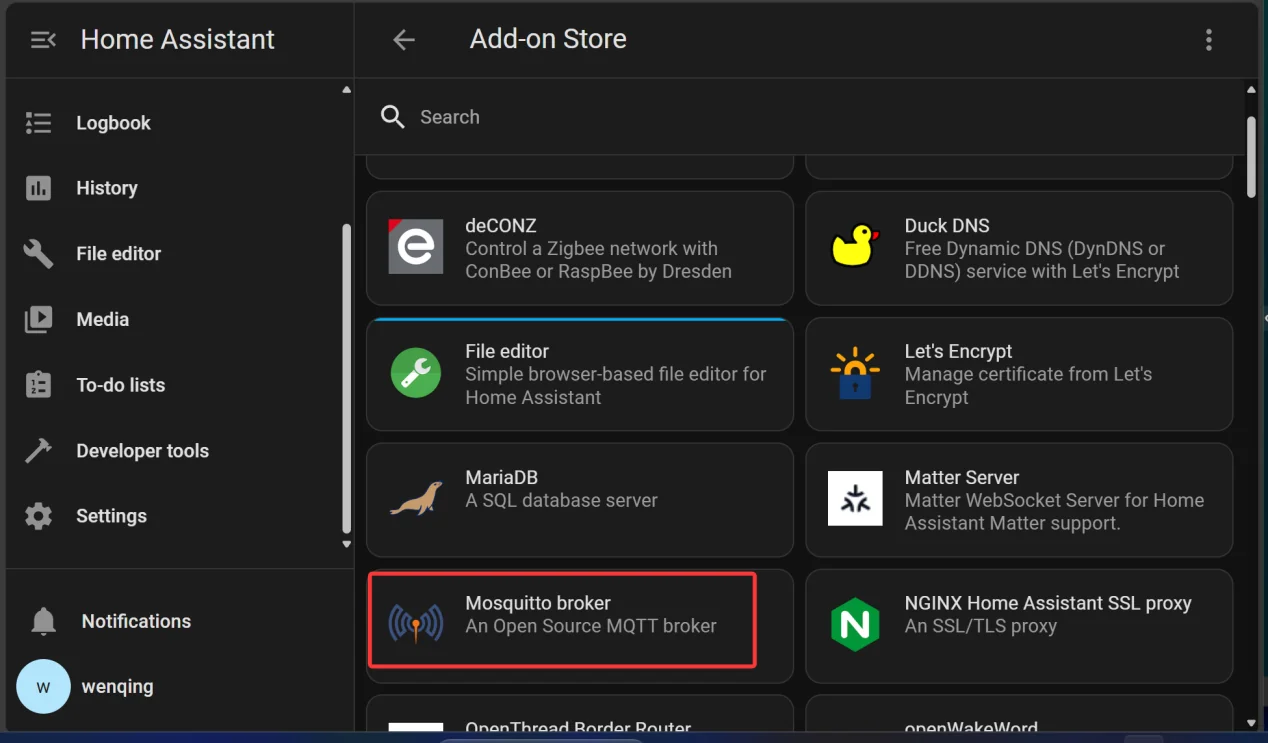
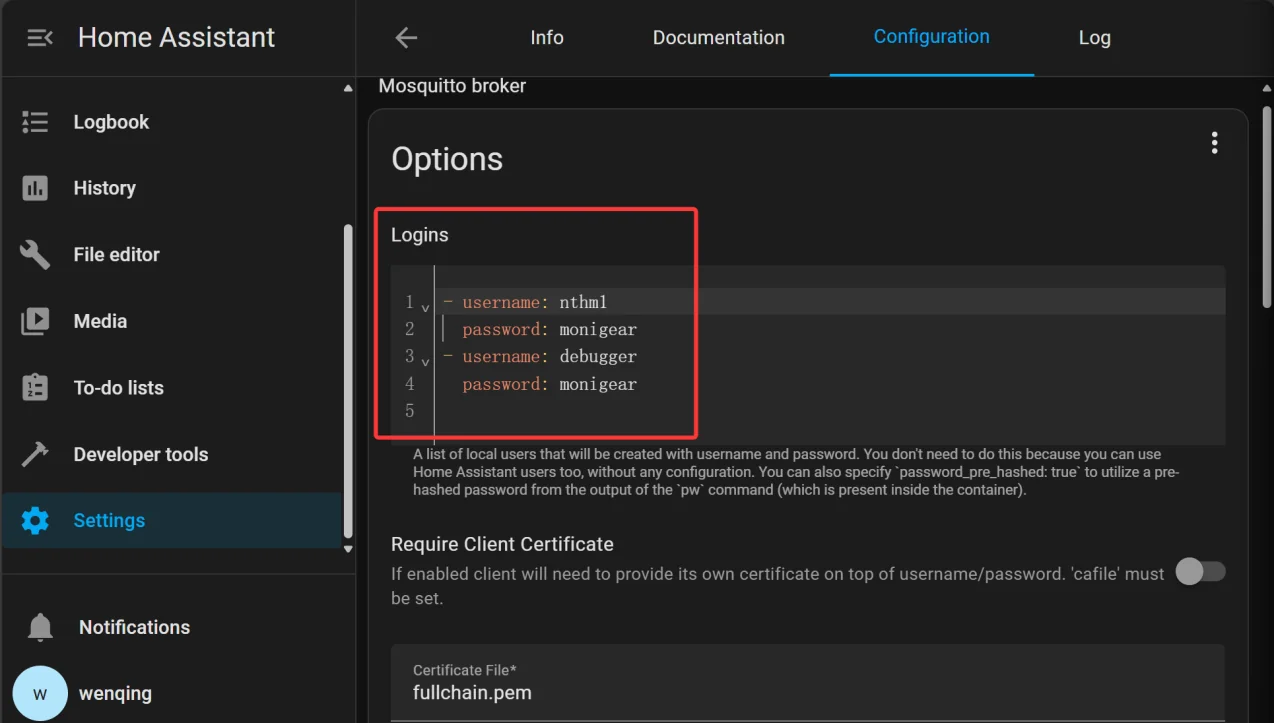
As shown above, go to the Add-on Store in Home Assistant's settings and select "Mosquitto broker" to install. After installation, don't start it immediately. Instead, add two users as shown below: one for device connections and one for debugging and viewing data with the MQTTFX tool. In real-world use, it's best not to set such a simple password. The Mosquitto broker allows multiple devices to login simultaneously using the same username and password.
If you want to use a digital certificate for TLS connection, you can refer to the Home Assistant documentation and add the corresponding certificate file on our device.
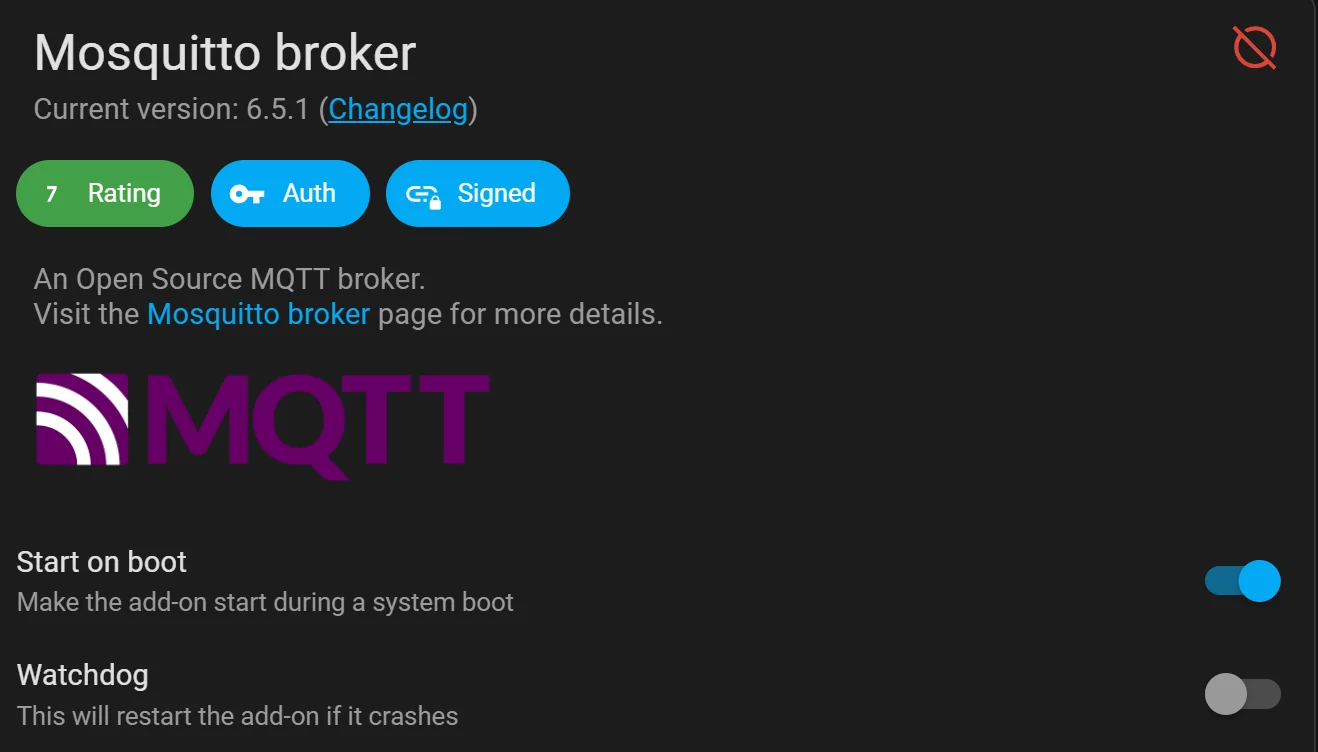
In addition, the MQTT service must be started during the system boot, and Watchdog can be enabled for long-term operation, as shown below
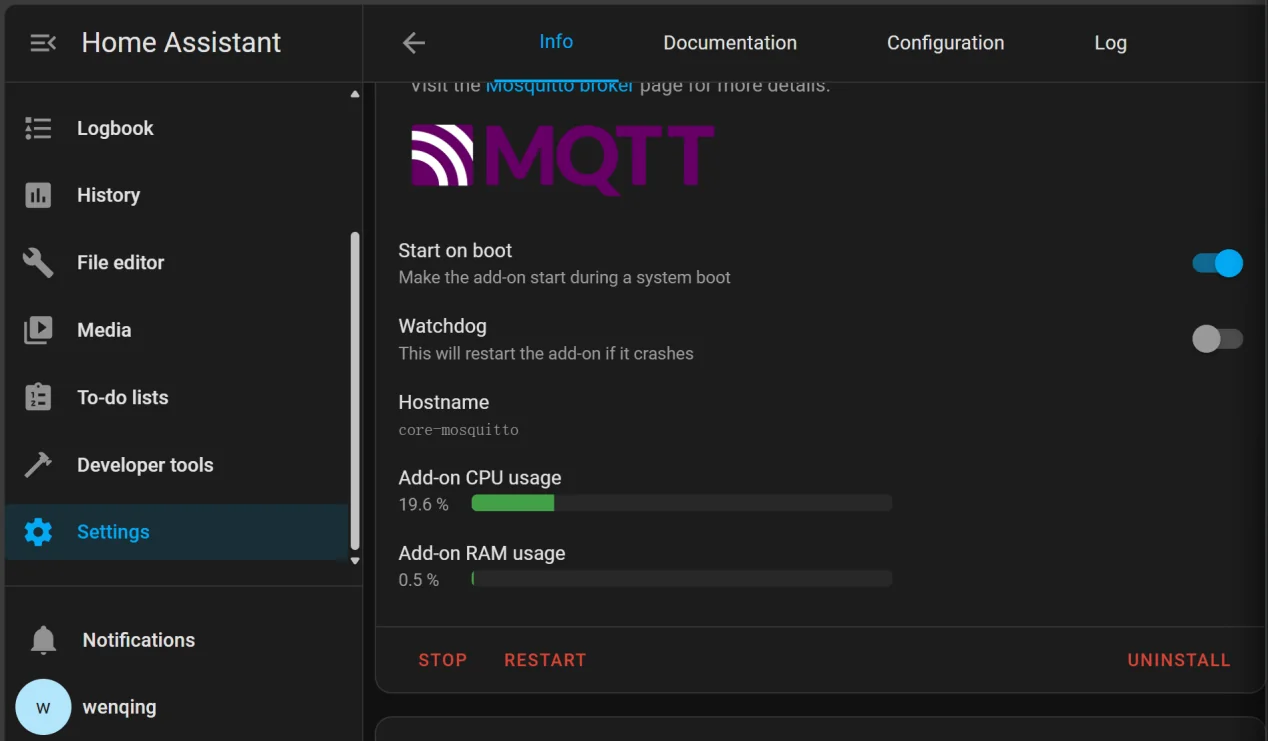
After setting up, start the service, the situation after startup is as follows.
Configure monigear devices
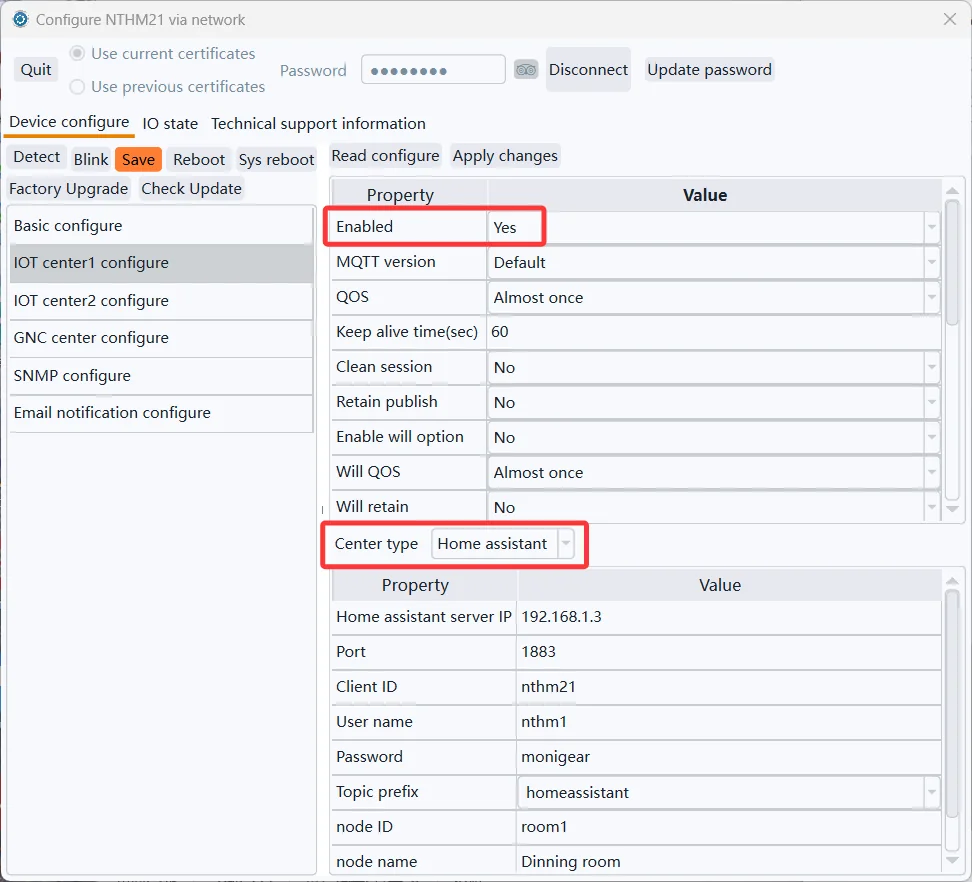
In our configuration tool software, select one of the IoT to configure, as shown above.
The most important settings are circled in red. The connection parameters must match those of the HomeAssistant server. If the "Topic prefix" setting is unchanged, it should be as shown in the image. If it has been modified in Home Assistant, it should be set accordingly. The Node name is for display purposes only, and the Node ID must be unique for each device, otherwise it will conflict with other entities in Home Assistant.
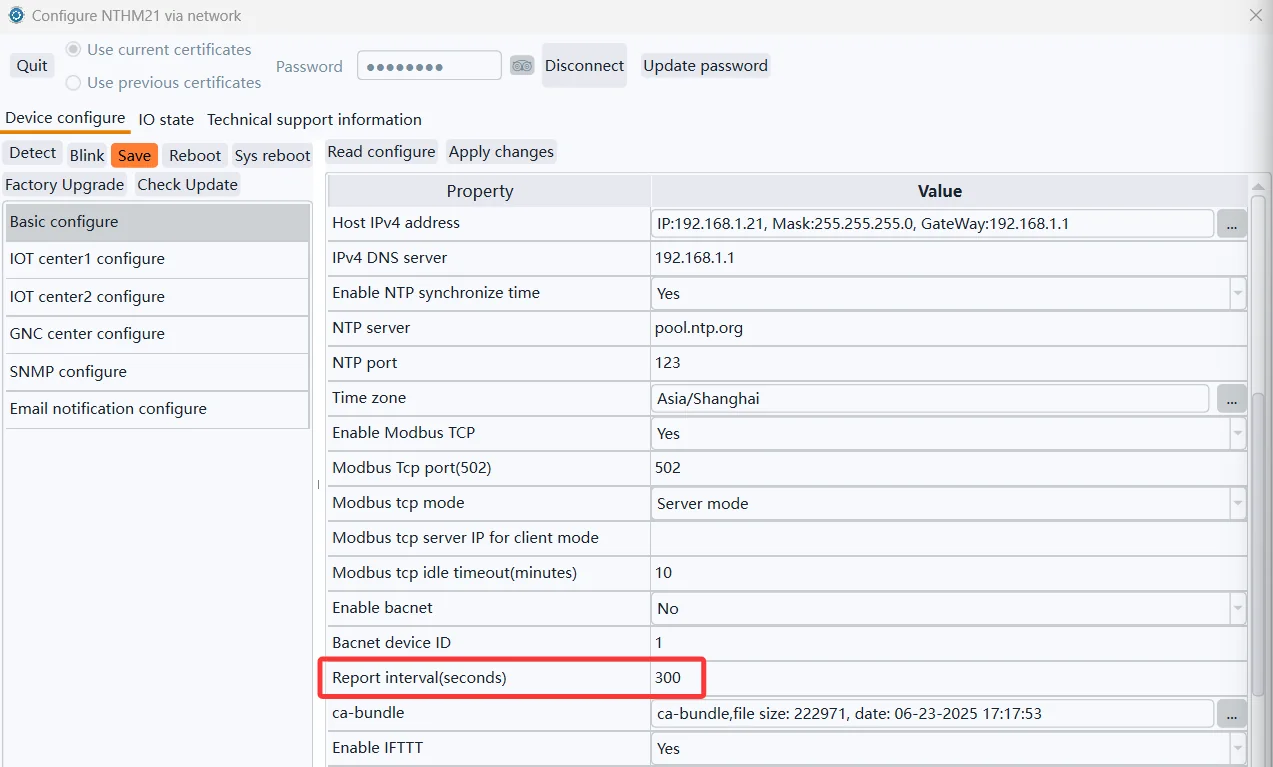
Another setting related to the reporting interval is within "Basic configure" category. The "Report interval" setting affects several protocols that actively report data, including MQTT. It also determines the interval for GNC protocol/SNMP traps. It's important to note that in addition to sending data regularly, analog supervisory points can also be configured to automatically send data when the data changes by a certain amount. This allows for notification of data changes in time. For more information, refer to the documentation for email event generation.
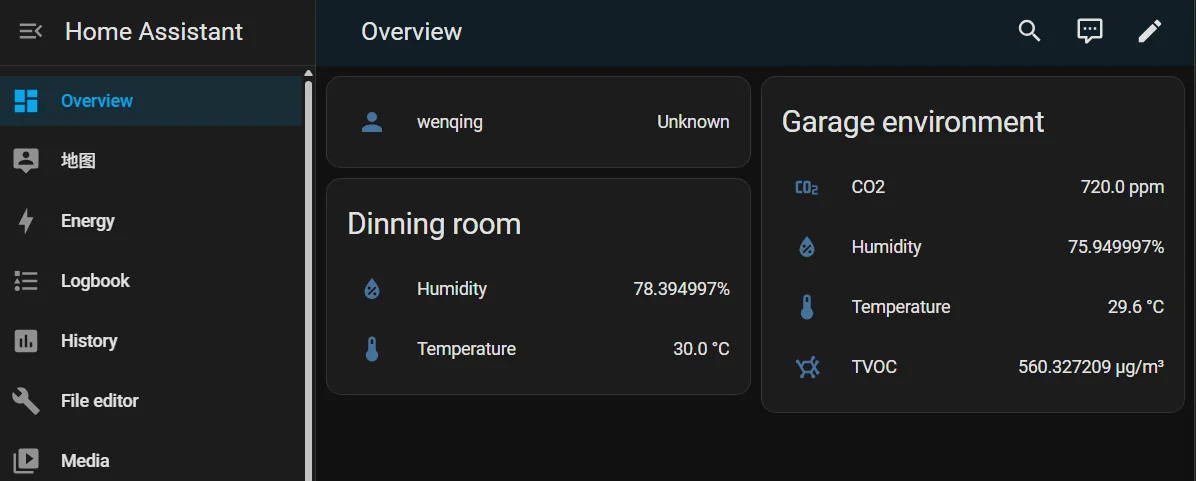
After setting everything up, click “Apply changes”->Save->Reboot to make the configuration take effect. If there are no abnormalities, you can immediately see the newly added sensor data on Home Assistant.
Below is an example of what the home assistant overview looks like after I set up the MN-NTHM, MN-NVOC 4in1 sensor.
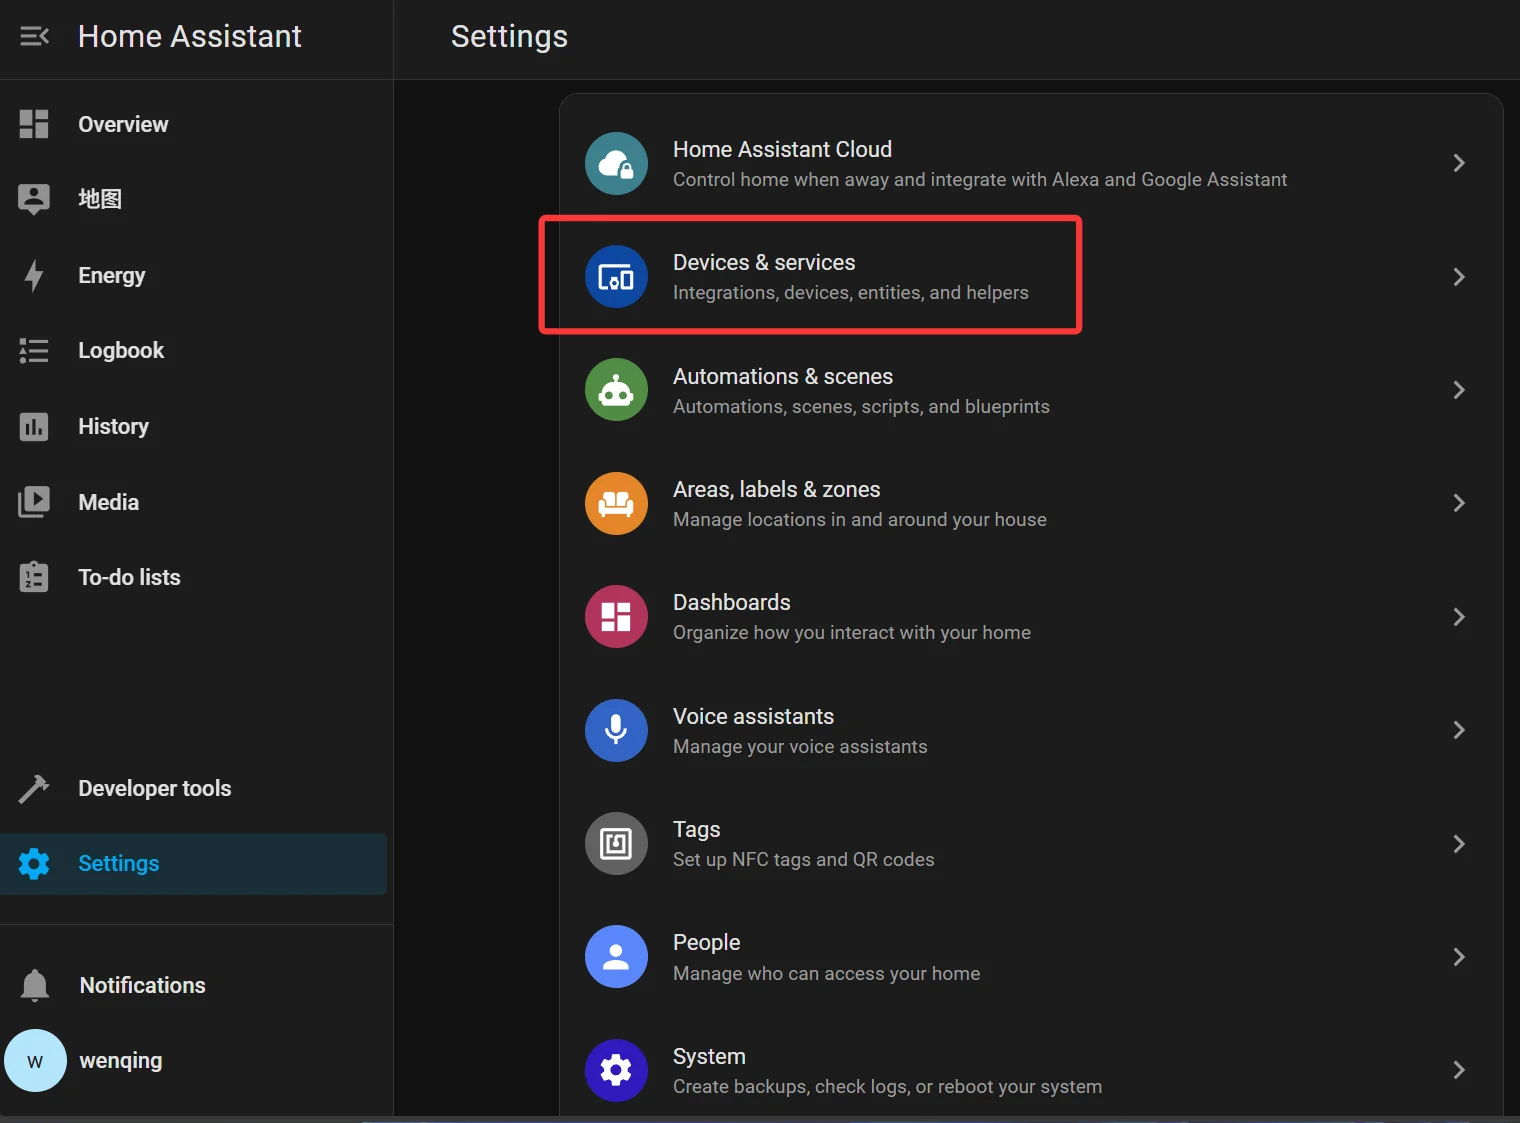
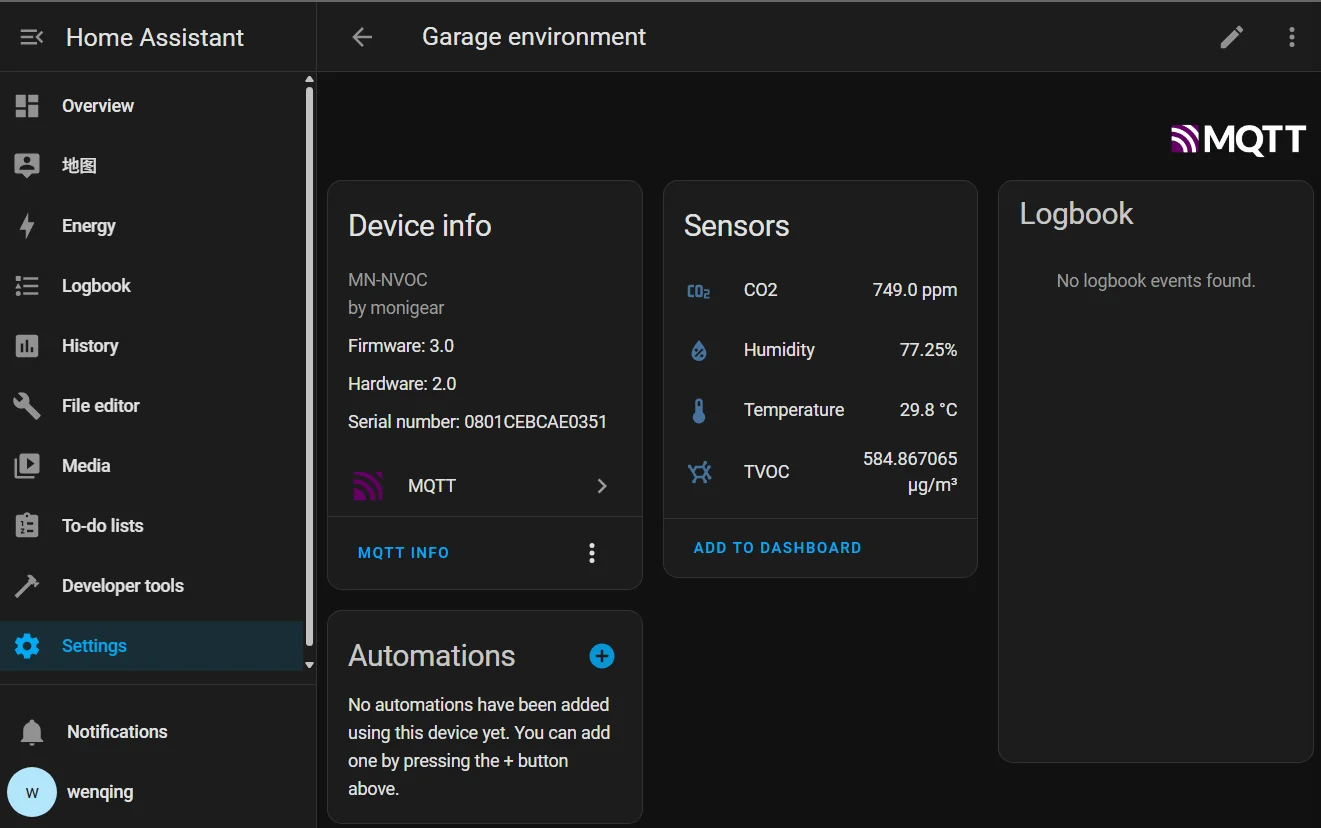
In Home Assistant's Settings->"Devices & Services"->MQTT, click on a single device to view the detailed information of our automatically discovered device, as shown below.
Debug(Optional)
On the Home Assistant server, you can view connection information through the Mosquitto addon's log. MQTT debugging and testing are also convenient. You can use the mqttfx tool. As shown below, set the connection parameters based on the HA broker's actual situation and then establish a connection.
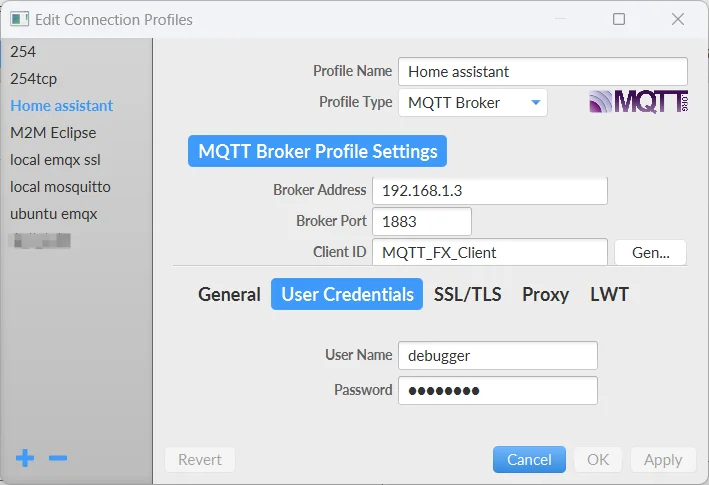
After connecting, subscribe to the "sensor/+/state" topic to see the status data sent by all monigear sensors, and subscribe to homeassistant/# to see the registration information of all sensors. As shown in the figure below

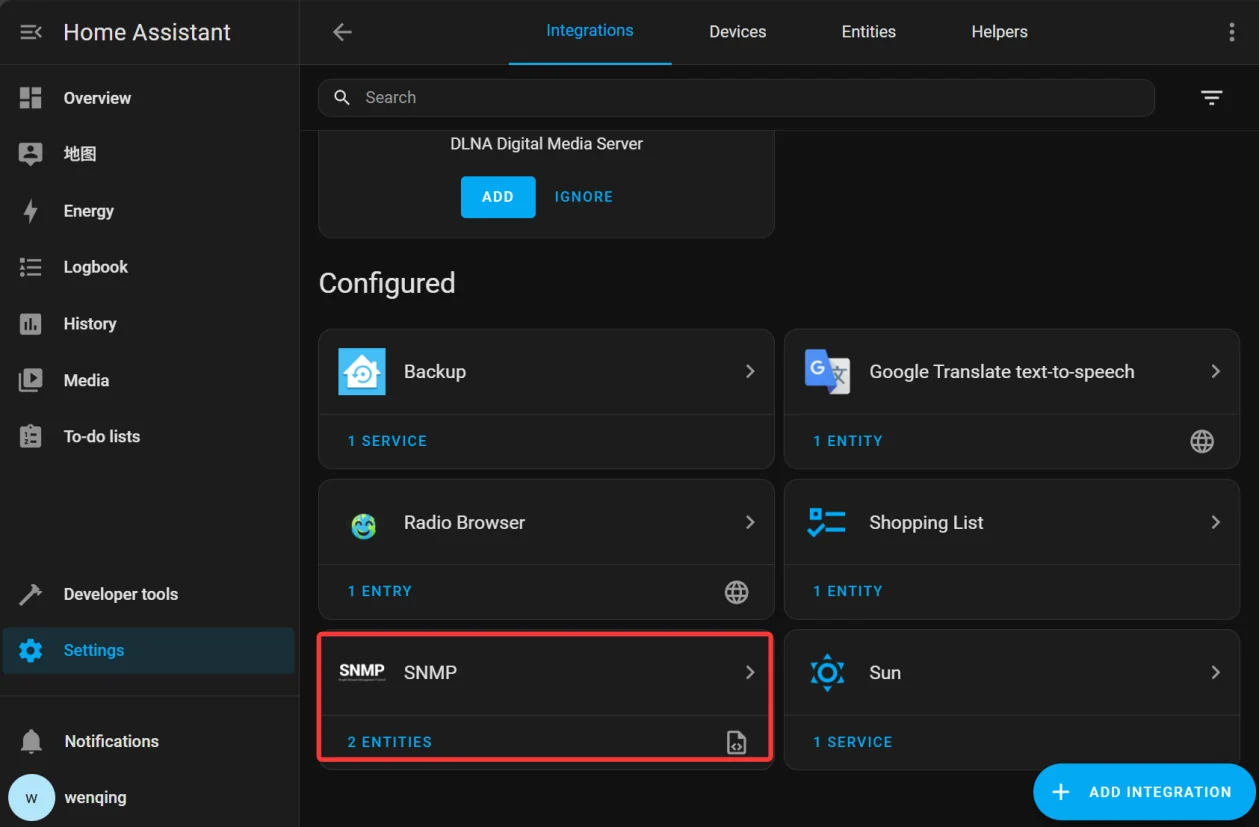
Section2 Add monigear network sensors to HA via SNMP
If the old product you have does not have the option to adapt MQTT to Home Assistant, but you want to use it in Home Assistant, the fastest and easiest way is to use SNMP. Home Assistant supports SNMP by default, so you can get the data from our sensors without installing an add-on.
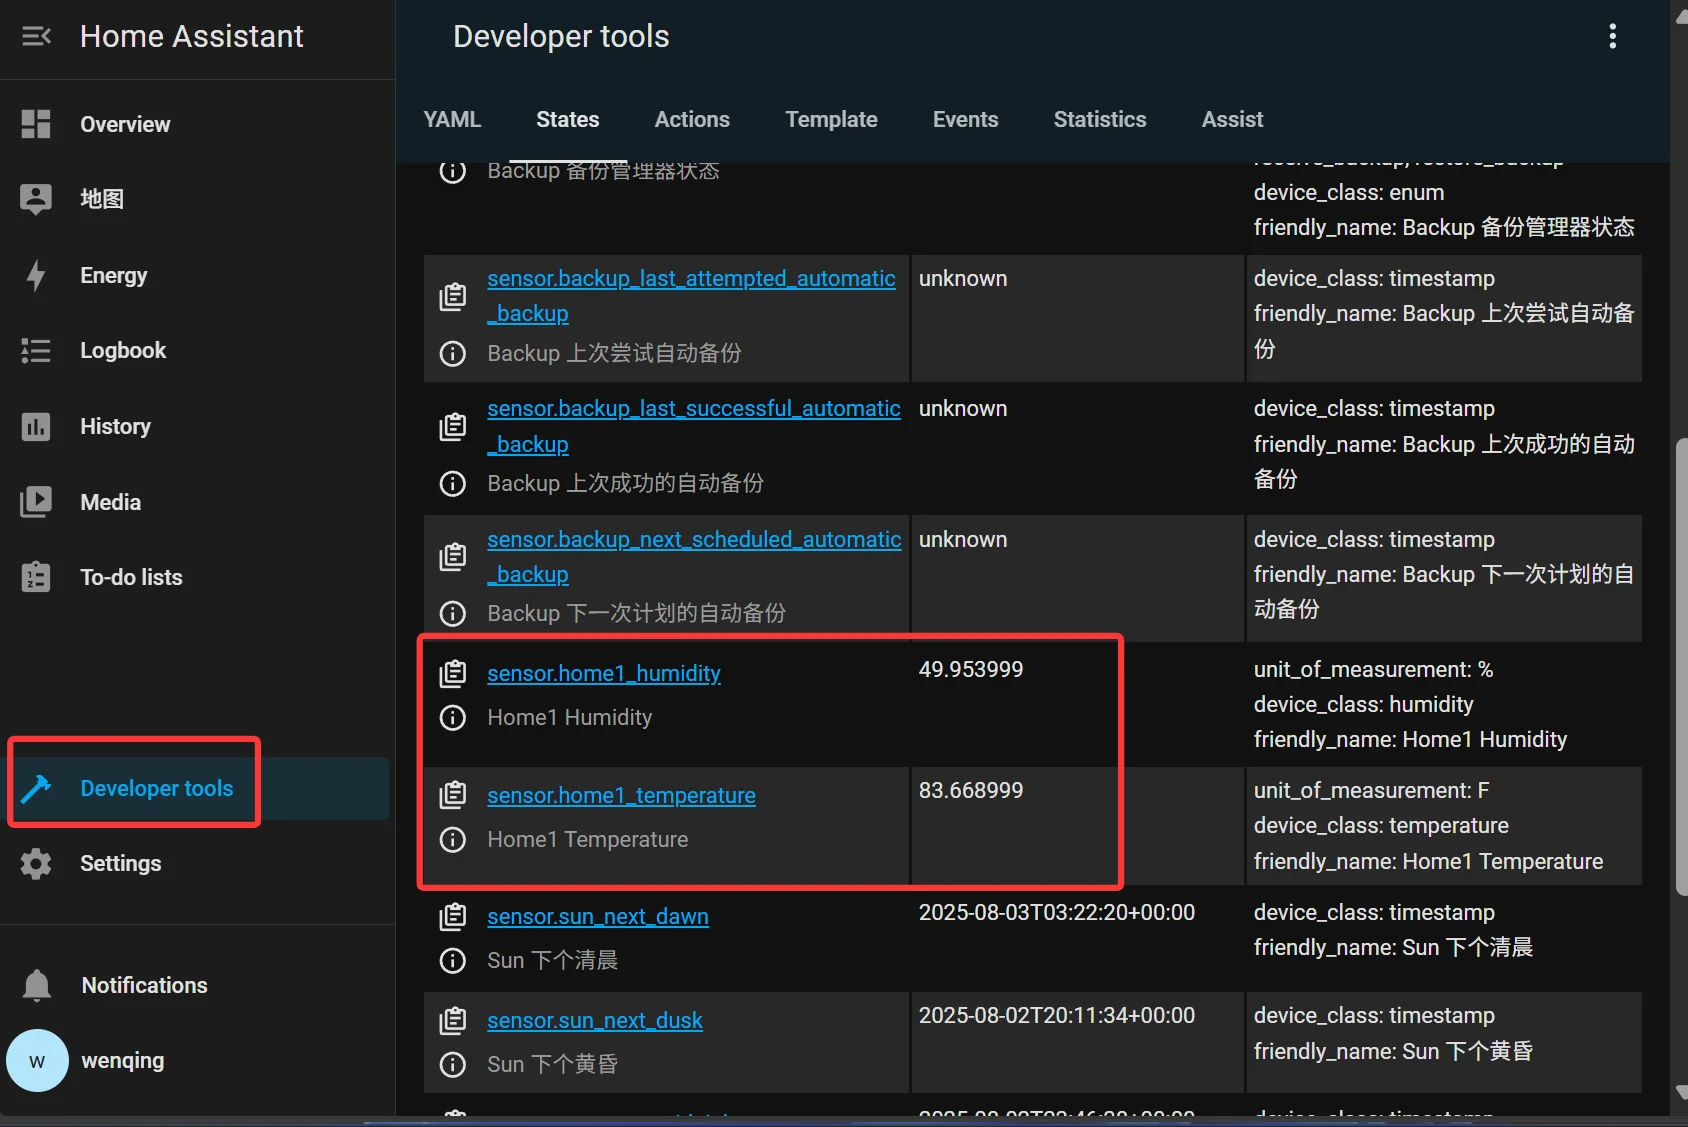
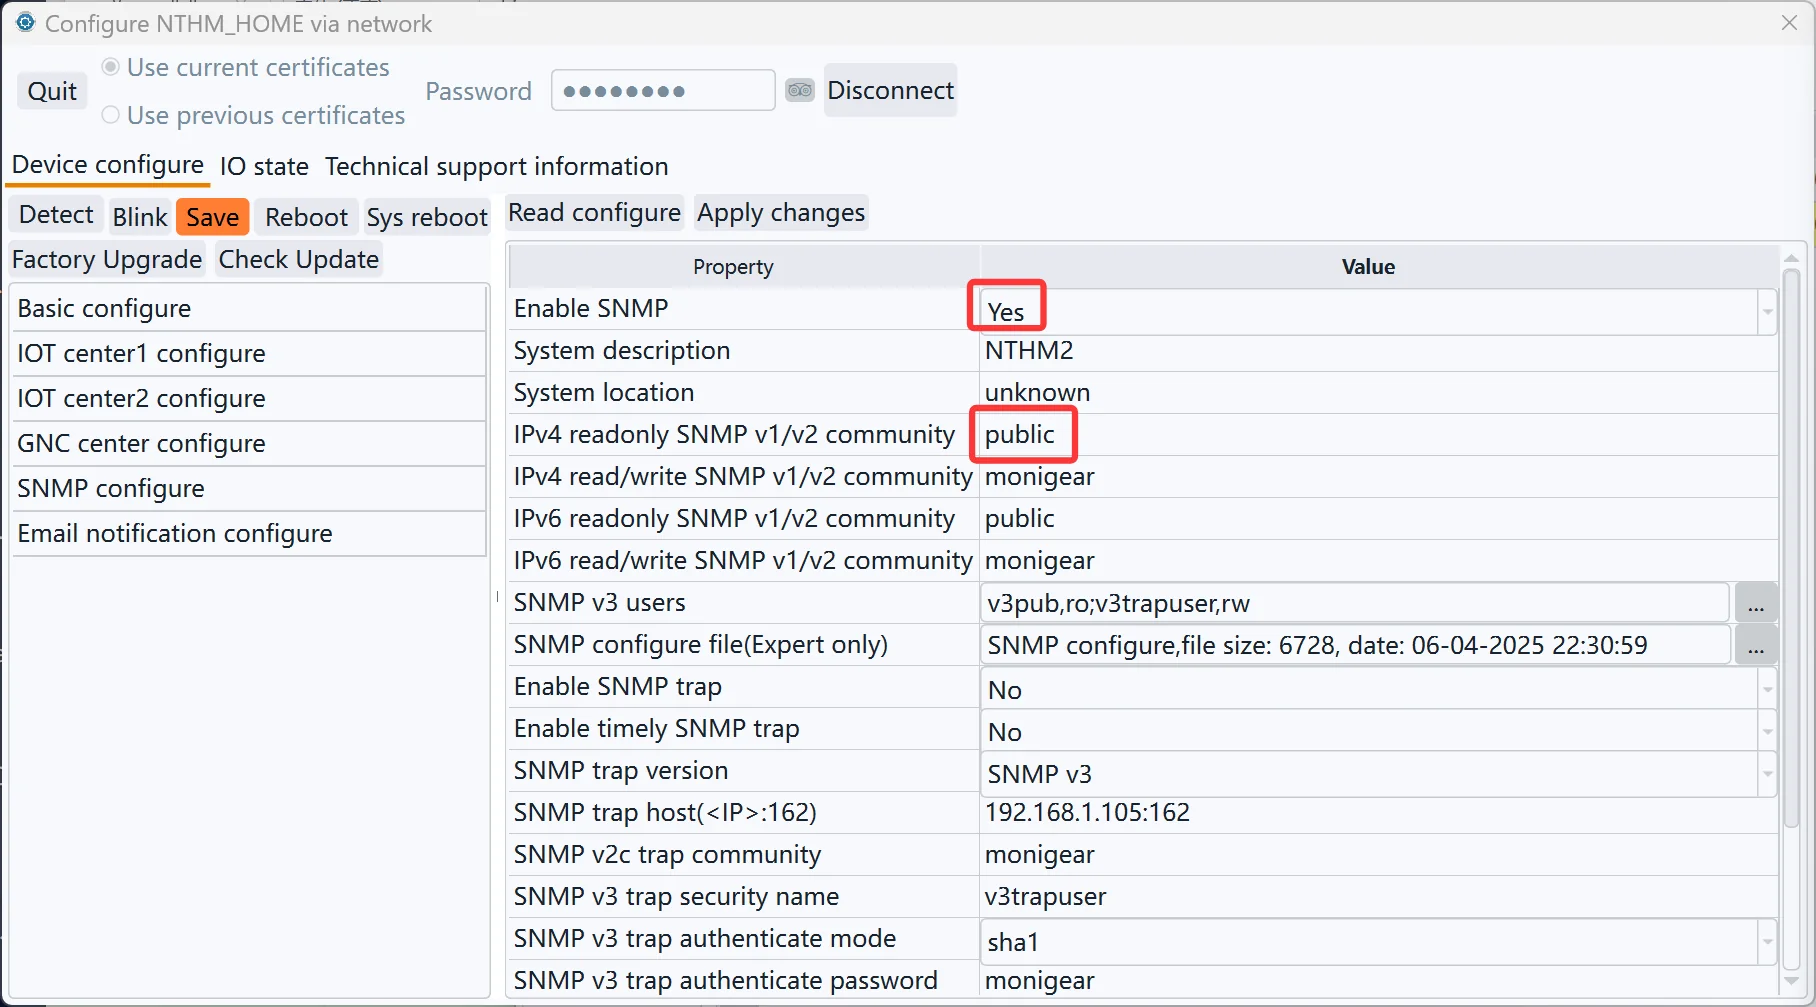
For example, if the MN-NTHM device IP is 192.168.1.4, enable SNMP with the following configuration, save, and reboot for the configuration to take effect. For more detailed SNMP information, refer to the Monigear SNMP documentation.
Modify the home assistant configure file “configuration.yaml”. For example, the following is the configuration file I modified. The content before the blue font is the original content, and the blue font part is the added sensor configuration.
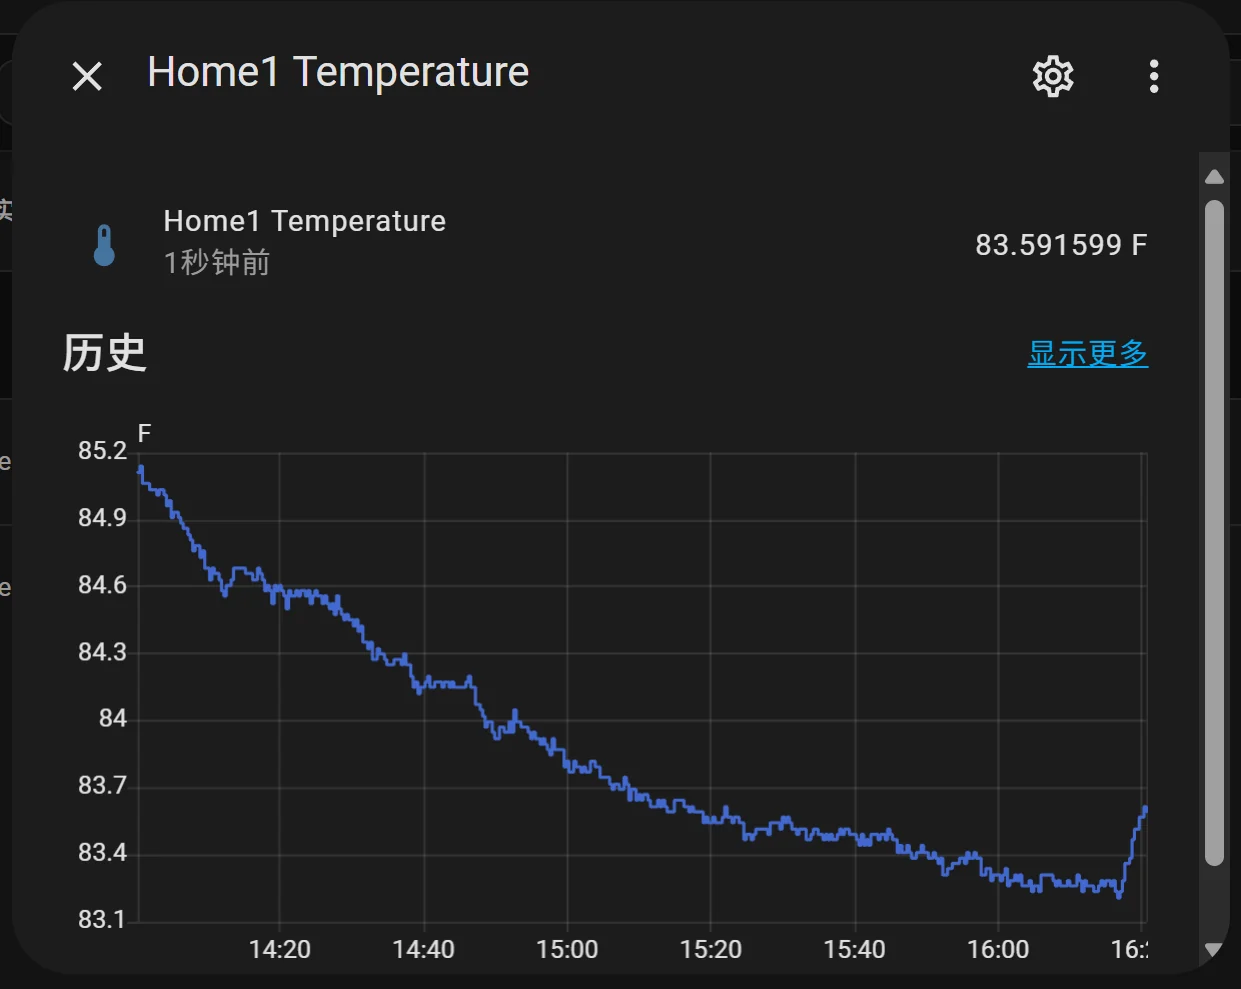
| # Loads default set of integrations. Do not remove.default_config:# Load frontend themes from the themes folderfrontend: themes: !include_dir_merge_named themesautomation: !include automations.yamlscript: !include scripts.yamlscene: !include scenes.yamlsensor: - platform: snmp host: 192.168.1.4 version: 2c community: public baseoid: .1.3.6.1.4.1.22853.1.3.1.2.1 scan_interval: 20 name: "Home1 Temperature" unit_of_measurement: "F" device_class: temperature - platform: snmp host: 192.168.1.4 version: 2c community: public baseoid: .1.3.6.1.4.1.22853.1.3.1.2.2 scan_interval: 20 name: "Home1 Humidity" unit_of_measurement: "%" device_class: humidity |
|---|
If there are multiple devices, just add them by referring to the above format.
Apply the configuration on the HA WEB manage page and restart Home Assistant to see the added sensor data.